
How to take northern lights video?
How to Take Video of the Northern Lights: A Complete Guide
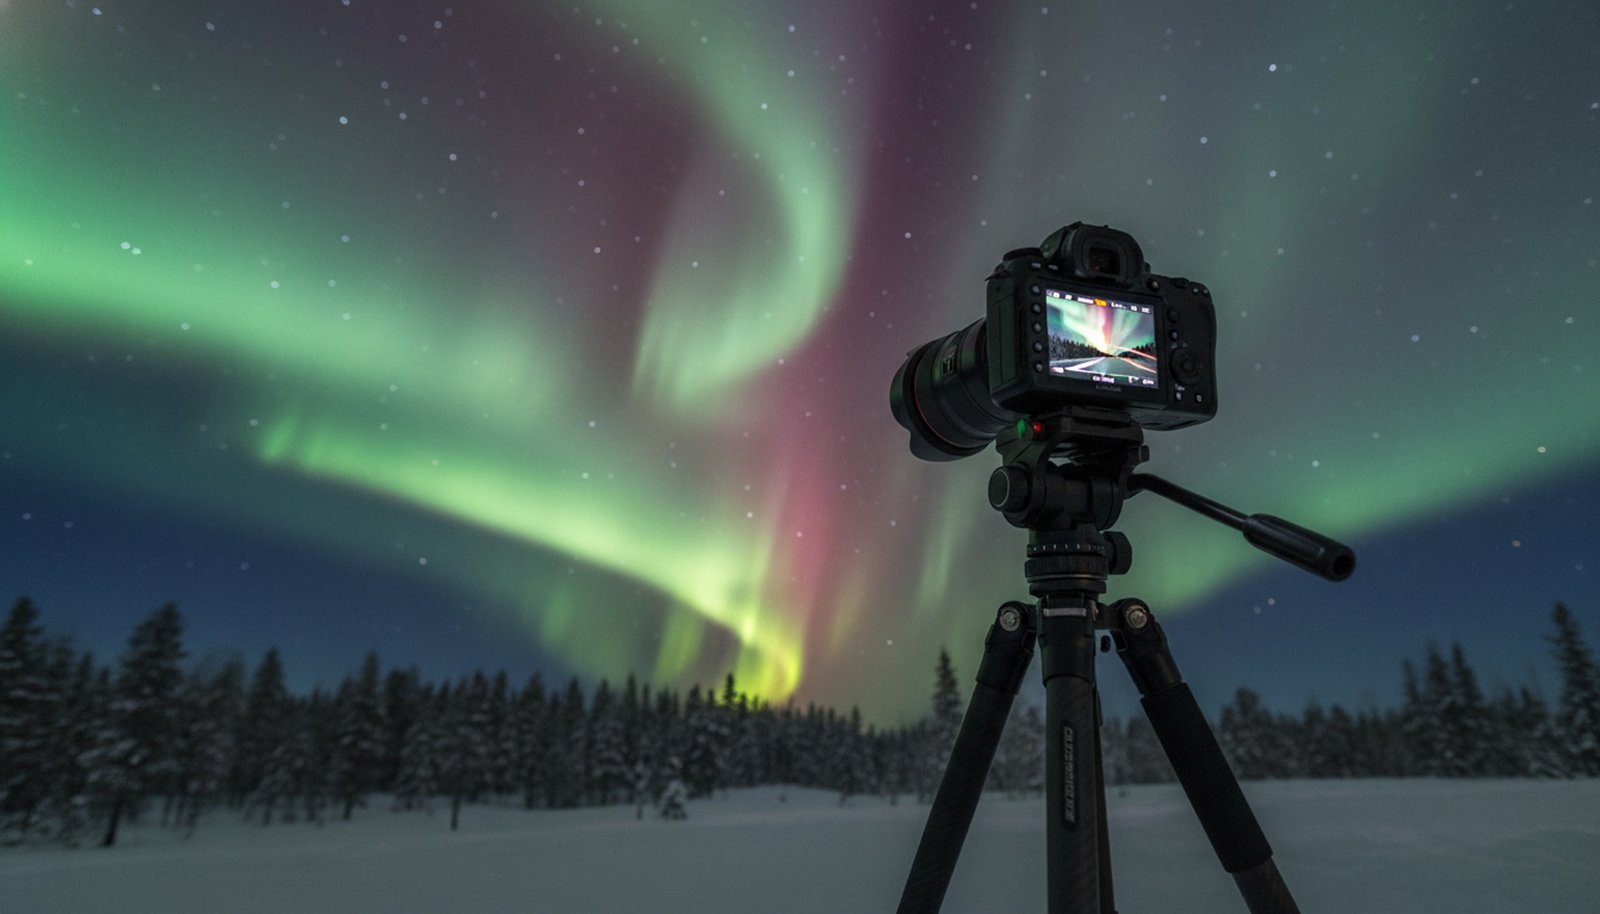
Capturing a photograph of the Northern Lights is one thing, but filming their ethereal, dancing motion in real-time video is a challenge that offers an incredible reward. While photographers often use long exposures to create static images, videography requires a different approach to capture the fluid movement without it becoming a blurry mess.
Fortunately, modern mirrorless and DSLR cameras have become so powerful in low-light situations that capturing high-quality aurora video is more accessible than ever. This guide will walk you through the essential gear, core settings, and techniques you need to create breathtaking footage of the world’s greatest light show.
Essential Gear for Aurora Videography
Having the right equipment is the foundation of successful aurora videography. While you don’t need the most expensive gear on the market, a few key items are non-negotiable for dealing with the dark and cold conditions.
The Right Camera
The ideal camera for aurora video has two main features: full manual control in video mode and excellent high-ISO performance. Modern mirrorless cameras are often preferred because their electronic viewfinders can brighten the scene, making it easier to compose your shot in the dark. A full-frame sensor will generally perform better in low light and produce cleaner footage at high ISOs than a crop-sensor (APS-C) camera, but many modern crop-sensor cameras are still very capable. The ability to shoot in a ‘Log’ profile or RAW video format is a significant bonus, as it provides much greater flexibility for color grading in post-production.
Lenses: Wide and Fast
Your lens choice is arguably more important than the camera body. You need a ‘fast’ lens, which means it has a very wide maximum aperture. Look for a lens with an aperture of f/2.8 or wider (e.g., f/1.8, f/1.4). A wider aperture allows more light to hit the camera’s sensor, which is critical for video in near-total darkness. Secondly, you need a wide-angle lens, typically in the 14mm to 24mm range on a full-frame camera. This allows you to capture the vast scale of the aurora as it stretches across the sky and include some of the landscape for context and scale.
The Unshakeable Tripod
A sturdy tripod is absolutely essential. You will be using relatively slow shutter speeds, and any camera movement, even from the wind, will result in shaky, unusable footage. Don’t rely on a flimsy, lightweight travel tripod. Choose a robust model that can handle the weight of your camera and lens and remain stable in potentially windy conditions. A fluid video head is a great addition if you plan to introduce smooth panning or tilting movements, but a solid ball head will work perfectly for static shots.
Extra Batteries and Memory Cards
Cold weather is the enemy of battery life. The freezing temperatures common during aurora season can drain a fully charged battery in a fraction of the normal time. Always bring at least two or three spare batteries and keep them warm in an inside pocket of your jacket. Video files, especially 4K footage, are also enormous. Ensure you have several large, high-speed memory cards (e.g., 64GB or 128GB V60 or V90 rated cards) so you don’t run out of space during a spectacular display.
Core Camera Settings for Northern Lights Video
Balancing frame rate, shutter speed, aperture, and ISO is the key to technically sound aurora video. Unlike photography, these settings are more constrained and directly impact each other. Here’s a reliable starting point.
Frame Rate and Shutter Speed
For a cinematic look, set your frame rate to 24 frames per second (fps). To achieve natural-looking motion blur, videographers often follow the 180-degree shutter rule, which states your shutter speed should be double your frame rate. For 24fps, this would be 1/48s or 1/50s. This is a great starting point for a bright, fast-moving aurora. For a fainter, slower display, you may need to ‘break’ this rule and use a slower shutter speed like 1/30s or 1/25s to let in more light, but be aware this will create more motion blur.
Aperture (f-stop)
This is the easiest setting. You want to let in as much light as possible, so set your lens to its widest maximum aperture. If you have an f/1.8 lens, use f/1.8. If you have an f/2.8 lens, use f/2.8. This allows you to use the lowest possible ISO, which results in cleaner, less noisy footage. Some lenses are slightly soft when wide open, so you can consider stopping down by a tiny amount (e.g., from f/1.4 to f/1.6) for extra sharpness, but only if the aurora is bright enough to allow it.
ISO and White Balance
ISO controls the digital brightness of your video. With your aperture wide open and shutter speed set, ISO will be your main exposure control. Start with an ISO around 3200 or 6400 and adjust based on the aurora’s intensity. A bright, dynamic aurora might only need ISO 1600, while a faint one could require ISO 12800 or even higher. Be mindful that very high ISO values will introduce digital noise (grain). For color, do not use Auto White Balance. Set a manual Kelvin temperature, typically between 3200K and 4500K, to get a pleasing blue hour look for the night sky that renders the aurora’s green tones accurately.
Focusing in the Dark
Autofocus will not work in the dark. You must use manual focus. The best method is to find the brightest star or planet in the sky (or a very distant light on the horizon). Switch your camera to its live view mode and digitally magnify the view on that point of light. Carefully turn your lens’s focus ring until that light is as small and sharp as possible. Once you’ve nailed the focus, you can use a piece of gaffer tape to lock the focus ring in place so it doesn’t get bumped accidentally.
Quick Facts
- A camera with manual video controls and good high-ISO performance is essential.
- Use a wide-angle (14-24mm) lens with a fast aperture (f/2.8 or wider).
- A sturdy tripod is non-negotiable to prevent shaky footage.
- Start with these settings: 24fps, 1/50s shutter speed, widest aperture, and ISO 3200-6400.
- Always use manual focus; focus on a bright star using live view magnification.
- Cold drains batteries fast; bring multiple spares and keep them warm.
- Set a manual white balance (Kelvin 3200K-4500K) for accurate colors.
Frequently Asked Questions (FAQ)
Q: Can I film the Northern Lights with my phone? A: Yes, modern high-end smartphones (like recent iPhones or Google Pixels) can capture decent video of a bright aurora using their night modes. However, for the best quality, you will need a dedicated app that allows manual control over ISO and shutter speed, and you must use a tripod.
Q: What’s the difference between a timelapse and a real-time video? A: A timelapse is a series of still photos taken over a period and then stitched together to show movement. It’s great for very slow-moving auroras. A real-time video captures 24 (or more) frames every second, showing the fluid, true-speed dance of a fast-moving aurora, which a timelapse cannot replicate.
Q: How do I reduce noise in my aurora video? A: The best way to reduce noise is to capture the cleanest signal possible. Use a lens with a very wide aperture (like f/1.8 or f/1.4) to keep your ISO as low as possible. In post-production, you can use dedicated video noise-reduction software like Neat Video or the tools built into DaVinci Resolve or Adobe Premiere Pro.
Other Books
- B&H Photo Video – How to Shoot the Aurora Borealis in Video
- Sony Alpha Universe – See The Northern Lights In Real Time With These Pro Video Tips
- Lonely Speck – Ultimate Guide to Shooting the Milky Way (many principles apply)


How were the northern lights visible last night?
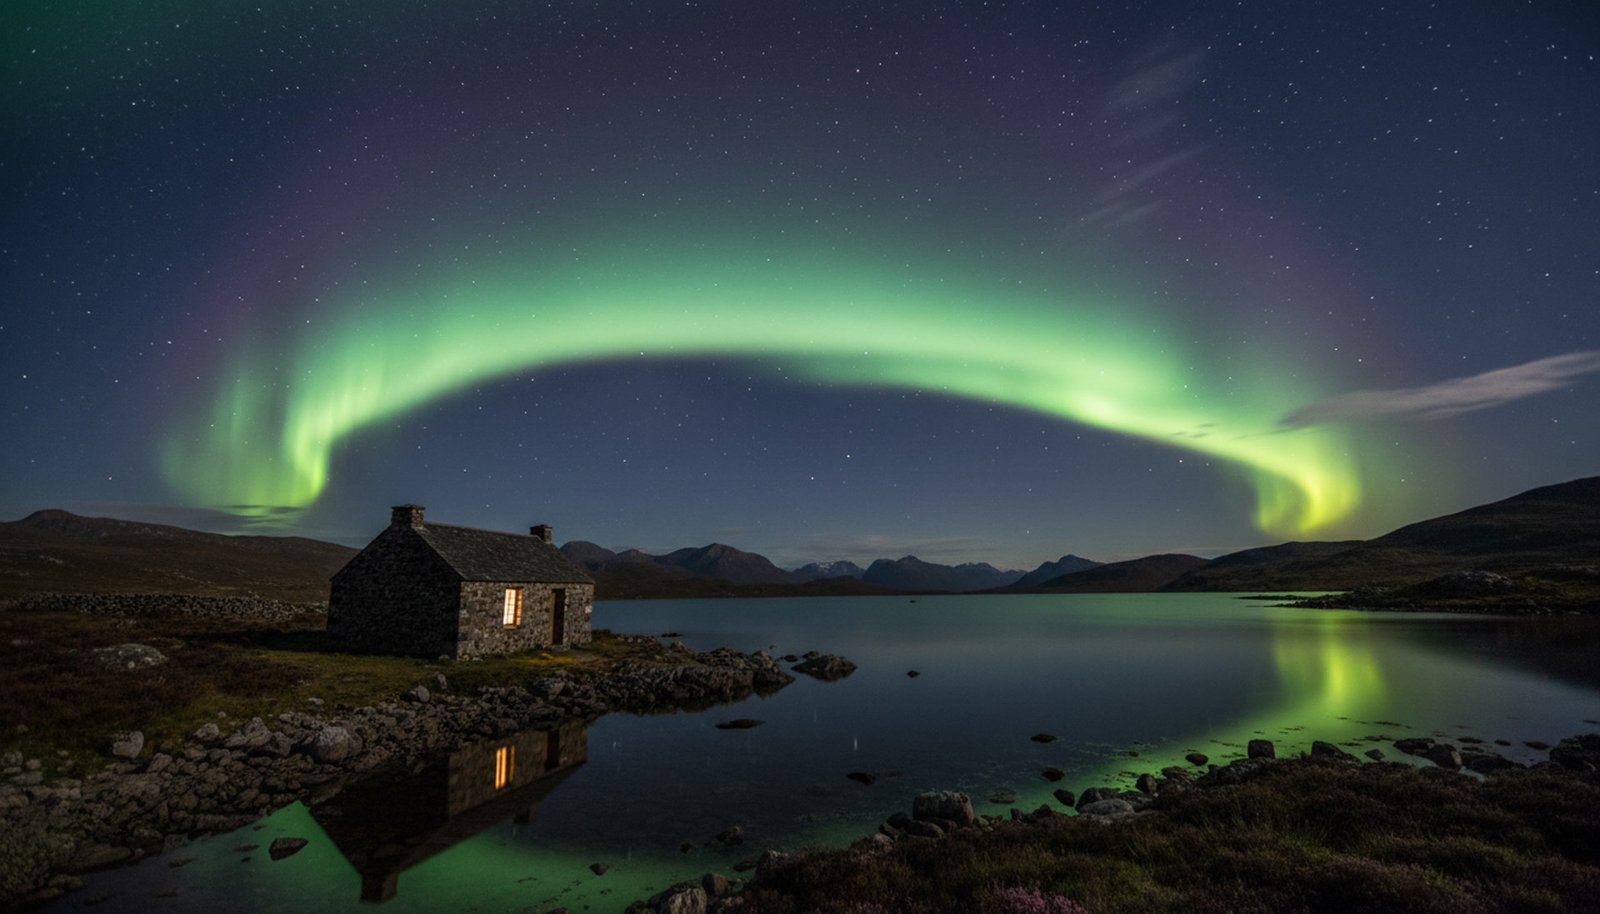
Why Are the Northern Lights Sometimes Visible Farther South?
Seeing the Northern Lights dance across the sky is a breathtaking experience, but it’s even more shocking and memorable when they appear in a location far from the Arctic Circle. Events like these, where the aurora is visible across much of Europe and the United States, are not random occurrences. They are the direct result of powerful eruptions on the surface of the Sun.
Understanding why this happens involves looking at the Sun’s activity and how it interacts with our planet’s protective magnetic shield. A stronger-than-usual solar event can supercharge this interaction, pushing the beautiful light show to millions of new viewers.
The Sun's Role: From Calm to Stormy
The visibility of the aurora is directly tied to the Sun’s behavior. Under normal conditions, the show is confined to the polar regions. But when the Sun unleashes a major storm, the rules change.
Normal Conditions: The Auroral Oval
On a typical night, the Northern Lights occur within a ring around the North Magnetic Pole known as the auroral oval. This ring usually covers northern Scandinavia, Siberia, Alaska, and northern Canada. The strength of the aurora on any given night is measured by the Kp-index, a scale from 0 to 9. Normal activity is usually in the Kp-1 to Kp-3 range, keeping the lights confined to these high-latitude regions. This ‘normal’ activity is caused by the steady stream of particles called the solar wind. Think of it as a constant, gentle breeze that powers a predictable light show in the far north.
The Game Changer: Coronal Mass Ejections (CMEs)
A widespread aurora display is caused by something much more powerful than the normal solar wind. A Coronal Mass Ejection (CME) is a massive eruption of plasma and magnetic field from the Sun’s corona. If the solar wind is a breeze, a CME is a hurricane. It hurls billions of tons of solar particles into space at immense speeds, sometimes over several million miles per hour. If a CME is aimed at Earth, it can trigger a geomagnetic storm, which is the event responsible for pushing the aurora south. These events are more common during the peak of the Sun’s 11-year activity cycle, known as the solar maximum.
Impact on Earth’s Magnetic Field
When a powerful CME arrives at Earth, it slams into our planet’s protective magnetic shield, the magnetosphere. This collision compresses the magnetic field on the day side of Earth and elongates it into a long tail on the night side. This process transfers a huge amount of energy into the magnetosphere. The magnetic field lines snap back like a stretched rubber band, accelerating charged particles down into the atmosphere at much lower latitudes than usual. This is the key mechanism that expands the auroral oval, allowing people in places like the northern United States or central Europe to witness the spectacle.
The Result: An Expanded Light Show on Earth
The aftermath of a CME’s arrival is a supercharged and geographically expanded aurora, often with more intense colors and faster movements.
The Kp-index and Your Location
The Kp-index becomes crucial for predicting visibility during a storm. While a Kp-3 might mean lights in northern Norway, a Kp-5 indicates a moderate storm, potentially bringing the aurora to the northern US border and Scotland. A strong storm, rated Kp-7, can push the aurora view line down to states like Illinois and Oregon in the US, and Germany or Poland in Europe. A major, rare storm at Kp-9 could make the aurora visible as far south as Florida and Texas. By checking real-time space weather forecasts for the predicted Kp-index, you can know if you have a chance to see the lights from your backyard.
Seeing Red: The Colors of a Solar Storm
While green is the most common aurora color, strong geomagnetic storms often produce vibrant red auroras. This happens because the incoming solar particles are so energetic that they can reach and excite oxygen atoms at very high altitudes (above 150 miles or 240 km). At these heights, excited oxygen emits a crimson glow. Seeing red in the aurora is often a sign of a particularly intense and widespread storm. You might also see pinks, which are a mix of red light from above and green light from below, or deep purples from collisions with nitrogen molecules.
Quick Facts
- Powerful solar storms, especially Coronal Mass Ejections (CMEs), are the primary cause of auroras visible at mid-latitudes.
- These storms expand the ‘auroral oval’, the ring where auroras typically occur, southward.
- The Kp-index is a scale from 0-9 that measures geomagnetic activity and helps predict how far south the aurora will be visible.
- A Kp-index of 7 or higher can bring the Northern Lights to the northern US and central Europe.
- Strong storms often produce rare, high-altitude red auroras in addition to the common green.
- Such events are more frequent during the ‘solar maximum’, the peak of the Sun’s 11-year cycle.
- To see the lights, you need a strong storm, clear skies, and a location away from city light pollution.
Frequently Asked Questions (FAQ)
Q: How often do these strong solar storms happen? A: The frequency of strong solar storms follows the Sun’s 11-year solar cycle. During the peak of the cycle, called the solar maximum, major storms can occur several times a year. During the solar minimum, they are much rarer.
Q: Can I predict when the aurora will be visible in my area? A: Yes, you can follow space weather forecasts from sources like NOAA’s Space Weather Prediction Center. They issue watches and warnings for geomagnetic storms and provide Kp-index forecasts, which are the best tools for predicting visibility.
Q: Are the geomagnetic storms that cause these auroras dangerous? A: The aurora itself is completely harmless to people on the ground. However, the underlying geomagnetic storm can pose risks to technology, potentially disrupting power grids, satellite operations, and GPS communications.
Other Books
- NOAA Space Weather Prediction Center – Official Forecasts
- SpaceWeatherLive – Real-time Auroral and Solar Data
- NASA’s Explanation of the Solar Cycle

How long do northern lights usually last?
How Long Do the Northern Lights Usually Last?
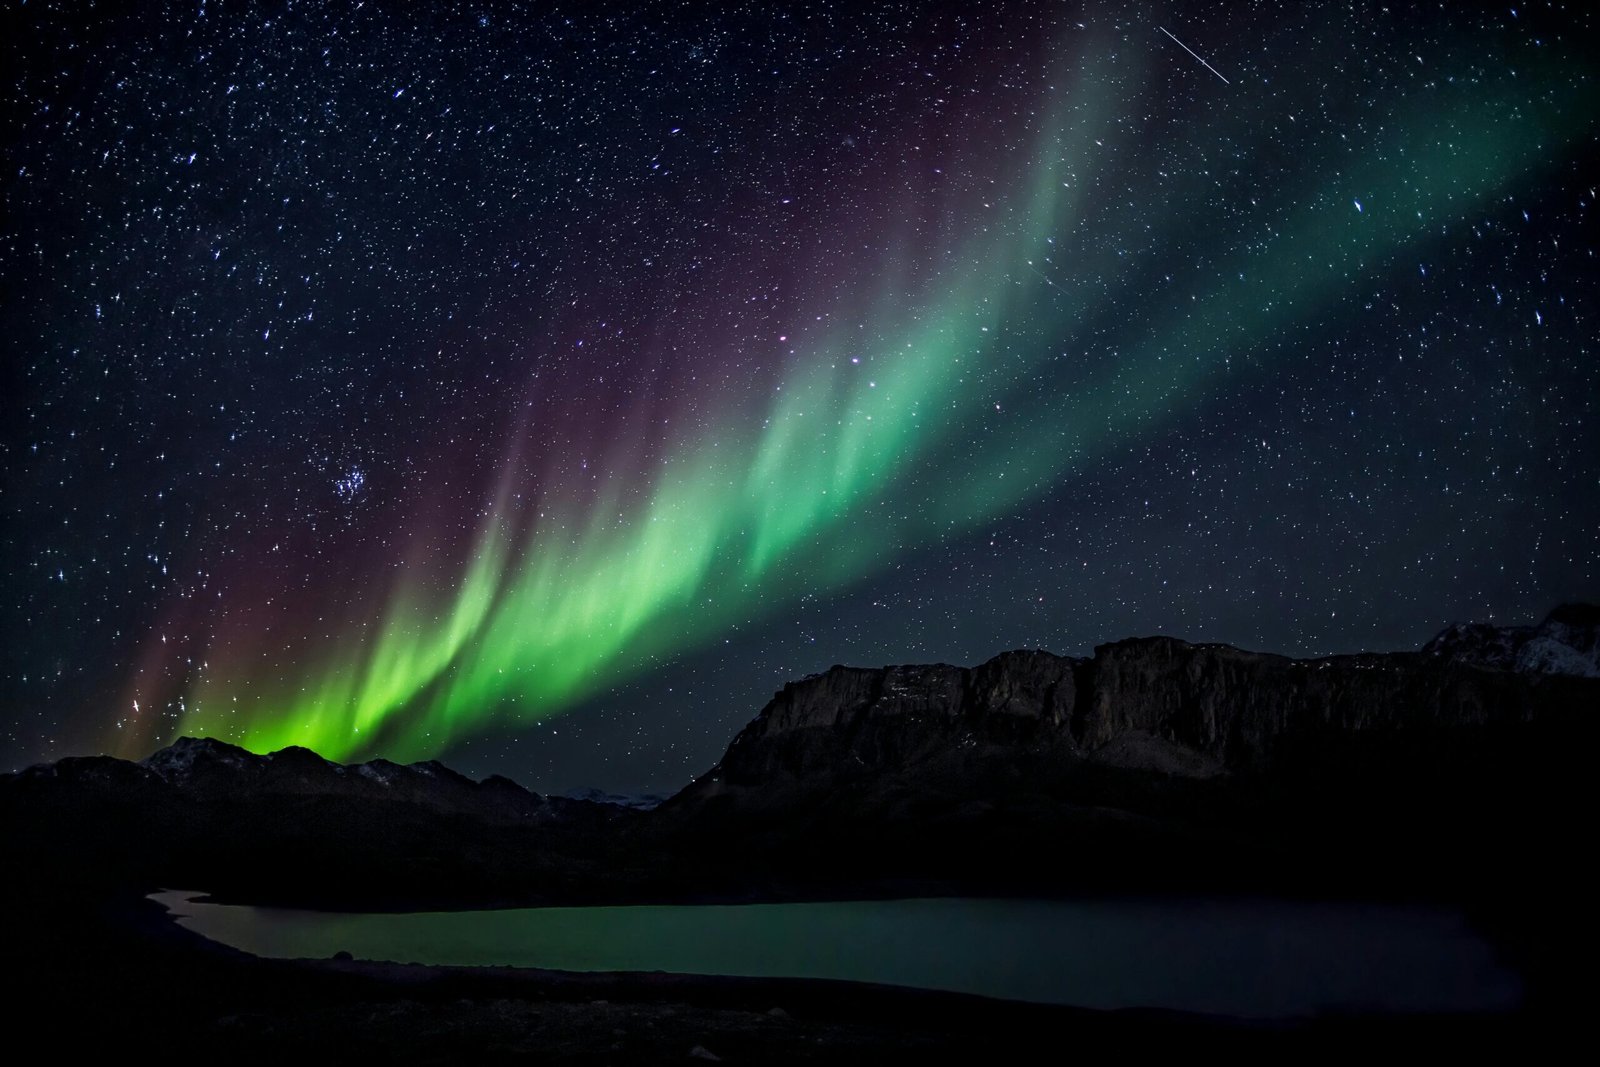
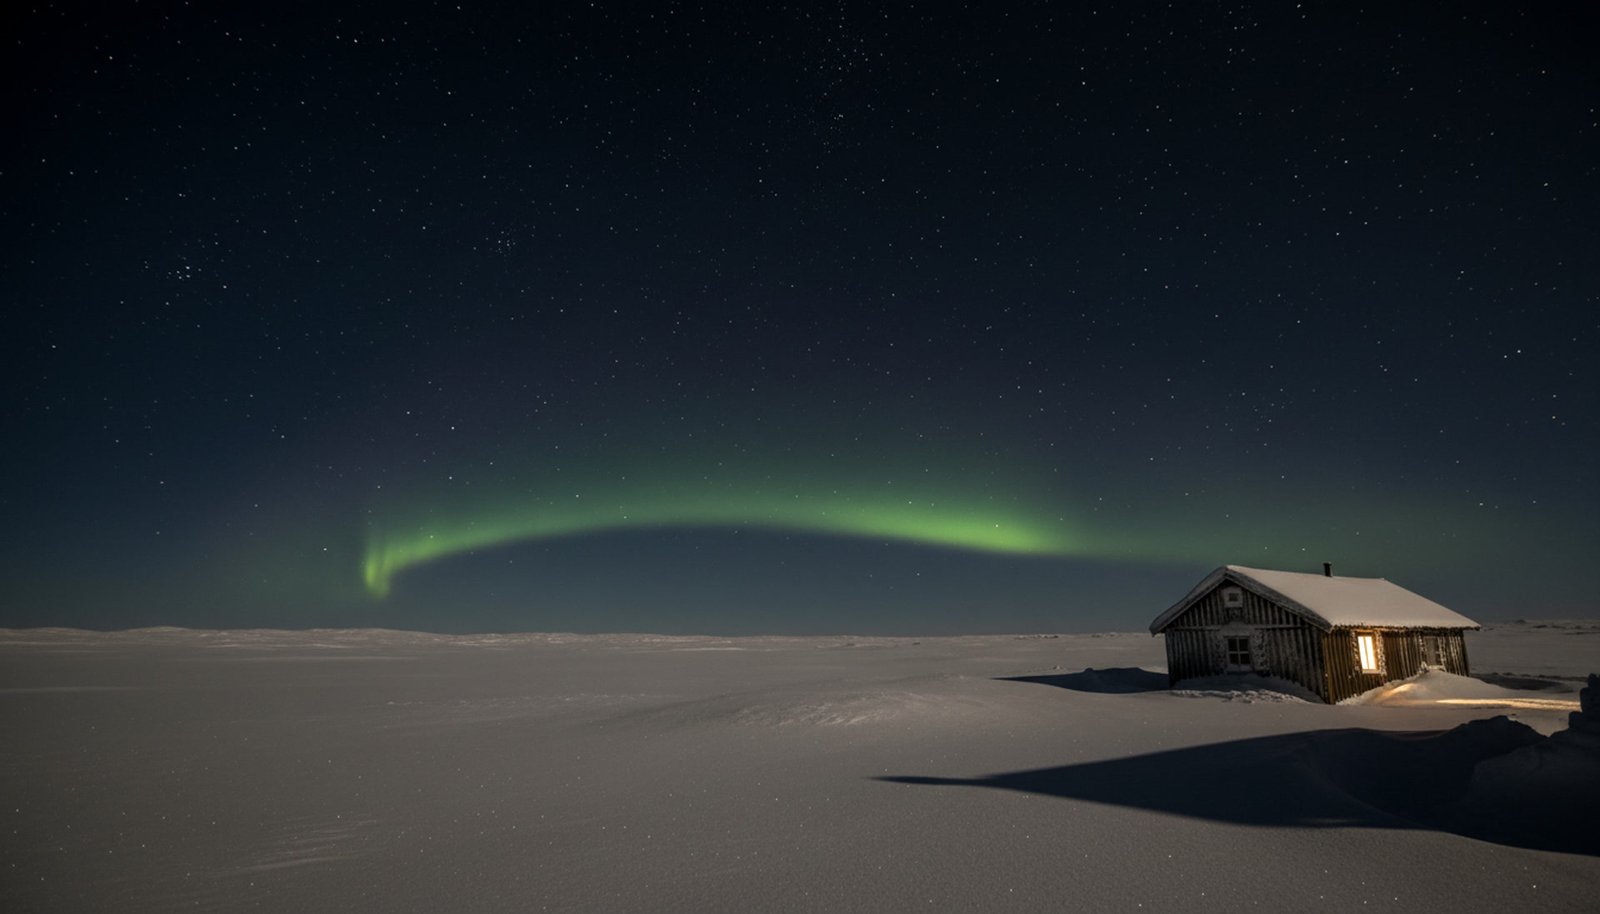
One of the most common questions from aspiring aurora chasers is about timing: ‘If I see them, how long will they stick around?’ The answer is as dynamic as the lights themselves. The Northern Lights are not a static phenomenon; they are a live performance put on by the Sun and Earth’s atmosphere, and the length of the show can be unpredictable.
While many displays are fleeting, lasting just long enough for a few breathtaking photos, others can fill the sky with dancing light from dusk until dawn. Understanding the factors that influence an aurora’s duration can help you manage expectations and maximize your chances of witnessing a truly unforgettable spectacle.
Understanding Aurora Duration: From Minutes to Hours
The length of an aurora display is directly tied to the behavior of the solar wind hitting Earth. Think of it like a fire: a small, quick gust of wind might cause a brief flare-up, while a steady, strong wind can keep the fire roaring for hours.
The Typical Display: 15-30 Minutes
For most observers, a typical, memorable aurora display is part of an event called a geomagnetic substorm. This is a relatively short, intense burst of energy released into the atmosphere. The display often starts as a simple, faint arc across the sky. As the substorm peaks, this arc can suddenly brighten and explode into dynamic, fast-moving curtains and rays of light. This peak activity, the most ‘active’ and photogenic part of the show, usually lasts for 15 to 30 minutes. Afterward, the lights may fade back into a quiet arc or disappear entirely as that specific injection of energy subsides.
The Brief Flicker: A Few Minutes
Sometimes, the conditions for an aurora are only marginally met. The solar wind might be weak, or its magnetic field orientation might be unfavorable for energy transfer. In these cases, you might only witness a brief flicker of auroral activity lasting just a few minutes. This can manifest as a faint, greyish-green glow on the horizon that is barely visible to the naked eye, or a short-lived patch of light that quickly dissipates. These minor events are very common but are often missed by casual observers. They represent the constant, low-level interaction between the solar wind and our planet’s magnetic shield.
The All-Night Spectacle: Several Hours
The holy grail for aurora hunters is the all-night display. These long-lasting events are powered by major solar events, most notably a Coronal Mass Ejection (CME) or a high-speed solar wind stream. When one of these hits Earth, it provides a powerful, continuous flow of energy into the magnetosphere for many hours. This results in a major geomagnetic storm. During such a storm, the aurora can remain active and dynamic for the entire night, going through multiple cycles of brightening, dancing, and fading, only to roar back to life again. These are the events that bring the aurora to lower latitudes and create the most awe-inspiring memories.
Key Factors Influencing Aurora Longevity
The duration of the aurora isn’t random. It’s governed by specific conditions in space weather, primarily the characteristics of the solar wind arriving at Earth.
Solar Wind and the ‘Southward Bz’
The single most important factor for a strong, long-lasting aurora is the orientation of the Interplanetary Magnetic Field (IMF), which is carried by the solar wind. Specifically, its north-south component, known as ‘Bz’. When the Bz is oriented southward (negative), it effectively ‘opens a door’ in Earth’s magnetosphere, allowing vast amounts of energy and particles to flow in. A strong and sustained southward Bz is the primary ingredient for a geomagnetic storm that can fuel the aurora for hours. If the Bz is northward (positive), the ‘door’ is mostly closed, and any auroral activity will be weak and short-lived.
The Role of Earth’s Rotation
From a fixed location on the ground, the duration of a display can also be influenced by Earth’s rotation. The aurora occurs in a giant ring around the magnetic pole called the auroral oval. This oval is generally fixed in place relative to the Sun. As the Earth rotates underneath it, your location on the ground moves into, through, and out of the most active part of this oval. The peak viewing time is typically around magnetic midnight (roughly 10 PM to 2 AM), when your location is under the most active, night-side portion of the oval. This is why a display might seem to fade late at night, simply because your viewing spot has rotated out of the prime zone.
The Dynamic Nature of a Display
Even during a long-lasting storm, the aurora is rarely constant. It’s important to understand that the lights ‘breathe’—they have their own rhythm of brightening and fading.
Ebbs and Flows
An aurora display is not a steady light. It is constantly changing in brightness, shape, and intensity. During a multi-hour event, it’s common to experience periods of intense, fast-moving coronas and curtains, followed by lulls where the light softens to a diffuse glow or a simple arc. Patience is key. Many novice aurora watchers make the mistake of leaving during a quiet period, only to miss a spectacular outburst an hour later. If a strong storm is forecast, it’s worth waiting through the lulls, as the show is likely not over. These ebbs and flows are the natural cycle of energy being stored and released in Earth’s magnetotail.
Quick Facts
- A typical aurora display, or ‘substorm’, lasts for 15-30 minutes.
- Major geomagnetic storms caused by CMEs can produce auroras that last for many hours.
- The duration is primarily controlled by the strength and consistency of the solar wind.
- A sustained southward Bz component of the Interplanetary Magnetic Field is crucial for long-lasting displays.
- The best viewing time is often around magnetic midnight (10 PM – 2 AM local time).
- Aurora displays are dynamic; they naturally brighten and fade in cycles.
- Even on a quiet night, you might see a brief flicker of auroral light lasting only a few minutes.
Frequently Asked Questions (FAQ)
Q: Do the Northern Lights happen every night? A: Yes, the aurora is almost always present somewhere within the auroral oval. However, its visibility from the ground depends on your location, clear skies, darkness, and the current level of geomagnetic activity.
Q: Can an aurora display stop and then start again? A: Absolutely. It is very common for a display to fade away for 30 minutes to an hour, only to return with another brilliant burst of activity. This is part of the natural cycle of substorms during a period of heightened activity.
Q: If the forecast is strong, am I guaranteed to see them all night? A: Not necessarily. A strong forecast increases the probability of a long-lasting event, but the timing and intensity can still be unpredictable. The solar wind is turbulent, and conditions can change, causing the aurora to fluctuate in strength throughout the night.
Other Books
- NOAA Space Weather Prediction Center – Aurora Dashboard
- University of Alaska Fairbanks – What is a Substorm?
- Space.com – Aurora Borealis: What Causes the Northern Lights & Where to See Them
How to see northern lights in UK?
How to See the Northern Lights in the UK: A Complete Guide
The magical dance of the Aurora Borealis isn’t reserved just for Arctic destinations like Iceland or Norway. Under the right conditions, this celestial light show can be witnessed from the UK, offering a breathtaking experience closer to home. However, seeing them here requires a perfect alignment of space weather and Earth weather.
This guide will walk you through everything you need to know, from the science that brings the lights south to the best locations and tools to use, transforming you into a skilled UK aurora hunter.
The Three Key Ingredients for a UK Sighting
Spotting the aurora in the UK depends on three critical factors coming together at the same time. If any one of these is missing, your chances drop significantly.
Ingredient 1: Strong Solar Activity
The Northern Lights are caused by particles from the sun hitting our atmosphere. For the aurora to be visible as far south as the UK, we need a particularly strong stream of these particles, usually from a Coronal Mass Ejection (CME). Scientists measure this activity using the Kp-index, a scale from 0 to 9. For a faint glow to be possible in Scotland, you typically need a Kp-index of 5 or higher. For sightings in Northern England or Wales, you’ll often need a Kp of 6 or 7. Following real-time aurora alerts from services like AuroraWatch UK is crucial, as they will tell you when solar activity is high enough.
Ingredient 2: A Clear, Dark Sky
This is the most common obstacle for UK aurora hunters: the weather. You need a cloud-free sky to see the lights. It’s essential to check the local weather forecast, paying close attention to cloud cover. Equally important is escaping light pollution. City and town lights create a ‘sky glow’ that will wash out the faint aurora. You must travel to a rural area, ideally a designated Dark Sky Park, and give your eyes at least 15-20 minutes to fully adjust to the darkness. Face north, away from any direct light sources, and find a spot with an unobstructed view of the northern horizon.
Ingredient 3: The Right Time of Year and Night
While it’s possible to see the aurora anytime there are dark nights, your chances are statistically highest during the months around the spring and autumn equinoxes (March/April and September/October). This is due to a phenomenon known as the ‘Russell-McPherron effect’, where Earth’s tilt is optimally aligned to receive solar wind. The long, dark nights of winter are also good, but summer is impossible due to the lack of true darkness. The best time of night is typically between 10 PM and 2 AM, when the sky is at its darkest.
Where to Go: Best UK Locations for Aurora Hunting
Location is everything. The further north you go, the better your chances are of seeing the aurora over the horizon.
Scotland: The UK’s Aurora Hotspot
Scotland is, without a doubt, the premier destination for seeing the Northern Lights in the UK. Its high latitude means the auroral oval is closer. The Shetland and Orkney Islands offer the very best odds. On the mainland, the northern coast, including the NC500 route, Caithness, and Sutherland, provides fantastic opportunities. The Cairngorms National Park, being a dark sky park, is another excellent choice. Even further south, places like Galloway Forest Park (another dark sky park) and the coasts of Fife and Aberdeenshire can yield sightings during strong storms.
Northern England: Your Next Best Bet
During a strong geomagnetic storm (Kp 6+), the aurora can be seen from the northern counties of England. The Northumberland International Dark Sky Park is arguably the best place in England, offering pristine dark skies and a clear northern horizon over the sea. The Lake District National Park, particularly around its northern lakes like Derwentwater, is another prime spot. The higher elevations of the Yorkshire Dales and North York Moors can also provide the necessary darkness and vantage points to catch a rare display.
Wales and Northern Ireland: Possible but Rare
Seeing the aurora from Wales and Northern Ireland is a true treat, requiring a very powerful storm (Kp 7+). In Wales, your best bet is to head to the darkest areas with a clear view north, such as the Snowdonia National Park or the coast of Anglesey. In Northern Ireland, the Antrim Coast, particularly around Dunluce Castle or the Giant’s Causeway, offers a stunning and dark foreground for potential displays. Patience and a significant space weather event are key for a successful hunt in these regions.
Quick Facts
- Scotland offers the best chance of seeing the aurora in the UK due to its higher latitude.
- A strong geomagnetic storm, measured by a Kp-index of 5 or higher, is required.
- The best months are around the equinoxes: March, April, September, and October.
- You must be in a location with minimal light pollution and no cloud cover.
- Look towards the northern horizon, typically between 10 PM and 2 AM.
- To the naked eye in the UK, the aurora often appears as a faint white or grey arc, not vivid dancing curtains.
- Use apps like AuroraWatch UK for real-time alerts on when to look up.
Frequently Asked Questions (FAQ)
Q: Can I see the Northern Lights from London or the South of England? A: It is exceptionally rare. This would require a once-in-a-decade geomagnetic storm (Kp-index 8 or 9). While it has happened, it is not something you can realistically plan for.
Q: What does the aurora look like to the naked eye in the UK? A: Often, it doesn’t look like the vibrant green photos. It usually starts as a faint, greyish-white glow or arc low on the northern horizon, easily mistaken for a cloud. A long-exposure photo with a camera will reveal the green and purple colours that your eyes can’t pick up.
Q: Do I need a special camera to see the colours? A: A modern smartphone with a ‘night mode’ can often capture the colours surprisingly well. For the best results, a DSLR or mirrorless camera on a tripod with a long exposure (5-20 seconds) is ideal for capturing the vivid details and colours of the aurora.
Other Books
- AuroraWatch UK – Real-time alerts from Lancaster University
- Met Office UK – Space Weather Forecast
- Northumberland International Dark Sky Park
How long does northern lights strain take to grow?
How Long Do the Northern Lights Last?
When searching for information on the ‘Northern Lights’, it’s common to encounter two very different topics: the breathtaking natural light show in the sky (Aurora Borealis) and a well-known cannabis strain. This article focuses exclusively on the natural celestial phenomenon.
One of the most common questions for aurora chasers is, ‘Once they appear, how long will they stick around?’ The answer is not simple, as the duration of an aurora display is as variable as its shape and color. Understanding the forces that drive the aurora helps explain why some shows are brief flashes while others are epic, all-night events.
Understanding Aurora Duration
The length of an aurora display is directly tied to the space weather conditions causing it. Think of it like a celestial faucet: the longer the solar wind ‘faucet’ is turned on and pointed at Earth, the longer the light show will last.
Typical Display Timespan
For a casual observer, a typical auroral ‘substorm’ or burst of activity often lasts between 15 and 40 minutes. During this time, the lights can go from a faint, static arc to a vibrant, dancing curtain of light that fills the sky. It’s common for the aurora to appear, put on a spectacular show, and then fade away, sometimes returning later in the night if conditions persist. Many aurora hunters pack their patience, as a quiet sky can erupt with light with little warning. It’s not a continuous event like a sunset; it’s a series of dynamic, often unpredictable, bursts of light.
Factors Influencing Duration
The primary factor determining how long the Northern Lights last is the solar wind streaming from the Sun. Specifically, the orientation of the interplanetary magnetic field (IMF) carried by the solar wind is crucial. When the IMF is oriented southward (a negative ‘Bz’ value), it efficiently connects with Earth’s magnetosphere, allowing energy to pour in. As long as this southward Bz condition persists, the aurora can continue. A strong, long-lasting stream of solar wind, such as from a coronal hole high-speed stream or a Coronal Mass Ejection (CME), can create intense auroras that last for many hours or even across multiple nights.
All-Night Auroras: Geomagnetic Storms
The most spectacular, long-lasting displays occur during geomagnetic storms. These are major disturbances of Earth’s magnetosphere caused by a powerful CME hitting our planet. During a strong storm (e.g., G3 or higher on the NOAA scale), the aurora can be visible for the entire night, from dusk until dawn. The display will ebb and flow in intensity, with multiple powerful substorms creating waves of activity. These are the events that allow the aurora to be seen at much lower latitudes than usual and provide the hours-long light shows that photographers and sky-watchers dream of.
Clarifying the 'Northern Lights' Name
It’s important to clarify that this website discusses the astronomical phenomenon. The term ‘Northern Lights’ has been adopted by others, which can cause confusion.
The Natural Wonder: Aurora Borealis
The Aurora Borealis, or Northern Lights, is a natural light display in Earth’s sky, predominantly seen in high-latitude regions. It is caused by collisions between energetic particles (electrons and protons) from the sun, carried by the solar wind, and gas particles in our own upper atmosphere. These collisions excite the gas atoms, causing them to emit light of different colors, most commonly green. This is a phenomenon of physics and astronomy, studied by agencies like NASA and NOAA. It is a beautiful, harmless, and awe-inspiring spectacle.
A Note on the Cannabis Strain
There is also a famous strain of cannabis named ‘Northern Lights’. It was named for its desirable characteristics, but it has no physical or scientific connection to the actual Aurora Borealis. Information regarding its cultivation, growth time, or effects is entirely unrelated to the study of auroras. For details on that topic, one would need to consult specialized horticultural or cannabis-specific resources. This website is dedicated solely to the science and wonder of the natural light show in our planet’s polar skies.
Quick Facts
- A typical aurora burst lasts for about 15-40 minutes.
- Major geomagnetic storms can produce aurora displays that last all night.
- The duration is controlled by the solar wind and the orientation of its magnetic field (Bz).
- A persistent ‘southward Bz’ is the key ingredient for a long-lasting aurora.
- The term ‘Northern Lights’ can refer to the Aurora Borealis or a cannabis strain; this article is about the natural phenomenon only.
- Aurora displays are not continuous; they often occur in waves or bursts of activity.
- Patience is key for aurora watching, as a quiet sky can become active later in the night.
Frequently Asked Questions (FAQ)
Q: Is there a best time of night to see a long-lasting aurora? A: While auroras can happen at any time during darkness, the most active periods are often centered around ‘magnetic midnight’, which is typically between 10 PM and 2 AM local time. This is when you are most likely to be under the most active part of the auroral oval.
Q: How can I know if an aurora display is likely to be long? A: You can monitor space weather forecasts from sources like the NOAA Space Weather Prediction Center. Look for alerts about incoming CMEs or high-speed solar wind streams, and check the real-time Bz value. A strong, sustained negative Bz value suggests conditions are ripe for a long display.
Q: Does the aurora ‘use up’ its energy and fade? A: Yes, in a way. An auroral substorm is a process where the magnetosphere releases built-up energy from the solar wind. Once that energy is discharged as an aurora, things may quiet down until more energy is loaded into the system, which can then trigger another display.
Other Books
- NOAA Space Weather Prediction Center – Official Forecasts
- SpaceWeatherLive – Real-time Auroral and Solar Data
- University of Alaska Fairbanks – Geophysical Institute FAQ
Can you see the northern lights every night?
Can You See the Northern Lights Every Night?
The dream of many travelers is to stand under a sky dancing with the ethereal green and purple hues of the Northern Lights. A common question is whether this spectacular display is a nightly event in the Arctic. While the aurora is a more frequent visitor to the polar skies than anywhere else, it is far from a guaranteed nightly show.
Seeing the aurora is like trying to catch a glimpse of a shy, wild animal; it requires patience, preparation, and a bit of luck. The appearance of the Northern Lights depends on a delicate interplay between the Sun’s activity, Earth’s magnetic field, and our local weather conditions. This guide breaks down the essential ingredients you need for a successful aurora hunt.
The Three Essential Ingredients for an Aurora Sighting
For the Northern Lights to be visible, three distinct conditions must be met simultaneously. If even one of these is missing, you won’t see the show, no matter how strong the solar storm.
Ingredient 1: Darkness (The Right Time & Place)
The aurora is a relatively faint phenomenon compared to the light from our sun or even a full moon. Therefore, the first requirement is complete darkness. This is why you cannot see the aurora during the day. In the high latitudes of the ‘auroral zone’, this also means you can’t see them during the summer months due to the Midnight Sun, when the sun never fully sets. The prime aurora viewing season runs from late August to early April. Additionally, you must get away from light pollution from cities and towns, which can easily wash out the aurora’s glow. Finding a remote spot with an unobstructed view of the northern horizon is critical.
Ingredient 2: Clear Skies (The Weather Factor)
This is often the most frustrating factor for aurora hunters. The Northern Lights occur very high in the atmosphere, between 60 to 200 miles (100-320 km) above the Earth’s surface. This is far above any weather or clouds. A strong aurora can be dancing brilliantly in the sky, but if there is a thick layer of cloud cover, you will not see a thing from the ground. Before heading out, it’s just as important to check the local weather forecast as it is to check the aurora forecast. A clear sky is non-negotiable. Sometimes, even a short drive of 20-30 minutes can be enough to escape a localized patch of clouds and find a clear viewing window.
Ingredient 3: Solar Activity (The Space Weather Factor)
The aurora is caused by charged particles from the sun—the solar wind—interacting with Earth’s magnetosphere. The strength and speed of this solar wind vary constantly. For a vibrant aurora to occur, there needs to be a significant stream of these particles hitting our atmosphere. This activity is measured on the Kp-index, a scale from 0 to 9. A Kp-index of 0-2 means very low activity, while a Kp of 4 or higher can produce a bright, active display visible across the auroral zone. This geomagnetic activity is unpredictable, driven by events on the sun like coronal mass ejections (CMEs). Following a space weather forecast is essential to know if the sun is providing the necessary fuel for the light show.
Maximizing Your Chances of a Sighting
While you can’t control the sun or the weather, you can control your preparation and strategy to significantly increase your odds of seeing the lights.
Choose the Right Location
Your geographical position is paramount. You need to be within the auroral oval, a ring-shaped zone centered on the magnetic north pole. Prime locations include northern Norway, Sweden, and Finland; Iceland; northern Canada (like Yukon and Northwest Territories); and Alaska. During periods of very high solar activity (a strong geomagnetic storm), this oval expands, and the lights can be seen from lower latitudes, but for the best and most consistent chances, you must travel north. The further you are inside this zone, the more likely you are to see the aurora even with lower Kp-index values.
Be Patient and Persistent
The aurora does not run on a schedule. It can appear for just a few minutes or dance for hours. The most common viewing window is between 10 PM and 2 AM local time, but it can happen at any time during the dark hours. The key is to be patient. Find a comfortable spot, dress in very warm layers, and be prepared to wait. Many successful sightings come after hours of waiting in the cold. Planning a trip with multiple nights dedicated to aurora hunting dramatically increases your chances, as it gives you more opportunities to get a night with clear skies and good solar activity.
Quick Facts
- You cannot see the Northern Lights every night; it’s a special event requiring specific conditions.
- Three things must align: darkness, clear skies, and sufficient solar activity.
- The best season for aurora viewing is from late August to early April when the nights are long and dark.
- Cloud cover is the number one obstacle; the aurora can be active above the clouds, but you won’t see it.
- Solar activity is measured by the Kp-index; a value of 4 or higher is considered a strong display.
- Location is critical: you must be within the ‘auroral oval’ in places like Iceland, northern Scandinavia, or Alaska.
- Patience is key. Plan for multiple nights and be prepared to wait, typically between 10 PM and 2 AM.
Frequently Asked Questions (FAQ)
Q: What time of night is best for seeing the aurora? A: While the aurora can appear at any time when it’s dark, the most active displays typically occur between 10 PM and 2 AM local time. This window is often referred to as ‘magnetic midnight’.
Q: Does a full moon prevent you from seeing the Northern Lights? A: A bright full moon can make the sky less dark, which can wash out faint auroras. However, a strong and vibrant aurora display will still be clearly visible, and the moonlight can beautifully illuminate the landscape for photography.
Q: Can the aurora be active even if I can’t see it? A: Yes, absolutely. The aurora is often active high in the atmosphere but may be too faint for the human eye to detect, especially if there’s light pollution. It could also be happening on the other side of the planet or be completely obscured by clouds.
Q: How far in advance can you forecast the Northern Lights? A: General long-term forecasts can predict active periods based on the sun’s rotation (27 days). However, reliable, short-term forecasts are typically only available 1 to 3 days in advance, after a solar event like a CME has occurred and is heading toward Earth.
Other Books
- NOAA Space Weather Prediction Center – Aurora Forecast
- Space.com – Where and When to See the Aurora
- Travel Alaska – Tips for Viewing the Northern Lights
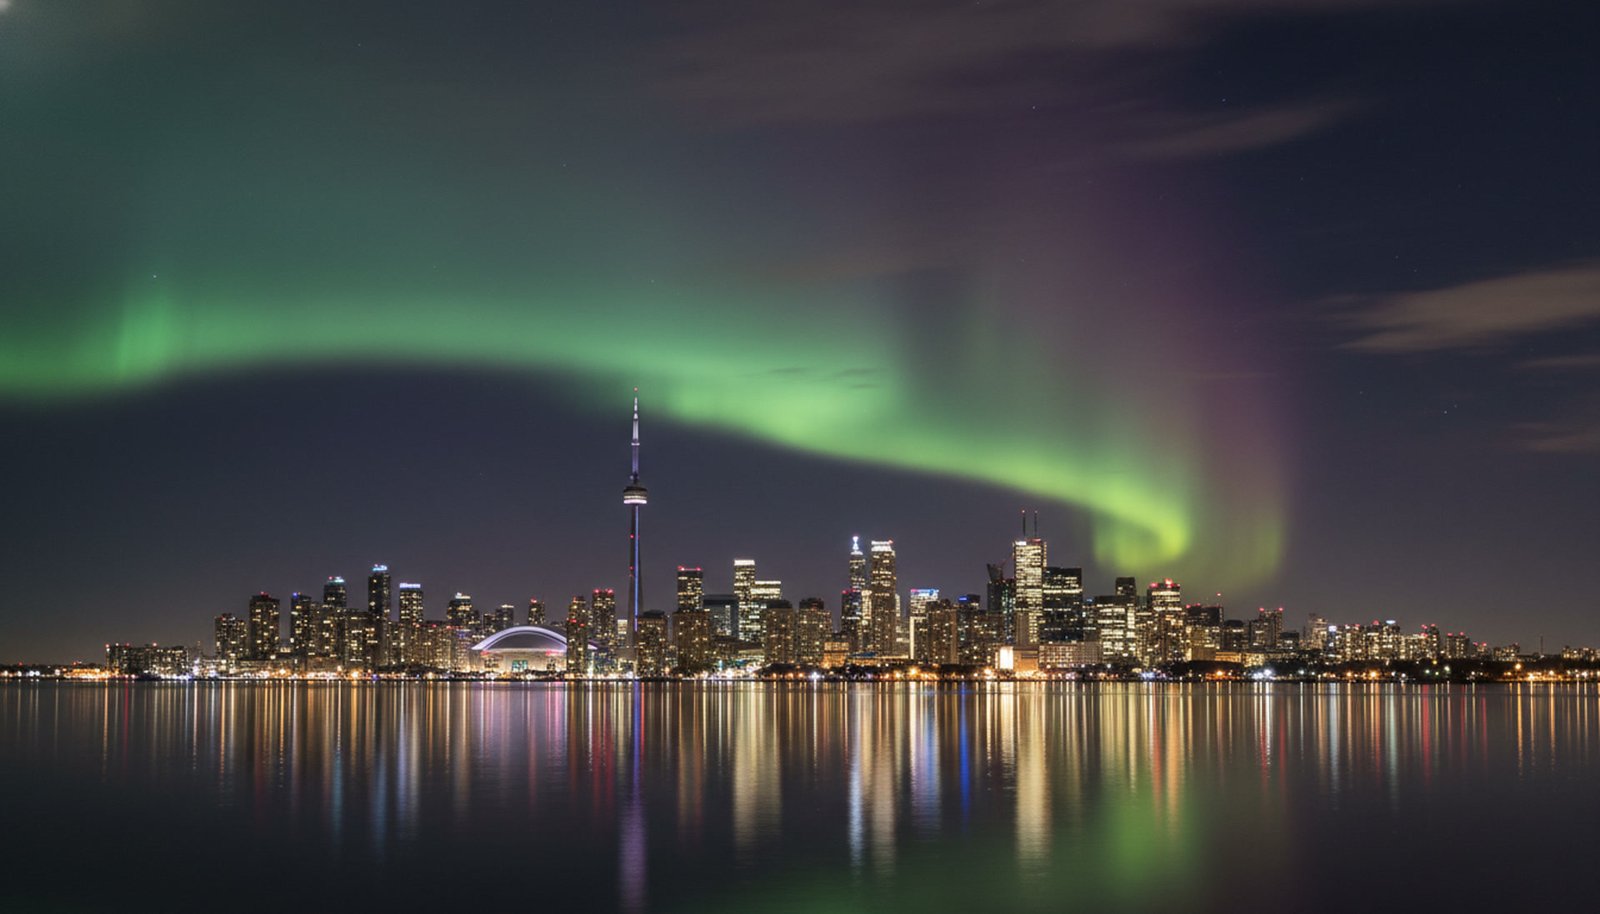
What are northern lights in Toronto?
Can You See the Northern Lights in Toronto?
Seeing the vibrant, dancing curtains of the Aurora Borealis is a bucket-list dream for many. While typically associated with Arctic locations like Iceland or Norway, the question often arises: can this celestial spectacle ever grace the skies of a southern Canadian city like Toronto? The answer is a hopeful, but conditional, yes.
Toronto lies far south of the Earth’s ‘auroral oval’, the region where auroras are a common sight. However, during periods of intense solar activity, this oval can expand dramatically, bringing the Northern Lights to lower latitudes. This guide explains the science behind why it’s so rare and provides practical tips for chasing this elusive sight in the Greater Toronto Area.
The Challenges: Why Toronto Isn't an Aurora Hotspot
Several major factors work against aurora sightings in Toronto. Understanding them is key to knowing what it takes for a successful viewing.
Geographic Latitude and the Auroral Oval
The Northern Lights occur within a ring around the Earth’s geomagnetic north pole known as the auroral oval. This oval typically covers northern Canada, Alaska, Scandinavia, and Siberia. Toronto’s geomagnetic latitude is simply too low for it to be under this oval on a normal night. For the aurora to be visible, a massive geomagnetic storm, fueled by a Coronal Mass Ejection (CME) from the sun, must hit Earth. This storm can energize and expand the auroral oval southward, sometimes stretching it down over southern Ontario and the northern United States, making a rare sighting possible.
The Battle Against Light Pollution
Even if a powerful storm pushes the aurora south, Toronto’s biggest challenge is light pollution. As one of North America’s largest metropolitan areas, the ambient light from buildings, streetlights, and cars creates a perpetual skyglow that washes out all but the brightest celestial objects. Auroras visible from this latitude are often faint and low on the northern horizon. This delicate light is easily obscured by the city’s glow. To see them, you must escape the city core. The brightness of the sky is often measured on the Bortle Scale, where Toronto’s core is a Class 8 or 9 (the brightest), making aurora viewing nearly impossible.
The Need for Extreme Space Weather
Regular solar wind causes the everyday aurora in the far north. For Toronto, we need an extraordinary event. The strength of a geomagnetic storm is measured on the Kp-index, a scale from 0 to 9. A typical night in the north might see auroras at Kp 2 or 3. For a faint glow to be visible on the horizon in Toronto, a storm of at least Kp 7 (‘Strong’) is required. For a truly impressive, overhead display (an exceptionally rare, once-in-a-decade event), a Kp 8 or 9 (‘Severe’ or ‘Extreme’) storm would be necessary. These powerful events are most common during the solar maximum, the peak of the Sun’s 11-year activity cycle.
How to Maximize Your Chances in Southern Ontario
If the conditions align, you can take steps to increase your odds of witnessing this rare spectacle.
Monitor Space Weather Forecasts
You can’t see the aurora if you don’t know it’s happening. Use resources like the NOAA Space Weather Prediction Center (SWPC) or apps like ‘My Aurora Forecast’. Look for alerts indicating a high Kp-index (7 or above). Other key indicators to watch for are a high solar wind speed (above 600 km/s) and a strongly negative Bz component (the direction of the interplanetary magnetic field). A southward Bz (negative value) is crucial as it allows solar particles to connect with Earth’s magnetic field more effectively, fueling a stronger storm and brighter aurora.
Escape the City and Look North
Your number one priority is to get away from city lights. Drive at least an hour or two north or east of the GTA. Look for locations with a clear, unobstructed view of the northern horizon. Provincial parks, conservation areas, or rural farmland are ideal. Places like the Torrance Barrens Dark-Sky Preserve near Gravenhurst are specifically designated for their dark skies and are excellent, though distant, options. Even getting to the north shore of Lake Simcoe can make a significant difference. The darker your location, the better your eyes can adapt and detect the faint auroral glow.
Manage Your Expectations and Use a Camera
When viewed from southern Ontario, the aurora might not look like the vibrant, dancing ribbons you see in photos. To the naked eye, a strong display might appear as a faint, greyish-white or greenish glow on the northern horizon, sometimes with subtle vertical pillars of light. Our eyes are not very sensitive to color in low light. However, a DSLR or mirrorless camera on a tripod can reveal the true colors. Use a long exposure setting (e.g., 10-20 seconds), a wide aperture (e.g., f/2.8), and a high ISO (e.g., 1600-3200) to capture the vivid greens and purples your eyes might miss.
Quick Facts
- Seeing the aurora in Toronto is possible but extremely rare, requiring a major geomagnetic storm.
- A Kp-index of 7 or higher is the minimum required for a potential sighting on the northern horizon.
- Severe light pollution from the city is the biggest obstacle; you must get to a dark location outside the GTA.
- Always look for a clear, unobstructed view to the north.
- To the naked eye, the aurora may appear as a faint, colorless glow, not the vibrant colors seen in photos.
- Use a camera with long exposure settings to capture the aurora’s true colors and structure.
- Sightings are more likely during the solar maximum, the peak of the Sun’s 11-year activity cycle.
Frequently Asked Questions (FAQ)
Q: How often can you see the Northern Lights in Toronto? A: Visible displays are very infrequent. A faint glow on the horizon might be possible a few times a year during the peak of the solar cycle, but a significant, memorable display might only happen once every 5-10 years.
Q: What is the best time of year to look for them? A: The aurora is caused by solar activity, which can happen any time. However, your chances are best during the months around the spring and fall equinoxes (March/April and September/October) due to favorable alignments of Earth’s magnetic field.
Q: Can I see the aurora from my apartment balcony in downtown Toronto? A: It is virtually impossible. The extreme light pollution in downtown Toronto will completely wash out any aurora except for perhaps a once-in-a-century superstorm. You must leave the city to have any realistic chance.
Other Books
- NOAA’s Space Weather Prediction Center – Aurora Forecast
- Dark Site Finder – Light Pollution Map
- Space.com: Auroras at lower latitudes
What is northern lights TV show about?
Northern Lights on TV: The Real Science Behind the Spectacle
You might have searched for information on a ‘Northern Lights TV show’ and found yourself here. It’s a popular title for dramas and thrillers, often using the aurora’s beauty and mystery as a backdrop. While those stories are captivating, the true story of the Northern Lights is a scientific epic that unfolds 93 million miles away and ends in a breathtaking light show in our planet’s sky.
This article explores how the aurora is portrayed in popular culture and then dives into the even more incredible science behind the real thing. We’ll separate the on-screen fiction from the astronomical facts to reveal what’s really happening during an auroral display.
The Aurora in Popular Culture
The Northern Lights have long captured the human imagination, making them a perfect element for storytelling in television and film. Their mysterious, ethereal quality provides a stunning backdrop for drama, romance, and suspense.
Common Themes in TV and Film
In media, the aurora is often used as a powerful symbolic device. It can represent magic, a connection to the spiritual world, a turning point in a character’s life, or an omen of things to come. For example, a TV show might use the appearance of the lights to coincide with a major plot twist or a moment of profound realization for a character. The setting is typically a remote, cold, and isolated location, which uses the aurora to amplify feelings of both beauty and isolation. Many fictional works, including recent TV series titled ‘Northern Lights’, leverage this dramatic potential, weaving the natural wonder into the fabric of their narrative to enhance the mood and atmosphere.
Separating On-Screen Fiction from Reality
While visually stunning, portrayals of the aurora on TV often take creative liberties. A common trope is characters ‘hearing’ the lights—a crackling or humming sound. In reality, the aurora occurs in the near-vacuum of the upper atmosphere, more than 60 miles (100 km) up, where it’s too thin for sound to travel to the ground. Another fictional element is attributing supernatural powers or direct influence over events to the aurora. While a strong geomagnetic storm (the cause of the aurora) can affect technology like satellites and power grids, the lights themselves are simply a beautiful result of physics and pose no direct danger or magical influence to people on the surface.
The Real 'Show': How the Aurora is Produced
The true story of the Northern Lights is a fascinating journey of energy and particles across the solar system. It’s a multi-stage process that turns invisible forces into the greatest light show on Earth.
Act 1: The Solar Wind
The show begins at our star, the Sun. The Sun constantly emits a stream of charged particles, mostly electrons and protons, known as the solar wind. This ‘wind’ travels through space at speeds of around one million miles per hour. Sometimes, the Sun has larger eruptions, called Coronal Mass Ejections (CMEs), which hurl vast clouds of these particles toward the planets. It is these powerful CMEs that are responsible for the most intense and widespread auroral displays, often visible much further south than usual. This journey from the Sun to Earth typically takes one to three days.
Act 2: Earth’s Magnetic Shield
When the solar wind reaches Earth, it first encounters our planet’s protective magnetic field, the magnetosphere. This invisible field, generated by the Earth’s molten outer core, deflects the majority of the harmful particles safely around the planet. However, the magnetosphere is weakest at the North and South Poles. Like a giant funnel, the magnetic field lines guide the solar wind particles down towards the polar regions, channeling them into the upper atmosphere where the final act of the light show takes place. This is why the aurora is concentrated in rings around the poles, known as the auroral ovals.
The Grand Finale: Atmospheric Collisions
As the trapped solar particles spiral down into the atmosphere, they collide with gas atoms and molecules, primarily oxygen and nitrogen. These collisions transfer energy to the atmospheric gases, ‘exciting’ them. To return to their normal state, the excited atoms must release this excess energy in the form of light particles called photons. The color of the light depends on which gas was hit and at what altitude. Green, the most common color, is from oxygen at 60-150 miles high. Red is from high-altitude oxygen (above 150 miles), while pinks and purples are often from nitrogen. Billions of these collisions create the shimmering curtains of light we see as the aurora.
Quick Facts
- The term ‘Northern Lights’ is used for various TV shows, but the real aurora is a natural light display.
- The aurora is caused by charged particles from the sun (solar wind) interacting with Earth’s magnetosphere.
- Fictional portrayals often include sounds or magical properties, which are not scientifically accurate.
- The different colors of the aurora are determined by which atmospheric gas (oxygen or nitrogen) is struck by solar particles and at what altitude.
- The lights are concentrated in ‘auroral ovals’ around the magnetic poles due to Earth’s magnetic field.
- Intense auroras are often caused by major solar events called Coronal Mass Ejections (CMEs).
- While the aurora itself is harmless, the underlying geomagnetic storms can impact satellites and power grids.
Frequently Asked Questions (FAQ)
Q: Are there any actual TV shows called ‘Northern Lights’? A: Yes, several TV shows, series, and movies have used the title ‘Northern Lights’. They are typically dramas or thrillers that use the aurora as a scenic or symbolic backdrop for a fictional story.
Q: Can the real aurora look as vibrant as it does on TV? A: Absolutely. During a strong geomagnetic storm, the aurora can be incredibly bright and fast-moving, looking just as spectacular as any special effect. However, what we see with the naked eye can sometimes be less colorful than what a camera captures in a long-exposure photograph.
Q: Are documentaries about the Northern Lights accurate? A: Generally, yes. Documentaries from reputable sources like PBS, BBC, National Geographic, or NASA provide scientifically accurate and fascinating insights into the physics behind the aurora and the efforts to study it.
Other Books
- NASA: What is an Aurora?
- IMDb: Example of a ‘Northern Lights’ TV Series
- NOAA Space Weather Prediction Center – Aurora Dashboard
When are northern lights today?
How Can I See the Northern Lights Tonight? A Forecasting Guide
The desire to see the Northern Lights ‘tonight’ is a common and exciting one. While the aurora isn’t predictable with the same certainty as tomorrow’s sunrise, modern space weather forecasting gives us powerful tools to dramatically increase our chances. It’s not about luck; it’s about knowing what to look for.
This guide will walk you through the three essential ingredients you need for a successful aurora hunt and introduce you to the key forecasting tools the experts use. By understanding these basics, you can turn a hopeful glance at the sky into a calculated and often rewarding viewing experience.
The Three Essential Ingredients for an Aurora Sighting
Seeing the aurora requires a perfect alignment of conditions both in space and on the ground. If you are missing any one of these three key elements, you won’t see the show, no matter how strong the solar storm is.
1. Complete Darkness
The aurora is a relatively faint phenomenon, easily washed out by other light sources. First, you need it to be dark in the sky, which means waiting until at least 1.5 to 2 hours after sunset, a period known as astronomical twilight. Second, you must get away from light pollution from cities and towns. Even a distant city can create a ‘sky glow’ on the horizon that can be mistaken for, or hide, a faint aurora. Use a light pollution map online to find the darkest possible viewing locations near you. The phase of the moon also matters; a bright full moon can make it harder to see fainter displays, while a new moon provides the ideal dark canvas for the aurora to shine.
2. Clear, Cloudless Skies
This may seem obvious, but it’s the most common reason for a failed aurora hunt. The Northern Lights occur in the thermosphere, between 60 to 200 miles (100-320 km) above the Earth’s surface. Clouds, on the other hand, form in the troposphere, just a few miles up. This means any significant cloud cover will completely block your view of the aurora above. Before you head out, always check your local weather forecast, paying close attention to the cloud cover forecast for the specific hours you plan to be watching. Satellite imagery apps can be particularly helpful for seeing where cloud banks are in real-time and finding potential clear patches.
3. High Auroral Activity (Geomagnetic Storm)
This is the ‘space weather’ component. Auroral activity is measured on a scale called the Kp-index, which runs from 0 (very calm) to 9 (extreme storm). For those living in the main auroral zone (like northern Alaska, Canada, Iceland, or Scandinavia), a Kp of 2 or 3 might be enough to see something. For viewers in the mid-latitudes (e.g., northern United States, UK, central Europe), you typically need a Kp-index of at least 4 or 5 to see the aurora, and even then, it will likely be a faint glow on the northern horizon. A Kp of 6 or 7 indicates a strong storm that could bring the lights much further south, making them brighter and more dynamic for everyone.
Your Aurora Forecasting Toolkit
Once you’ve confirmed dark and clear skies are likely, it’s time to check the space weather forecast using a few key data points.
The Kp-Index Forecast
The Kp-index is the single most important number to watch. Websites like NOAA’s Space Weather Prediction Center and apps like SpaceWeatherLive provide a short-term Kp forecast, usually for the next 24-48 hours. This forecast is broken down into 3-hour blocks. Look for periods where the predicted Kp is highest during your local nighttime hours. Remember, this is a planetary index, so it’s the same number no matter where you are. A higher Kp means the auroral oval (the ring of light around the pole) is expanding, pushing the aurora further south and making it visible to more people. Many apps allow you to set alerts for when the Kp-index reaches a certain level.
Real-Time Solar Wind Data
For the most accurate, up-to-the-minute forecast, advanced chasers look at real-time solar wind data from satellites. The most critical value is Bz (pronounced ‘B-sub-Z’). When the Bz value is negative (pointing south), it effectively ‘opens a door’ in Earth’s magnetic field, allowing solar wind energy to pour in and fuel the aurora. A sustained negative Bz is the best indicator that an aurora is imminent or in progress. Other important values are Speed (faster is better, over 500 km/s is great) and Density (more particles mean more potential light). A strong negative Bz combined with high speed and density is the perfect recipe for a spectacular show.
Quick Facts
- You need three things to see the aurora: darkness, clear skies, and high geomagnetic activity.
- The Kp-index measures auroral strength on a scale of 0 to 9.
- For mid-latitudes (e.g., northern US/UK), you generally need a Kp-index of 4 or 5, at minimum.
- Forecasts are most reliable in the short term; check the 30-60 minute forecast for the best accuracy.
- The solar wind’s ‘Bz’ value must be negative (southward) to effectively trigger an aurora.
- Use light pollution maps to find dark viewing spots away from city glow.
- Aurora forecast apps can send you push notifications when activity levels are high.
Frequently Asked Questions (FAQ)
Q: What Kp-index do I need to see the aurora? A: It depends on your location. Inside the auroral oval (e.g., Iceland, Fairbanks), a Kp of 2-3 is often visible. For mid-latitudes (e.g., Seattle, Glasgow), you’ll likely need a Kp of 4-5 for a horizon glow and Kp 6+ for overhead displays.
Q: How long does an aurora display last? A: It varies greatly. A display can be a brief ‘substorm’ lasting only 10-20 minutes, or it can be an ongoing event that waxes and wanes for several hours. It’s best to be patient and stay out for at least an hour if activity is predicted.
Q: Can I see the aurora with a full moon? A: Yes, but the bright moonlight will wash out fainter auroras, making them much harder to see and photograph. A very strong display (Kp 6+) can still be spectacular with a full moon, but a new moon always provides the best viewing conditions.
Q: What direction should I look to see the Northern Lights? A: Unless you are in the far north, you should always start by looking toward the **northern horizon**. The aurora often begins as a faint, greyish-green arc in the north. If the storm is very strong, it may expand to fill the entire sky.
Other Books
- NOAA SWPC – Aurora 30-Minute Forecast
- SpaceWeatherLive – Real-Time Solar Wind Data
- Light Pollution Map
How much is northern lights tour in Iceland?
How Much Does a Northern Lights Tour in Iceland Cost?
Seeing the Aurora Borealis dance across the Icelandic sky is a bucket-list dream for many travelers. But what does this magical experience actually cost? The price of a Northern Lights tour in Iceland can vary significantly, so understanding the options is key to planning your budget.
This guide breaks down the different types of tours available, their typical price ranges, and the factors that influence the final cost. Whether you’re looking for a budget-friendly excursion or a once-in-a-lifetime private adventure, we’ll help you understand what to expect.
Breaking Down the Costs: Tour Types & Price Ranges
The single biggest factor determining the price of your tour is the type of vehicle you’re in and the size of your group. Each option offers a different balance of cost, comfort, and flexibility.
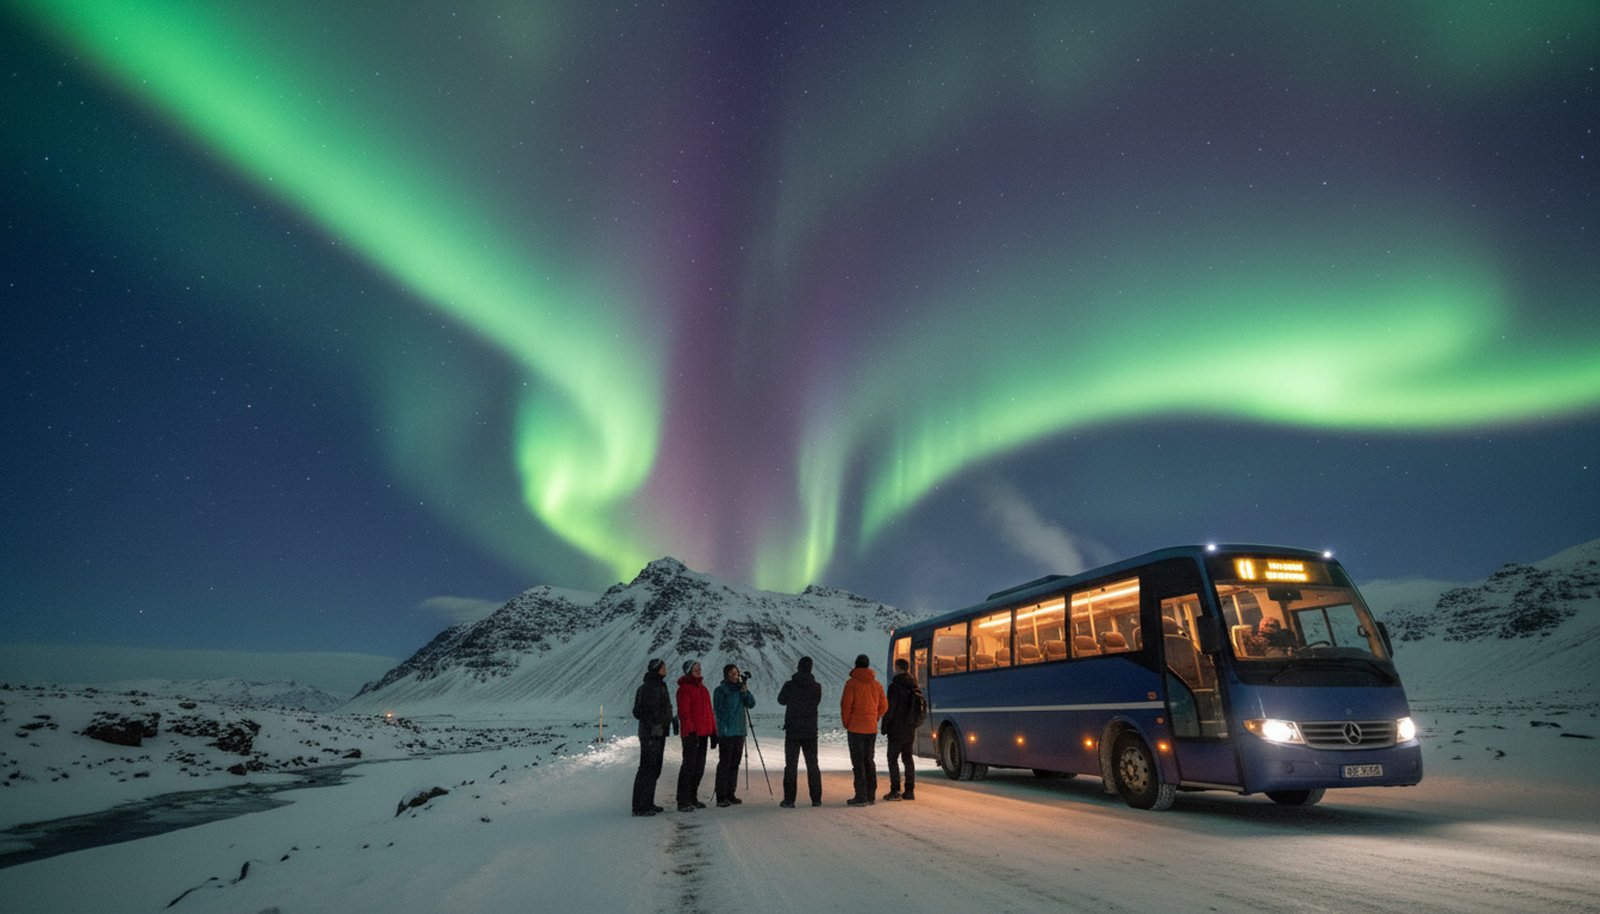
Budget-Friendly: Large Bus Tours ($50 – $90 USD)
Large coach tours are the most common and most affordable way to hunt for the aurora. These tours accommodate 40-70 passengers and follow a set route to known viewing spots away from city lights. The primary advantage is the low cost. The main disadvantages are the large crowds, limited personal interaction with the guide, and less flexibility to change locations quickly if conditions are poor. A significant perk offered by most bus tour operators is a ‘free retry’ policy: if you don’t see the Northern Lights on your tour, you can join again on another night for free. This makes it a low-risk option for budget-conscious travelers.
Mid-Range: Small Group & Minibus Tours ($90 – $150 USD)
For a more personal and comfortable experience, small group tours using a minibus or van are an excellent mid-range choice. With group sizes typically under 20 people, there’s more opportunity to ask the guide questions and less time spent getting on and off the vehicle. These tours are more agile and flexible, able to change plans and chase clear skies more effectively than a large coach. Many operators also include complimentary hot chocolate and Icelandic snacks, and some may even provide tripods for photography. This option strikes a great balance between cost and a quality viewing experience.
Premium Experience: Super Jeep & Private Tours ($150 – $500+ USD)
For the ultimate adventure, super jeep and private tours offer unparalleled access and exclusivity. Super jeeps are heavily modified 4×4 vehicles with massive tires, capable of navigating rough, snowy terrain to reach remote locations inaccessible to buses. This means you’ll be far from any crowds. A private tour gives you complete control over the itinerary and the guide’s undivided attention. While these are the most expensive options, they provide the most intimate and unique aurora hunting experience, often including professional photography assistance and premium refreshments. The price for a super jeep tour is per person, while private tours are usually a flat rate for the vehicle.
Other Factors That Influence the Final Price
Beyond the tour type, a few other variables can affect the overall cost and value of your Northern Lights excursion.
Tour Duration and Inclusions
Most standard Northern Lights hunts last between 3 to 5 hours, including travel time to and from your pickup point in Reykjavík. Longer, more specialized tours will naturally cost more. Always check what’s included in the price. A basic tour includes transportation and a guide. Mid-range and premium tours might add warm overalls, crampons for icy conditions, hot drinks, snacks, or even professional photos of you with the aurora. These inclusions can add significant value, as renting winter gear separately can be expensive. Always read the tour description carefully to avoid unexpected costs.
Combination Tours
A popular way to maximize your time and budget is to book a combination tour. These packages pair a Northern Lights hunt with another popular Icelandic activity. For example, you might find tours that include an afternoon visit to the Golden Circle, a relaxing evening at the Sky Lagoon or Blue Lagoon, or even an ATV adventure before heading out for the aurora hunt. While the upfront cost is higher than a standalone aurora tour, these combos often offer a better overall value than booking each activity separately. This is a great option if your time in Iceland is limited.
Quick Facts
- Large bus tours are the cheapest option, typically costing $50-$90 USD.
- Small group minibus tours offer a better experience for a mid-range price of $90-$150 USD.
- Super jeep and private tours provide the most exclusive experience, costing $150 to over $500.
- Most standard aurora tours last between 3 and 5 hours.
- Many budget tours offer a ‘free retry’ policy if the Northern Lights are not seen.
- The price often reflects group size, vehicle capability, and included extras like hot drinks or photos.
- Combination tours that pair the aurora hunt with another activity can offer good value.
Frequently Asked Questions (FAQ)
Q: Is a more expensive tour guaranteed to see the Northern Lights? A: No, seeing the aurora is never guaranteed as it’s a natural phenomenon dependent on solar activity and clear skies. However, more expensive small-group or super jeep tours have experienced guides and the flexibility to travel further to chase clear weather, which can increase your chances.
Q: What is usually included in a basic tour price? A: A basic tour price almost always includes pickup and drop-off from a designated location in Reykjavík, transportation in the tour vehicle, and the services of an expert guide. Warm clothing, food, and drinks are not typically included at the lowest price point.
Q: Should I just rent a car and hunt for them myself? A: Renting a car is an option, but it’s only recommended if you are very confident driving in Iceland’s potentially treacherous winter conditions (ice, snow, high winds). Tour guides are experts at interpreting weather and aurora forecasts, know the safest roads, and can take you to the best dark-sky locations, which can be difficult to find on your own.
Other Books
- Guide to Iceland – Northern Lights Tours
- Visit Iceland – The Official Tourism Information Site
- Lonely Planet – Tips for Seeing the Northern Lights in Iceland
How to see northern lights tonight?
How Can I See the Northern Lights Tonight? A Step-by-Step Guide
The idea of seeing the Northern Lights ‘tonight’ is thrilling, turning a regular evening into a potential celestial adventure. While seeing the aurora always involves a bit of luck, you can dramatically increase your chances by being prepared. It’s not about just looking up; it’s about knowing when and where to look.
This guide provides a simple, actionable checklist to follow. By understanding the key factors—space weather, local weather, and location—you can transform from a hopeful sky-gazer into a strategic aurora hunter and give yourself the best possible shot at witnessing nature’s greatest light show.
Your 3-Step Checklist for Tonight's Aurora Hunt
Success in seeing the aurora tonight hinges on three critical checks. If any one of these fails, your chances drop to nearly zero. Follow these steps in order to know if it’s worth heading out.
Step 1: Check the Aurora Forecast
The aurora’s strength is driven by solar activity, which is measured on a scale called the Kp-index, from 0 (calm) to 9 (extreme geomagnetic storm). For most locations in the northern United States or southern Canada, you’ll need a Kp-index of at least 4 or 5 to see anything. For prime aurora-viewing regions like Alaska, Iceland, or northern Scandinavia, a Kp of 2 or 3 can be sufficient. Use a reliable source like the NOAA Space Weather Prediction Center or a dedicated aurora forecasting app. These services provide short-term forecasts (30-90 minutes) that are crucial for ‘tonight’ viewing. A high Kp forecast is your green light to proceed to the next step.
Step 2: Check the Local Weather Forecast
This step is just as important as the first. An amazing Kp-9 storm is happening, but if your sky is covered in a thick blanket of clouds, you won’t see a thing. The aurora occurs far above the clouds, at altitudes of 60 to 200 miles (100-320 km). You need clear or mostly clear skies to see it. Check your local weather forecast specifically for cloud cover percentage. Look for large patches of clear sky, especially on the northern horizon. Satellite imagery apps can be very helpful for visualizing where the cloud breaks might occur. If the sky is overcast, it’s better to wait for another night.
Step 3: Escape the City Lights
The aurora can be very faint, and the glow from cities, known as light pollution, will easily wash it out. You must get as far away from urban centers as possible. Use a light pollution map online to find ‘dark sky’ locations near you. These are often state or national parks, rural roads, or conservation areas. Your ideal spot has an unobstructed view to the north, as the aurora often begins as a low arc on the northern horizon. Even a small town can create enough light to obscure a faint display, so the darker your location, the better your chances of seeing the subtle colors and movements of the lights.
Essential Tips for a Successful Viewing
Once the forecasts look promising and you’ve chosen your spot, a few extra preparations can make the difference between a frustrating night and a magical one.
When and Where to Look
The most active period for auroras is typically during solar midnight, which is usually between 10 PM and 2 AM local time. While strong storms can produce auroras earlier or later, this window is your best bet. When you arrive at your dark location, face north. For viewers at lower latitudes, the aurora may just appear as a faint, greenish glow or pillars of light low on the horizon. Don’t expect the sky to erupt in color immediately. Be patient and scan the northern sky continuously. Sometimes what you think is a faint cloud is actually the beginning of an auroral arc.
Let Your Eyes Adjust to the Dark
Your eyes need time to become sensitive to low light. It can take 20 to 30 minutes for your pupils to fully dilate and for you to achieve ‘night vision’. During this time, you must avoid looking at bright lights, especially your phone screen. The white light from a screen will instantly reset your night vision. If you need a light, use a headlamp with a red-light mode, as red light has a minimal impact on your dark adaptation. This single tip is crucial, as a faint aurora can be completely invisible until your eyes are fully adjusted.
What to Bring for Comfort and Safety
Aurora hunting often involves standing still in the cold for long periods. Dress in warm layers, much warmer than you think you’ll need. Insulated boots, gloves, a hat, and a winter jacket are essential, even on a seemingly mild night. Bring a thermos with a hot drink to stay warm from the inside. A folding chair or blanket will make waiting more comfortable. If you plan to take pictures, a tripod is non-negotiable for the long exposures required. Finally, let someone know where you are going and when you expect to be back, especially if you are heading to a remote area.
Quick Facts
- You need three things to align: a good aurora forecast (Kp-index), clear skies, and a dark location.
- The Kp-index measures geomagnetic activity; a value of 4 or 5 is often needed for mid-latitudes.
- The aurora happens far above the clouds, so a clear weather forecast is mandatory.
- Use a light pollution map to find a viewing spot far from city lights with an open view to the north.
- The best time to watch is usually between 10 PM and 2 AM local time.
- Allow your eyes at least 20 minutes to fully adapt to the darkness; avoid looking at your phone.
- Dress in very warm layers, bring a hot drink, and use a red-light headlamp to preserve night vision.
Frequently Asked Questions (FAQ)
Q: What Kp-index do I need to see the aurora from my location? A: This depends entirely on your magnetic latitude. In places like Fairbanks, Alaska or Tromsø, Norway, a Kp of 1-2 is often visible. In the northern US (e.g., Minnesota, Montana), you’ll likely need a Kp of 4-6. For rare sightings further south, a major geomagnetic storm of Kp 7 or higher is required.
Q: Can I see the Northern Lights if there is a full moon? A: Yes, but a bright moon acts like a form of natural light pollution. It can wash out fainter auroras, making them harder to see and photograph. However, a very strong aurora will still be visible, and the moonlight can beautifully illuminate the landscape in your photos.
Q: Will my phone camera be able to capture the Northern Lights? A: Modern high-end smartphones with ‘Night Mode’ can often capture decent photos of the aurora. For best results, mount your phone on a small tripod to keep it perfectly still and use the longest exposure setting available. A dedicated DSLR or mirrorless camera with manual controls will still provide superior quality.
Other Books
- NOAA Space Weather Prediction Center – 30-Minute Aurora Forecast
- Light Pollution Map – Find Dark Skies Near You
- Space.com – How to Photograph the Aurora
When are northern lights tonight?
How Can I Predict the Northern Lights Tonight?
The question ‘Can I see the Northern Lights tonight?’ is one of the most common, but the answer is never a simple yes or no. Seeing the aurora is a magical experience that depends on a perfect alignment of space weather and Earth’s local weather. It’s not about a set schedule; it’s about knowing what to look for.
This guide will empower you to become your own aurora forecaster. We’ll break down the three essential ingredients you need for a successful viewing and introduce you to the simple, powerful tools that experts use to predict when and where the celestial dance will begin.
The Three Essential Ingredients for an Aurora Sighting
For the Northern Lights to be visible, three distinct conditions must be met simultaneously. If even one of these is missing, your chances of seeing the aurora drop to nearly zero. Think of it as a three-item checklist for your aurora hunt.
1. Strong Geomagnetic Activity (The Aurora Forecast)
The aurora is caused by activity from the sun, and we measure this activity using the Kp-index. This is a global scale from 0 (calm) to 9 (extreme geomagnetic storm). For most people living in the northern United States, UK, or central Europe, a Kp-index of at least 4 or 5 is needed for the aurora to be visible on the horizon. In prime aurora locations like Iceland or northern Norway, a Kp of 1 or 2 can be enough for a good show. You can find the current and predicted Kp-index on websites like NOAA’s Space Weather Prediction Center or through dedicated mobile apps. A higher Kp-index means a stronger, more dynamic, and more widespread aurora.
2. A Dark, Clear Sky (Weather and Location)
This is the most straightforward but often most frustrating factor. The aurora occurs 60-200 miles up in the atmosphere, far above any clouds. If there is heavy cloud cover, you will not see the lights, no matter how strong the storm is. Always check your local weather forecast for cloud cover predictions for the hours between 10 PM and 2 AM. Additionally, you must escape light pollution. City and even suburban lights create a glow that will wash out all but the most intense auroral displays. Use a light pollution map to find a dark spot with a clear view of the northern horizon, at least a 20-30 minute drive away from any significant light sources.
3. The Right Time of Night (And Year)
While a strong storm can be visible after sunset, the prime viewing window is typically during the darkest part of the night, between 10 PM and 2 AM local time. This is when the sky is at its darkest, allowing your eyes to fully adjust and perceive the aurora’s faint colors. Another factor is the moon phase. A bright full moon acts like a giant source of light pollution, making it much harder to see the aurora’s details and colors. The best nights will always be around the new moon. Seasonally, the best times are during the months surrounding the equinoxes (September-October and March-April), as solar activity often increases during these periods.
Your Aurora Forecasting Toolkit
You don’t have to guess. Several free and powerful tools can give you a clear picture of your chances for any given night. Using a combination of these resources will give you the best possible prediction.
Real-Time Ovation Models
For the most accurate ‘right now’ forecast, nothing beats the aurora ovation models provided by organizations like NOAA. These are maps that show a 30-to-60-minute forecast of the aurora’s current intensity and location. The map displays a glowing green, yellow, and red oval over the polar regions. If you see that oval stretching down over your location on the map, and your skies are clear and dark, you should go outside immediately. This is the single most reliable tool for answering the ‘tonight’ question, as it’s based on real-time data from satellites monitoring the solar wind.
Essential Apps and Websites
Several user-friendly apps and websites consolidate all the necessary data into one place. Apps like My Aurora Forecast & Alerts and Glendale App are popular choices. They provide the current Kp-index, short-term and long-term forecasts, cloud cover maps, and solar wind data. Most importantly, you can set up push notifications that will alert you when the Kp-index reaches a certain level for your location. This means you don’t have to constantly check the data; your phone can tell you when it’s time to head out. Websites like SpaceWeatherLive and NOAA’s SWPC are excellent desktop resources for more detailed data and expert analysis.
Quick Facts
- You need three things to see the aurora: a high Kp-index, dark skies, and clear weather.
- The Kp-index measures geomagnetic activity on a scale of 0-9; a Kp of 4 or higher is often needed for mid-latitudes.
- The best viewing time is typically between 10 PM and 2 AM local time.
- Use NOAA’s 30-minute aurora forecast for the most accurate real-time view of aurora activity.
- City light pollution and a bright full moon can significantly reduce aurora visibility.
- Mobile apps like ‘My Aurora Forecast’ can send you alerts when activity is high.
- Even with a perfect forecast, local cloud cover is the ultimate deciding factor.
Frequently Asked Questions (FAQ)
Q: What Kp-index do I need to see the aurora from my location? A: This depends entirely on your latitude. In the Arctic Circle (e.g., Tromsø, Fairbanks), a Kp of 1-2 is often visible. In the northern US or UK, you’ll likely need a Kp of 4-6. For rare sightings in mid-latitude states, a major storm of Kp 7 or higher is required.
Q: How reliable are long-term aurora forecasts? A: Forecasts more than 2-3 days out are highly speculative. They are based on observing sunspots that might produce an eruption. The most reliable predictions are within a 24-48 hour window, after a Coronal Mass Ejection (CME) has actually left the sun and is heading toward Earth.
Q: Can I see the Northern Lights in a city? A: It is extremely difficult. City light pollution creates a bright skyglow that will wash out all but the most intense, once-in-a-decade auroral storms. For the best experience, you should always plan to drive to a dark location away from city lights.
Q: Why does my camera see the aurora better than my eyes? A: Camera sensors are more sensitive to light than the human eye. They can use a long exposure (leaving the shutter open for several seconds) to collect more light, revealing vibrant colors and details that may appear as faint, greyish clouds to the naked eye, especially during weaker displays.
Other Books
- NOAA SWPC – Aurora 30-Minute Forecast
- SpaceWeatherLive – Real-time Aurora and Solar Data
- NASA – What is Space Weather?
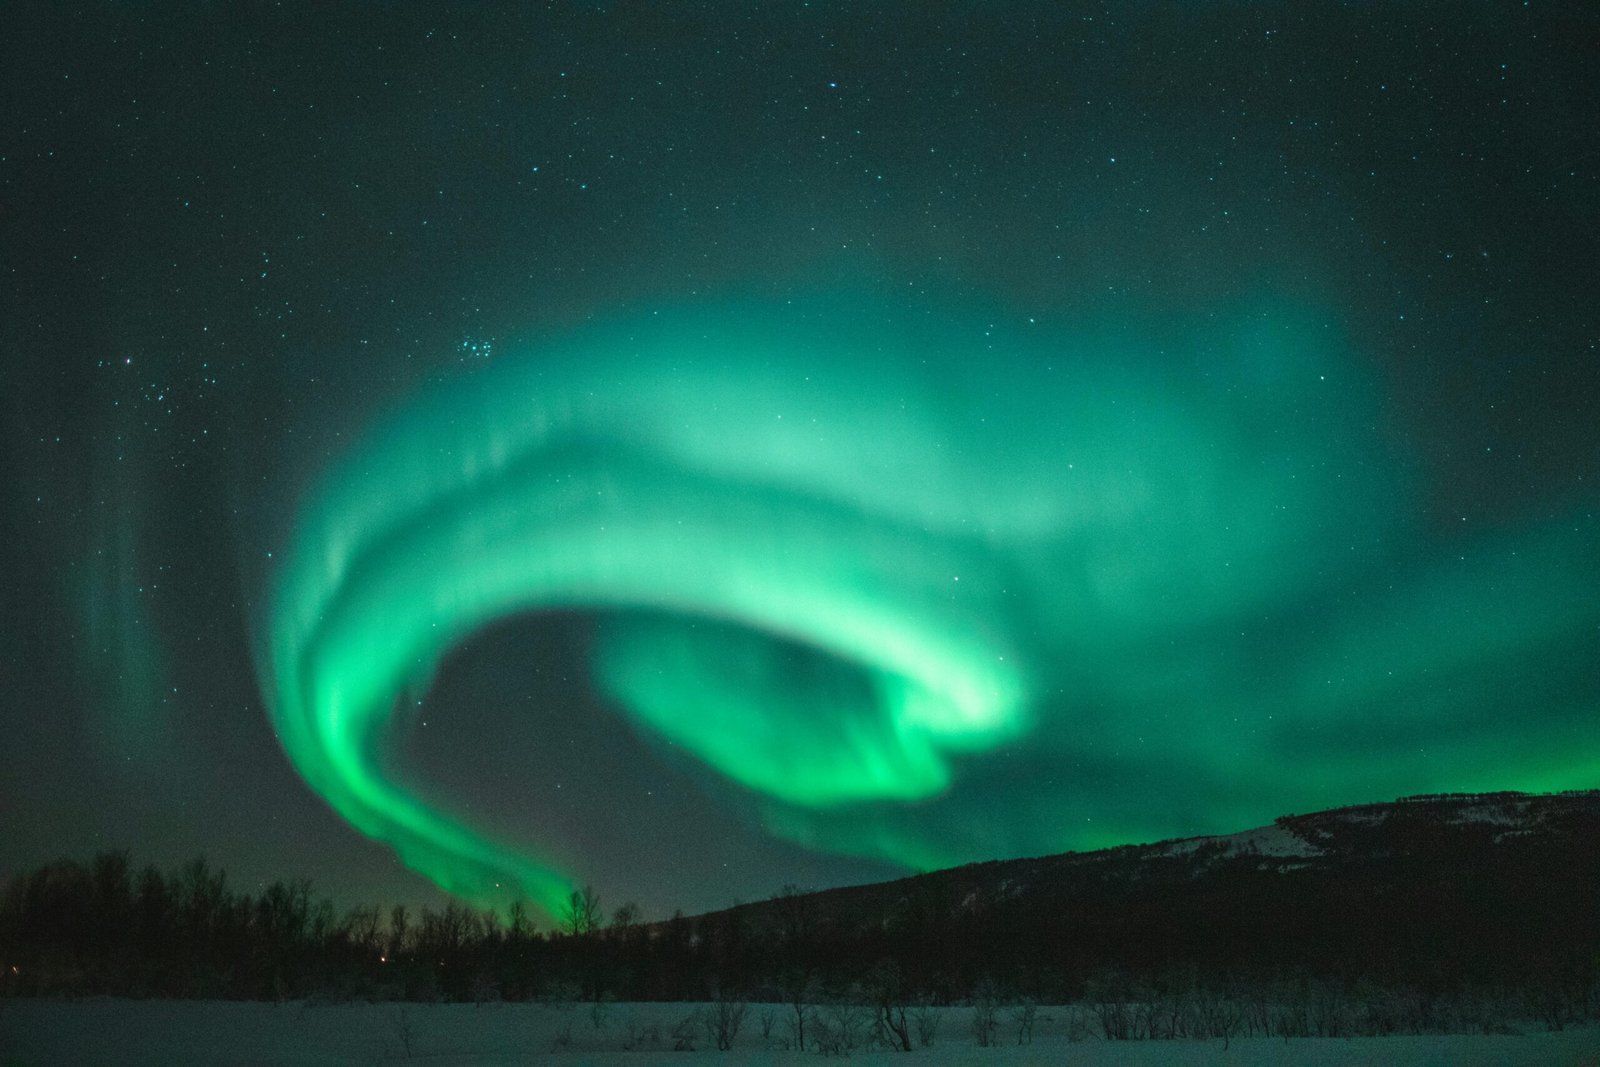
What is northern lights stone?
What Is Northern Lights Stone? A Guide to Auroral Gems
If you’ve searched for ‘Northern Lights Stone’, you’ve likely seen a variety of beautiful, iridescent gems. However, this isn’t a specific geological classification. It’s a marketing term used to describe any gemstone whose appearance captures the ethereal, shifting colors of the Aurora Borealis. The effect is caused by unique optical properties within the stone, not by pigments or dyes.
While several gems can fall under this umbrella, the name is most famously and accurately associated with one particular mineral family known for its breathtaking play-of-color. This guide will explore the primary stones known as Northern Lights Stone and other contenders for the title.
The Primary 'Northern Lights Stone': Labradorite & Spectrolite
The true origin of the ‘Northern Lights Stone’ name lies with the feldspar mineral Labradorite. Its unique optical phenomenon is so tied to the aurora that it has become the definitive gem for this description.
Labradorite: The Original Aurora Gem
Labradorite is the gemstone most commonly sold as Northern Lights Stone. It is a feldspar mineral that, at first glance, can appear to be a dull, dark grey-green stone. However, when it catches the light at the right angle, it flashes with an incredible iridescent glow of blue, green, gold, and peacock colors. This stunning optical effect is called labradorescence. According to Inuit legend, the Northern Lights were once trapped inside the rocks along the coast of Labrador, and a warrior freed most of them with his spear, but some of the light remained captured within the stone. This folklore perfectly captures the visual magic of Labradorite, making it the quintessential auroral gem.
Spectrolite: Labradorite’s Premium Cousin
Spectrolite is not a different mineral, but rather a specific, exceptionally high-quality variety of Labradorite found only in Finland. What sets it apart is the intensity and range of its colors. While standard Labradorite primarily shows blues and greens, Spectrolite can display the entire spectrum of color, including vibrant oranges, reds, and purples, often all at once. This full-spectrum display makes it an even more accurate representation of the Northern Lights. Discovered during World War II, its rarity and superior labradorescence make Spectrolite more valuable and sought-after by collectors and jewelry designers.
The Science Behind the Glow: Labradorescence
The magical glow of Labradorite and Spectrolite is not a surface color but a fascinating trick of the light. The effect, known as labradorescence, is a form of iridescence caused by light interacting with the stone’s internal structure. The mineral is composed of extremely thin, stacked layers of different compositions. When light enters the stone, it bounces off these various layers. This interference splits the light into its component colors, and only certain wavelengths (colors) are reflected back to your eye. As you change the angle of the stone or the light source, the colors you see will change, creating the dynamic, shimmering effect that so perfectly mimics the dancing aurora.
Other Gems with an Auroral Glow
While Labradorite is the classic ‘Northern Lights Stone’, other gems, often enhanced by humans, are sometimes marketed under the same name due to their iridescent qualities.
Aura Quartz: A Man-Made Wonder
Aura Quartz is a group of crystals, most commonly clear quartz, that have been treated to produce a vibrant, metallic rainbow sheen. The process, called vapor deposition, involves placing the quartz in a vacuum chamber and bonding microscopic particles of precious metals like gold, titanium, or platinum to its surface. The result, known as ‘Angel Aura’ or ‘Aqua Aura’ quartz, has a high-energy, rainbow-like appearance. While beautiful, it’s important to know that this is a man-made enhancement. The color is a surface coating and not an intrinsic optical property of the quartz itself, unlike the natural glow of Labradorite.
Mystic Topaz: The Coated Gemstone
Similar to Aura Quartz, Mystic Topaz is a natural gemstone—in this case, white topaz—that has been given a special coating to create a rainbow effect. A very thin layer of titanium is applied to the stone’s pavilion (the bottom, pointed part), which causes light to reflect in a kaleidoscope of colors. The effect is dazzling and often marketed as ‘Northern Lights Topaz’. Like Aura Quartz, this is a surface treatment that can be scratched or damaged over time. Its color play is typically more of a surface-level rainbow shimmer compared to the deeper, more directional flash seen in high-quality Labradorite.
Quick Facts
- ‘Northern Lights Stone’ is a trade name, not a scientific mineral name.
- Labradorite is the gemstone most commonly and accurately associated with this term.
- Spectrolite is a rare, high-quality variety of Labradorite from Finland with a full spectrum of color.
- The glow in Labradorite is a natural optical effect called ‘labradorescence’.
- Other stones like Aura Quartz and Mystic Topaz are surface-coated to create a similar iridescent effect.
- The effect in Labradorite is caused by light interference within the stone’s layered structure.
- Always ask a seller to clarify which specific mineral they are selling when they use a trade name.
Frequently Asked Questions (FAQ)
Q: Is Northern Lights Stone the same as Aurora Borealis Stone? A: Yes, ‘Northern Lights Stone’ and ‘Aurora Borealis Stone’ are interchangeable marketing terms. They both refer to gemstones, primarily Labradorite and Spectrolite, that exhibit a colorful iridescence resembling the aurora.
Q: How can you tell if Labradorite is real? A: Real Labradorite has a directional play-of-color, known as ‘flash’ or ‘schiller’. The color appears and disappears as you tilt the stone. Fake or low-quality imitations often have a uniform, painted-on look that is visible from all angles.
Q: Is Spectrolite more valuable than Labradorite? A: Generally, yes. True Spectrolite from Finland is much rarer and displays a more intense and broader range of colors than typical Labradorite. These factors make it more valuable to collectors and in the jewelry market.
Q: Can the coating on Aura Quartz or Mystic Topaz wear off? A: Yes, because the iridescence on Aura Quartz and Mystic Topaz comes from a microscopic surface coating, it can be scratched or worn away over time with rough handling or exposure to abrasive chemicals.
Other Books
- GIA Gem Encyclopedia on Labradorite
- Geology.com: What is Labradorescence?
- Mindat.org – Spectrolite Information

How much are northern lights seeds?
Understanding the Two 'Northern Lights': Aurora vs. Cannabis Strain
A search for ‘Northern Lights’ can lead you down two very different paths. One is a journey to the Arctic Circle to witness the breathtaking Aurora Borealis, a natural light show powered by the sun. The other leads to information about a well-known cannabis strain. It’s a common point of confusion, and this article aims to clarify the difference.
While they share a name, they are entirely unrelated. This website is your expert guide to the scientific marvel that is the Aurora Borealis. Here, we’ll briefly acknowledge the cannabis strain to clear up any confusion before diving back into the celestial phenomenon we’re passionate about.
The 'Northern Lights' Cannabis Strain
To directly address the query, it’s important to acknowledge the famous cannabis strain that shares the name of the aurora. This is purely for informational clarity.
A Brief Overview of the Strain
The Northern Lights cannabis strain is one of the most famous indica strains in the world. It gained prominence in the 1980s and is known for its resilience and specific genetic characteristics. Its name was likely inspired by the sense of wonder and its potent effects, but it has no physical or scientific connection to the actual Aurora Borealis. It’s a product of agricultural cultivation, entirely separate from the space weather phenomenon that lights up the polar skies. Many other products and brands use ‘aurora’ or ‘northern lights’ in their names to evoke a sense of beauty and wonder, and this is a prime example.
Regarding Seeds and Pricing
This website does not provide information on the sale, pricing, or legality of cannabis seeds. The cost of ‘Northern Lights’ seeds varies widely based on the supplier, genetics, quantity, and your geographical location. The legality of purchasing and cultivating cannabis seeds is also highly dependent on local laws and regulations. If you are seeking this information, you must consult with legal, licensed dispensaries or reputable seed banks in your jurisdiction. We are an educational resource focused solely on astronomy and space science, and we encourage all users to adhere to their local laws.
The Aurora Borealis: The Natural Wonder
Now, let’s turn our attention to the celestial spectacle that is this website’s focus: the true Northern Lights, also known as the Aurora Borealis.
The Science Behind the Lights
The Aurora Borealis is a natural light display that occurs in the high-latitude regions around the Arctic. It’s not a weather event; it’s a space weather event. The phenomenon is caused by electrically charged particles from the sun, traveling on the solar wind, colliding with gaseous particles in the Earth’s upper atmosphere. Our planet’s magnetic field, the magnetosphere, funnels these solar particles towards the poles. When they strike oxygen and nitrogen atoms, they ‘excite’ them, causing them to release energy in the form of light, creating the beautiful, dancing ribbons we see from the ground.
Why is it Called ‘Northern Lights’?
The scientific name, ‘Aurora Borealis’, was coined by Galileo in 1619. ‘Aurora’ is the Roman goddess of the dawn, and ‘Boreas’ is the Greek name for the north wind. However, the common name ‘Northern Lights’ is a simple, descriptive term used for centuries by people living in the northern latitudes who witnessed the phenomenon. It literally describes a beautiful light that appears in the northern sky. Its counterpart in the southern hemisphere is called the Aurora Australis, or the ‘Southern Lights’.
Quick Facts
- The term ‘Northern Lights’ can refer to the Aurora Borealis or a cannabis strain.
- This website is an educational resource exclusively about the astronomical phenomenon.
- The Northern Lights cannabis strain has no scientific connection to the aurora.
- We do not provide information on the price or legality of cannabis seeds.
- The Aurora Borealis is caused by solar particles interacting with Earth’s magnetosphere.
- The different colors of the aurora are caused by collisions with different gases at various altitudes.
- Always consult and adhere to local laws regarding cannabis products.
Frequently Asked Questions (FAQ)
Q: Is there any real connection between the aurora and the cannabis strain? A: No, there is no scientific or historical connection. The strain was likely named after the natural phenomenon to evoke a sense of wonder, beauty, or its powerful effects, which is a common marketing practice.
Q: So this website doesn’t have information on where to buy seeds? A: That is correct. We are a scientific and informational resource focused entirely on the Aurora Borealis. We do not provide any information related to cannabis products, their sale, or their legality.
Q: What is the best way to see the real Northern Lights? A: To see the Aurora Borealis, you need to travel to a high-latitude location within the ‘auroral oval,’ such as parts of Alaska, Canada, Iceland, or Scandinavia. The best viewing times are on dark, clear nights between September and April.
Other Books
- NASA’s In-Depth Guide to the Aurora
- NOAA Space Weather Prediction Center – Aurora Forecast
- What Are the Northern Lights? – Royal Museums Greenwich
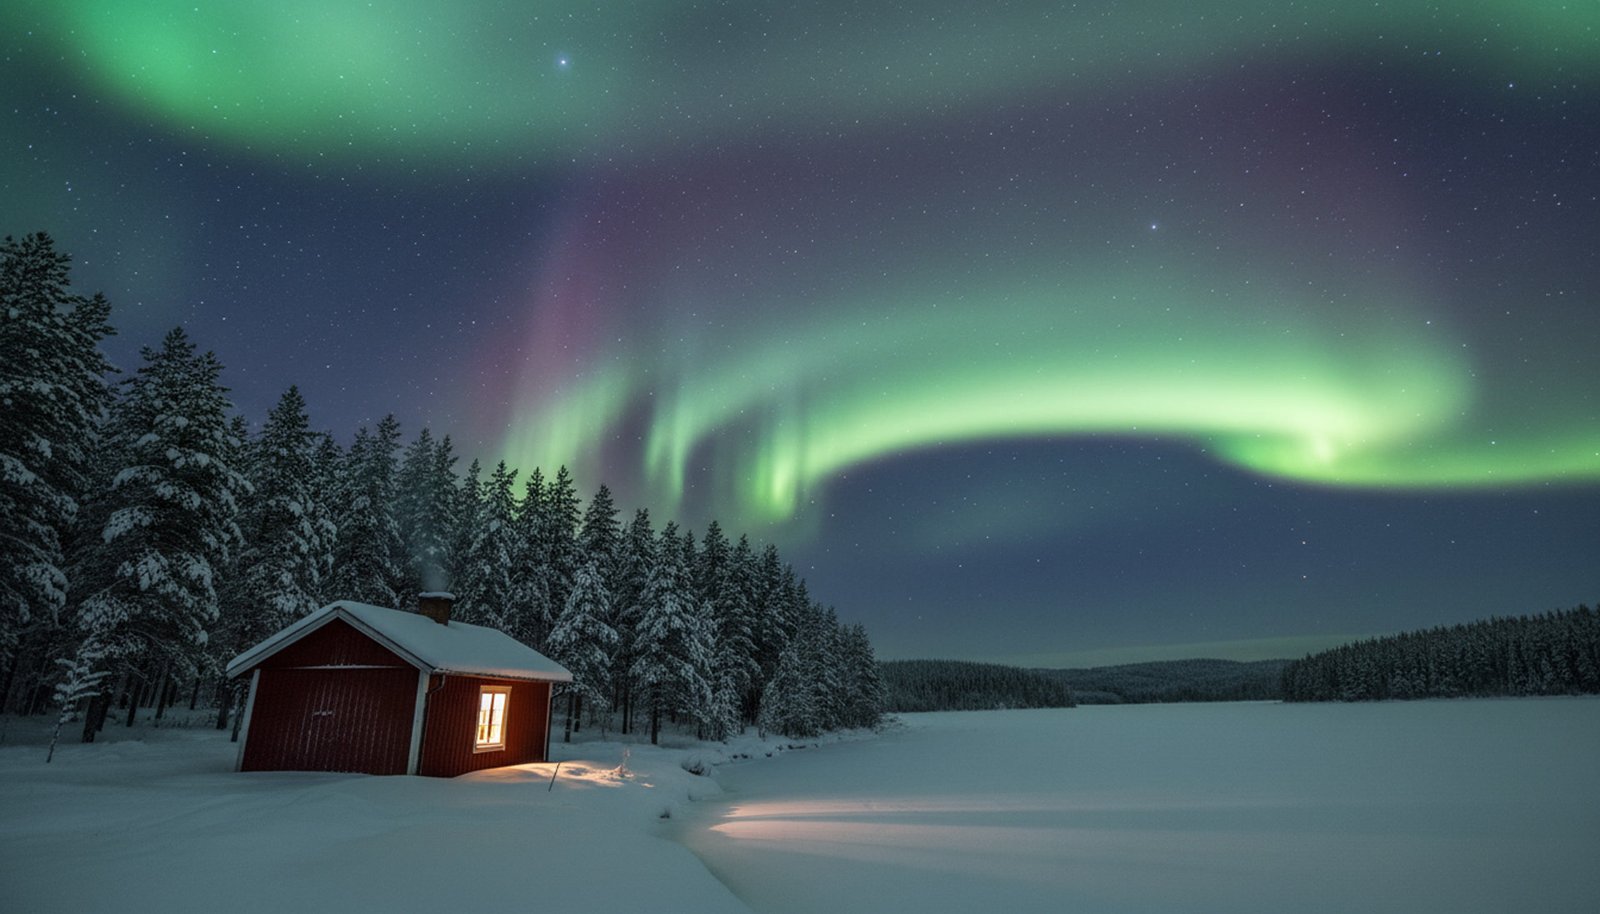
What are northern lights in Sweden?
What Are the Northern Lights in Sweden? A Complete Guide
The Northern Lights, a celestial ballet of shimmering color across the night sky, hold a special place in Swedish folklore and culture. Known by the indigenous Sámi people as ‘guovssahas’—’the light you can hear’—this natural wonder is not unique to Sweden, but the country’s vast, dark landscapes in the north provide one of the most spectacular stages on Earth to witness it.
This guide explains the science behind the aurora, why Sweden is a premier viewing destination, and provides practical tips on where and when to go for the best chance of experiencing this unforgettable light show.
The Science and Scenery of Sweden's Aurora
While the scientific cause of the Northern Lights is the same everywhere, Sweden’s unique geography and climate create the perfect conditions for an extraordinary viewing experience. It’s a combination of being in the right place at the right time.
The Universal Cause: A Cosmic Collision
The aurora begins 93 million miles away at the Sun, which constantly sends out a stream of charged particles called the solar wind. When this wind reaches Earth, our planet’s magnetic field, the magnetosphere, funnels these particles towards the polar regions. As they enter our upper atmosphere, they collide with gas atoms, primarily oxygen and nitrogen. These collisions ‘excite’ the atoms, causing them to release energy in the form of light. Billions of these collisions create the dancing curtains of green, pink, and purple light we see as the Aurora Borealis.
Why Sweden is a Prime Viewing Location
Sweden’s prime status for aurora viewing is due to its position under the auroral oval. This is a permanent, ring-shaped zone of high auroral activity centered on the Earth’s magnetic poles. The northernmost part of Sweden, known as Swedish Lapland, lies directly within this oval. This means that even with minimal solar activity, the aurora is often visible. Locations like Kiruna, Jukkasjärvi, and Abisko are world-renowned because they offer consistent sightings throughout the aurora season, making them a magnet for aurora chasers.
The Importance of Darkness and Clear Skies
Beyond its geographical advantage, Swedish Lapland offers two other crucial ingredients: darkness and minimal light pollution. During the winter months, the region experiences long periods of darkness, including the Polar Night when the sun doesn’t rise above the horizon. This deep darkness provides a perfect black canvas for the aurora’s colors to pop. Furthermore, the sparse population and vast national parks mean there is very little artificial light to interfere with the view, allowing for crisp, clear sightings of even faint auroral displays.
Your Guide to Seeing the Aurora in Sweden
Knowing what the lights are is the first step. The next is planning your adventure to see them. Here’s a breakdown of the best places and times to go.
Best Locations in Swedish Lapland
The undisputed king of aurora viewing in Sweden is Abisko National Park. It’s famous for its ‘blue hole’, a patch of sky over Lake Torneträsk that often remains clear due to a unique microclimate, giving it more clear nights than almost anywhere else in the auroral zone. The Aurora Sky Station here is a world-class observatory. Other top locations include Kiruna, Sweden’s northernmost city and a hub for space research, and the village of Jukkasjärvi, home to the famous ICEHOTEL, which offers a magical setting for a night of aurora hunting.
The Ideal Season: Autumn to Spring
The Northern Lights season in Sweden runs from late September to early April. During these months, the nights are long and dark enough for the aurora to be visible. The peak months are often considered to be from December to February due to the longest nights. However, September and October can also be excellent, as the weather is often milder and the autumn colors provide a beautiful daytime backdrop. The summer months, with the Midnight Sun, are not suitable for aurora viewing as the sky never gets dark enough.
Key Conditions for a Sighting
To see the Northern Lights, you need three things to align: geomagnetic activity, clear skies, and darkness. You can monitor solar activity using aurora forecast apps or websites that show the Kp-index, a scale of geomagnetic activity from 0 to 9. A Kp-index of 3 or higher is generally good for sightings in northern Sweden. Always check the local weather forecast for cloud cover, and make sure you get away from any town or city lights for the darkest possible sky.
Quick Facts
- The Northern Lights in Sweden are the Aurora Borealis, a natural phenomenon.
- The best viewing area is Swedish Lapland, located inside the Arctic Circle and under the auroral oval.
- Abisko National Park is a world-famous spot due to its ‘blue hole’ microclimate, which results in frequent clear skies.
- The prime viewing season is from late September to early April when the nights are long and dark.
- Success requires a combination of solar activity (a high Kp-index), clear, cloudless skies, and minimal light pollution.
- The indigenous Sámi people of Sweden have a rich history with the lights, calling them ‘guovssahas’.
- You cannot see the aurora during the Swedish summer due to the Midnight Sun.
Frequently Asked Questions (FAQ)
Q: Can I see the Northern Lights from Stockholm or Gothenburg? A: It is extremely rare to see the Northern Lights from southern cities like Stockholm or Gothenburg. It would require a very powerful geomagnetic storm (Kp-index of 7 or higher). For reliable sightings, you must travel north to Swedish Lapland.
Q: What is the ‘blue hole of Abisko’? A: The ‘blue hole’ is a patch of sky over Lake Torneträsk in Abisko that often remains clear even when surrounding areas are cloudy. This is caused by local mountain weather patterns, making Abisko one of the most reliable aurora-watching destinations in the world.
Q: Are the Northern Lights in Sweden always green? A: Green is the most common color, caused by collisions with oxygen at lower altitudes. During intense solar storms, you might also see shades of pink, purple, or even red, which are caused by collisions with nitrogen or high-altitude oxygen.
Other Books
- Visit Sweden – Official Guide to the Northern Lights
- Swedish Institute of Space Physics (IRF) in Kiruna
- SpaceWeatherLive – Real-time Auroral Activity
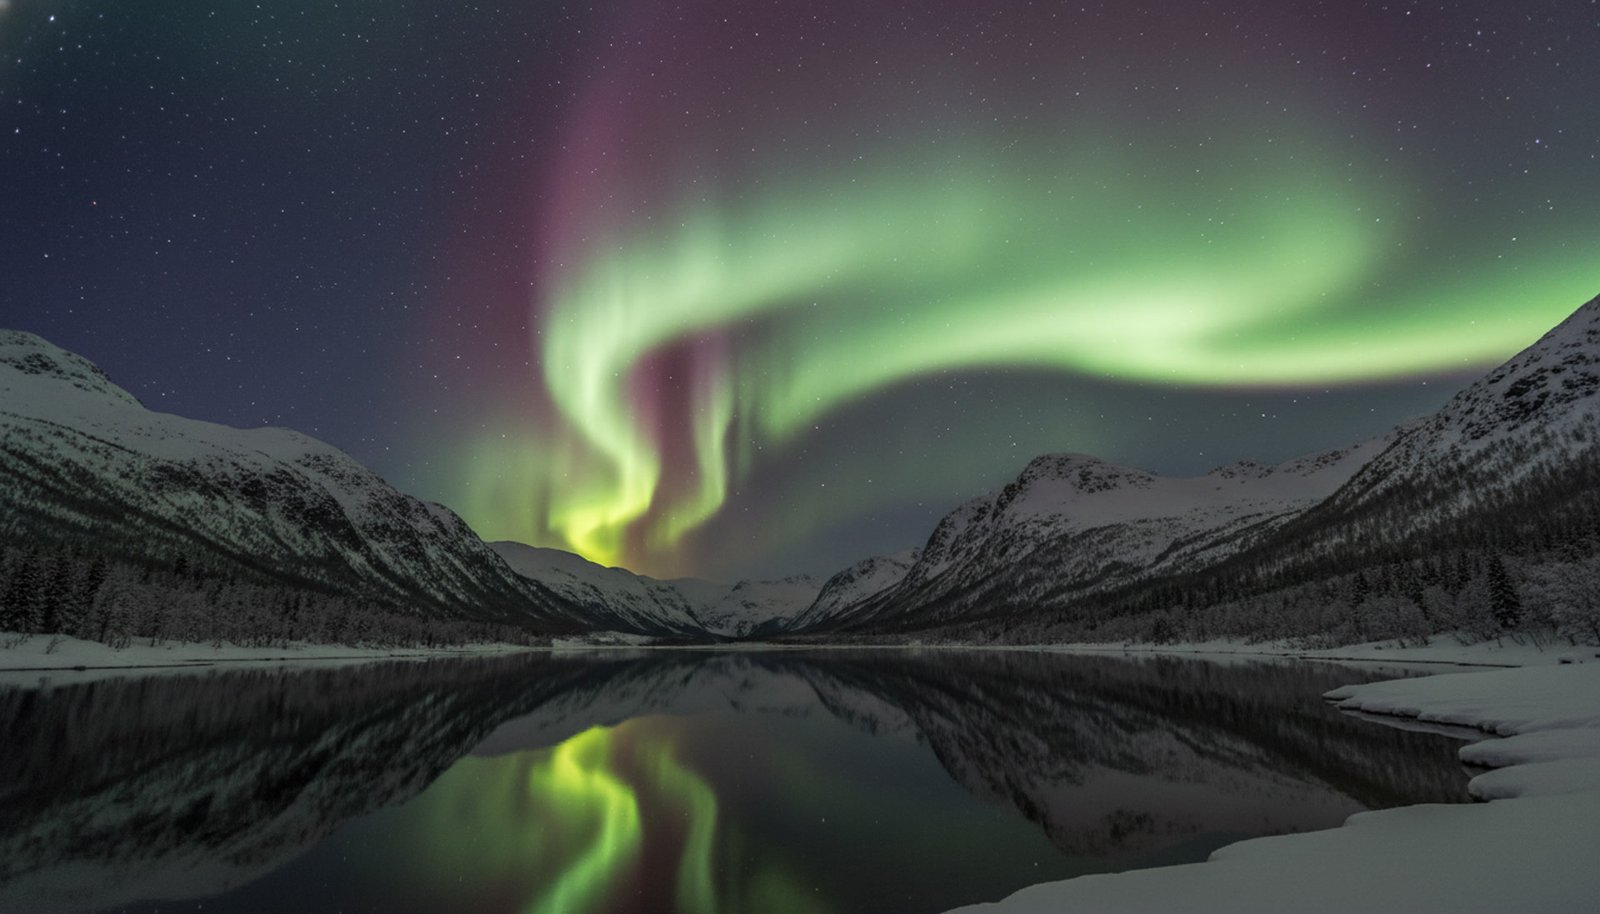
What are northern lights (science explanation)?
What Are the Northern Lights? A Scientific Explanation
The shimmering, dancing curtains of light known as the Northern Lights are a breathtaking spectacle that has captivated humanity for millennia. While they may seem magical, the aurora is not a weather phenomenon like clouds or rain; it’s a ‘space weather’ event. The entire process is a grand cosmic interaction between our planet and the Sun, beginning 93 million miles away.
This guide breaks down the science of what the Northern Lights are, explaining the journey of solar particles and the atmospheric collisions that result in this incredible display. Understanding the science behind the glow only adds to its wonder.
The Anatomy of an Aurora: From Sun to Sky
To understand what an aurora is, we need to look at four key components: the Sun’s emissions, Earth’s magnetic shield, our atmosphere, and the resulting light. It’s a chain reaction that connects our star directly to our sky.
The Engine: The Sun and the Solar Wind
The process begins at the Sun. Our star is a massive ball of hot gas that constantly emits a stream of charged particles, mostly electrons and protons. This stream is called the solar wind, and it flows outward through the solar system at speeds of around one million miles per hour. During more intense solar events, like a Coronal Mass Ejection (CME), the Sun releases a much larger and faster cloud of these particles. These CMEs are often the cause of the most spectacular and widespread aurora displays, as they carry a huge amount of energy toward Earth.
The Guide: Earth’s Magnetic Field
As the solar wind approaches Earth, it encounters our planet’s protective magnetic field, the magnetosphere. This invisible field, generated by the molten iron in Earth’s core, deflects the majority of the harmful solar particles, shielding life on the surface. However, the magnetosphere is weakest at the North and South Poles. Here, the magnetic field lines curve back down towards the planet, acting like a giant funnel. This funnel captures some of the solar wind particles and channels them down into the upper atmosphere above the polar regions.
The Canvas: Collisions in the Upper Atmosphere
The final stage of the process happens high above our heads, typically between 60 and 200 miles (100-320 km) in altitude. As the captured solar particles are accelerated down the magnetic field lines, they slam into the gas atoms and molecules in Earth’s upper atmosphere. The two most common gases involved are oxygen and nitrogen. This high-speed collision transfers energy from the solar particle to the atmospheric gas atom, putting the atom into an ‘excited’ state. This is similar to how a neon sign works, where electricity is used to excite neon gas atoms.
The Result: A Luminous Glow
An atom cannot stay in an ‘excited’ state for long. To return to its normal state, it must release the extra energy it gained during the collision. It does this by emitting a tiny particle of light, called a photon. When billions upon billions of these atoms release photons simultaneously, the combined effect is the beautiful, shimmering light display we see from the ground. The constant stream of incoming solar particles and the dynamic nature of the magnetic field cause the lights to move and ‘dance’ across the sky, creating the famous curtains, arcs, and rays of the aurora.
Decoding the Aurora's Appearance
The science also explains why the aurora looks the way it does—from its stunning array of colors to its ever-changing shapes.
Why Are There Different Colors?
The color of the aurora is determined by two factors: the type of gas atom being struck and the altitude of the collision. The most common color, a brilliant green, is produced by collisions with oxygen atoms at altitudes of about 60 to 150 miles. Rarer, all-red auroras are caused by collisions with high-altitude oxygen (above 150 miles). Hitting nitrogen atoms can produce blue or purplish-red light, often seen on the lower edges of the green curtains during intense displays. Our eyes are most sensitive to the green wavelength, which is why it’s the color we see most often.
Why Do They ‘Dance’ and Change Shape?
The aurora’s movement is a direct visual representation of the invisible forces at play. The ‘dancing’ is caused by the constant fluctuations in the incoming solar wind and the complex way it interacts with Earth’s magnetosphere. As the density, speed, and magnetic orientation of the solar wind change, the flow of particles into the atmosphere also changes. This creates the famous moving curtains, rays, and spirals. During a powerful geomagnetic storm, these movements can be incredibly fast and dramatic, filling the entire sky with motion.
Quick Facts
- The Northern Lights are a light phenomenon caused by solar particles colliding with gases in Earth’s atmosphere.
- Earth’s magnetic field (the magnetosphere) plays a crucial role by funneling these particles toward the poles.
- The most common green color comes from collisions with oxygen atoms at altitudes of 60-150 miles.
- Red, blue, and purple auroras are caused by collisions with high-altitude oxygen or nitrogen.
- The aurora’s ‘dancing’ movement reflects the dynamic interaction between the solar wind and our magnetic field.
- The same phenomenon in the Southern Hemisphere is called the Aurora Australis or ‘Southern Lights’.
- Intense auroras are often caused by major solar events called Coronal Mass Ejections (CMEs).
Frequently Asked Questions (FAQ)
Q: Are the Northern Lights visible from space? A: Yes, astronauts aboard the International Space Station (ISS) often see the aurora. From their perspective, it appears as a glowing ribbon of light curving around the polar regions of the Earth.
Q: Do other planets have auroras? A: Yes! Any planet with a substantial atmosphere and a strong magnetic field can have auroras. Jupiter and Saturn, for example, have auroras that are much larger and more powerful than Earth’s.
Q: Is the aurora hot? A: No, you cannot feel any heat from the aurora. While the particles involved are very high-energy, the collisions happen in the thermosphere where the air is incredibly thin, so there is not enough matter to transfer any noticeable heat to the ground.
Q: What is the Kp-index? A: The Kp-index is a global scale from 0 to 9 that measures geomagnetic activity, which is directly related to aurora strength. A higher Kp-index (e.g., 5 or above) means a stronger geomagnetic storm and a higher probability of seeing the aurora at lower latitudes.
Other Books
- NASA Science: The Aurora
- NOAA Space Weather Prediction Center – Aurora Dashboard
- Space.com: What are the northern lights?
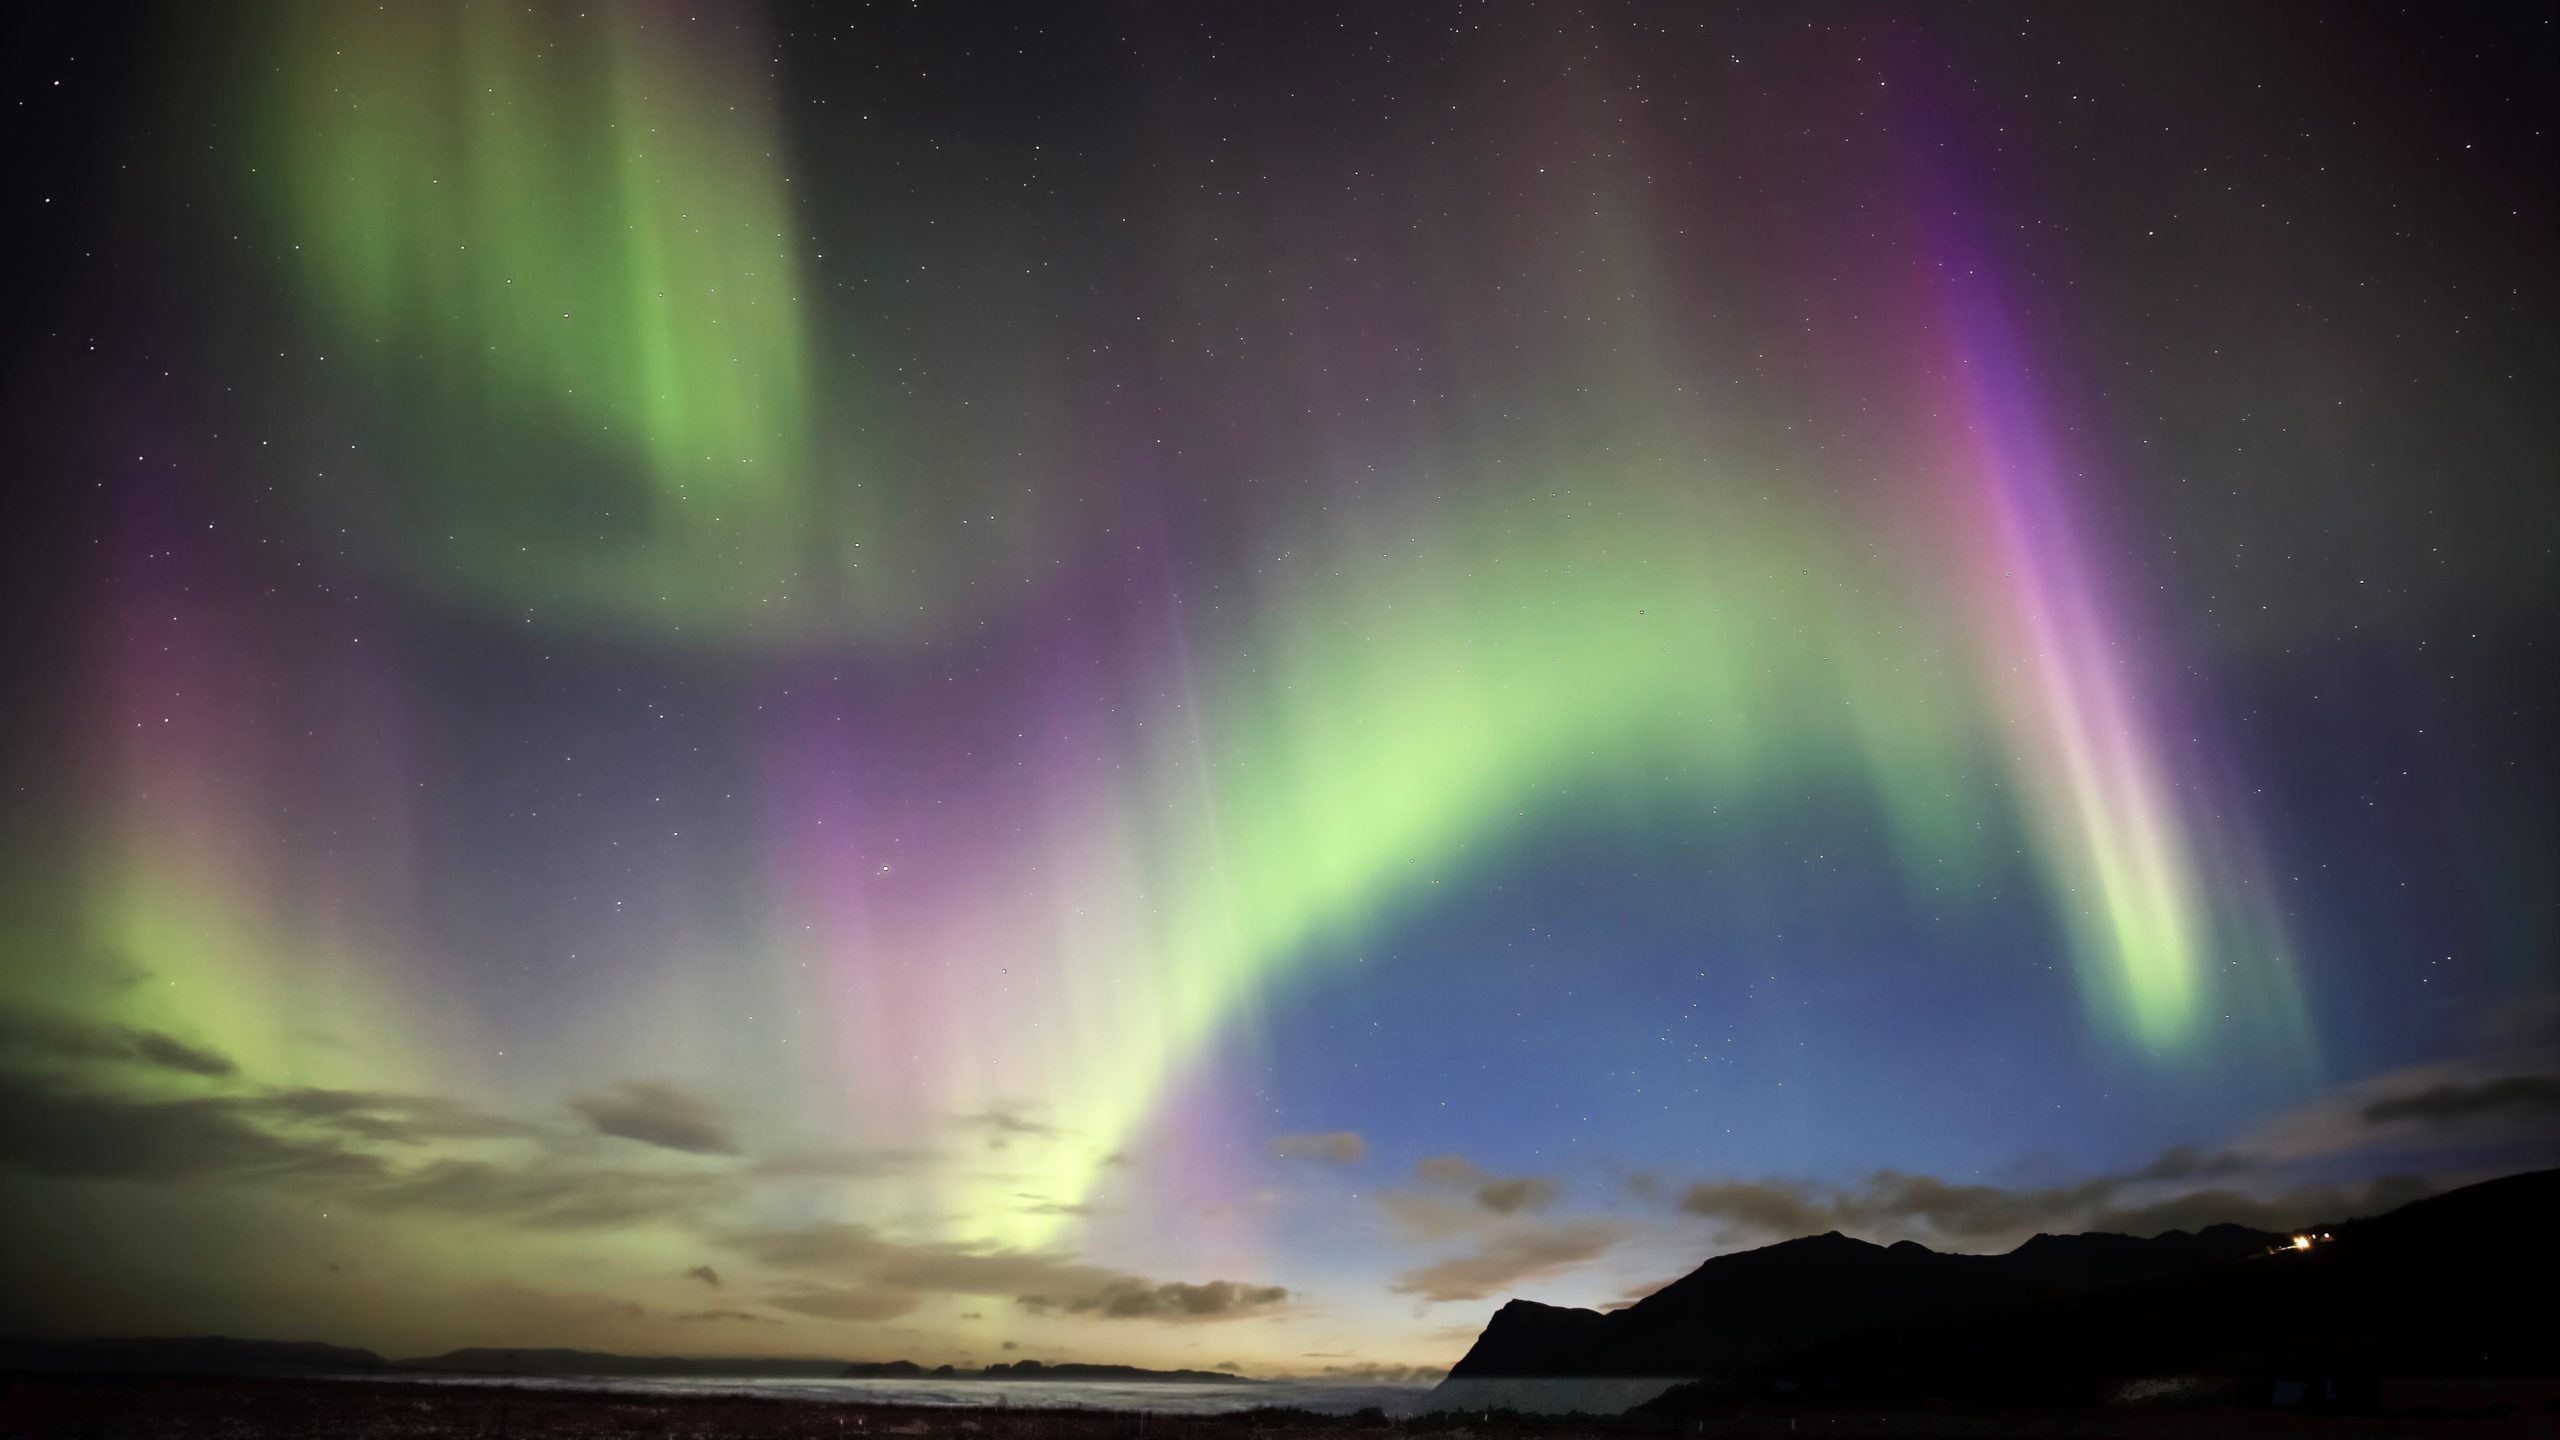
What colors will I actually see tonight?
What Are Northern Lights Colors? (Live Spectrum Analysis)
Most people think the Northern Lights are just green. If you look at a standard photo, that is usually what you see. But if you are lucky enough to witness a powerful geomagnetic storm, the sky can explode into a rainbow of Crimson Red, Neon Pink, and Deep Purple.
But here is the secret: The colors aren’t random.
The colors you see depend entirely on two things: Altitude and Gas Composition. Think of the atmosphere like a layer cake. Different gases live at different heights, and they glow in different colors when hit by solar particles.
We developed the Live Spectral Analyzer below. It reads real-time solar wind data (Speed and Density) to calculate which atmospheric layers are being hit right now, and predicts which colors are likely visible to the human eye.
The Science: Why Do These Colors Happen?
To understand the colors, you have to understand the collision. The Northern Lights are essentially a neon sign on a planetary scale. Solar particles smash into atoms in our atmosphere, exciting them. When the atoms calm down, they release a photon of light.
1. Green (The Standard)
Element: Oxygen
Altitude: 100km – 150km
This is the most common color. Our eyes are most sensitive to green light, and Oxygen at this altitude is abundant. It takes a “standard” amount of energy to excite these atoms. If the Kp index is 2 or higher, you will almost certainly see green.
2. Pink & Purple (The High-Speed Hammer)
Element: Nitrogen
Altitude: Below 100km
This is the “Holy Grail” for aurora chasers. Nitrogen is a heavy molecule that lives low in the atmosphere. To get the aurora to glow pink, the solar wind particles need to be moving incredibly fast (usually >500 km/s) to punch through the upper layers and smash into the Nitrogen at the bottom.
Check the “Pink” bar in the tool above. If it is high, look for a purple fringe at the very bottom of the aurora curtains.
3. Red (The High Altitude Ghost)
Element: Oxygen
Altitude: Above 200km
Red is actually very common, but it is often too faint for the human eye to see. It happens at the very edge of space. Because the air is so thin up there, the red light is easily drowned out by the brighter green below it. However, during massive storms, the entire sky can turn blood red. This was historically seen as a bad omen!
How to Photograph the Colors
Your eyes are not as good as your camera sensor. At night, human eyes struggle to see color (we mostly see in black and white). You might see a greyish-white cloud, but your camera will see vibrant green and pink.
To capture the full spectrum:
- White Balance: Set to 3500K – 4000K. If you leave it on Auto, the camera might try to “correct” the purple nitrogen glow and turn it blue.
- Exposure: Keep it under 5 seconds. If you expose for too long, the movement of the aurora will blend the colors together, turning the distinct pink bottom into a muddy white.
- Look North: But also look Up. The Red aurora often appears directly overhead (the Corona), while the Pink appears at the bottom of the arcs on the horizon.
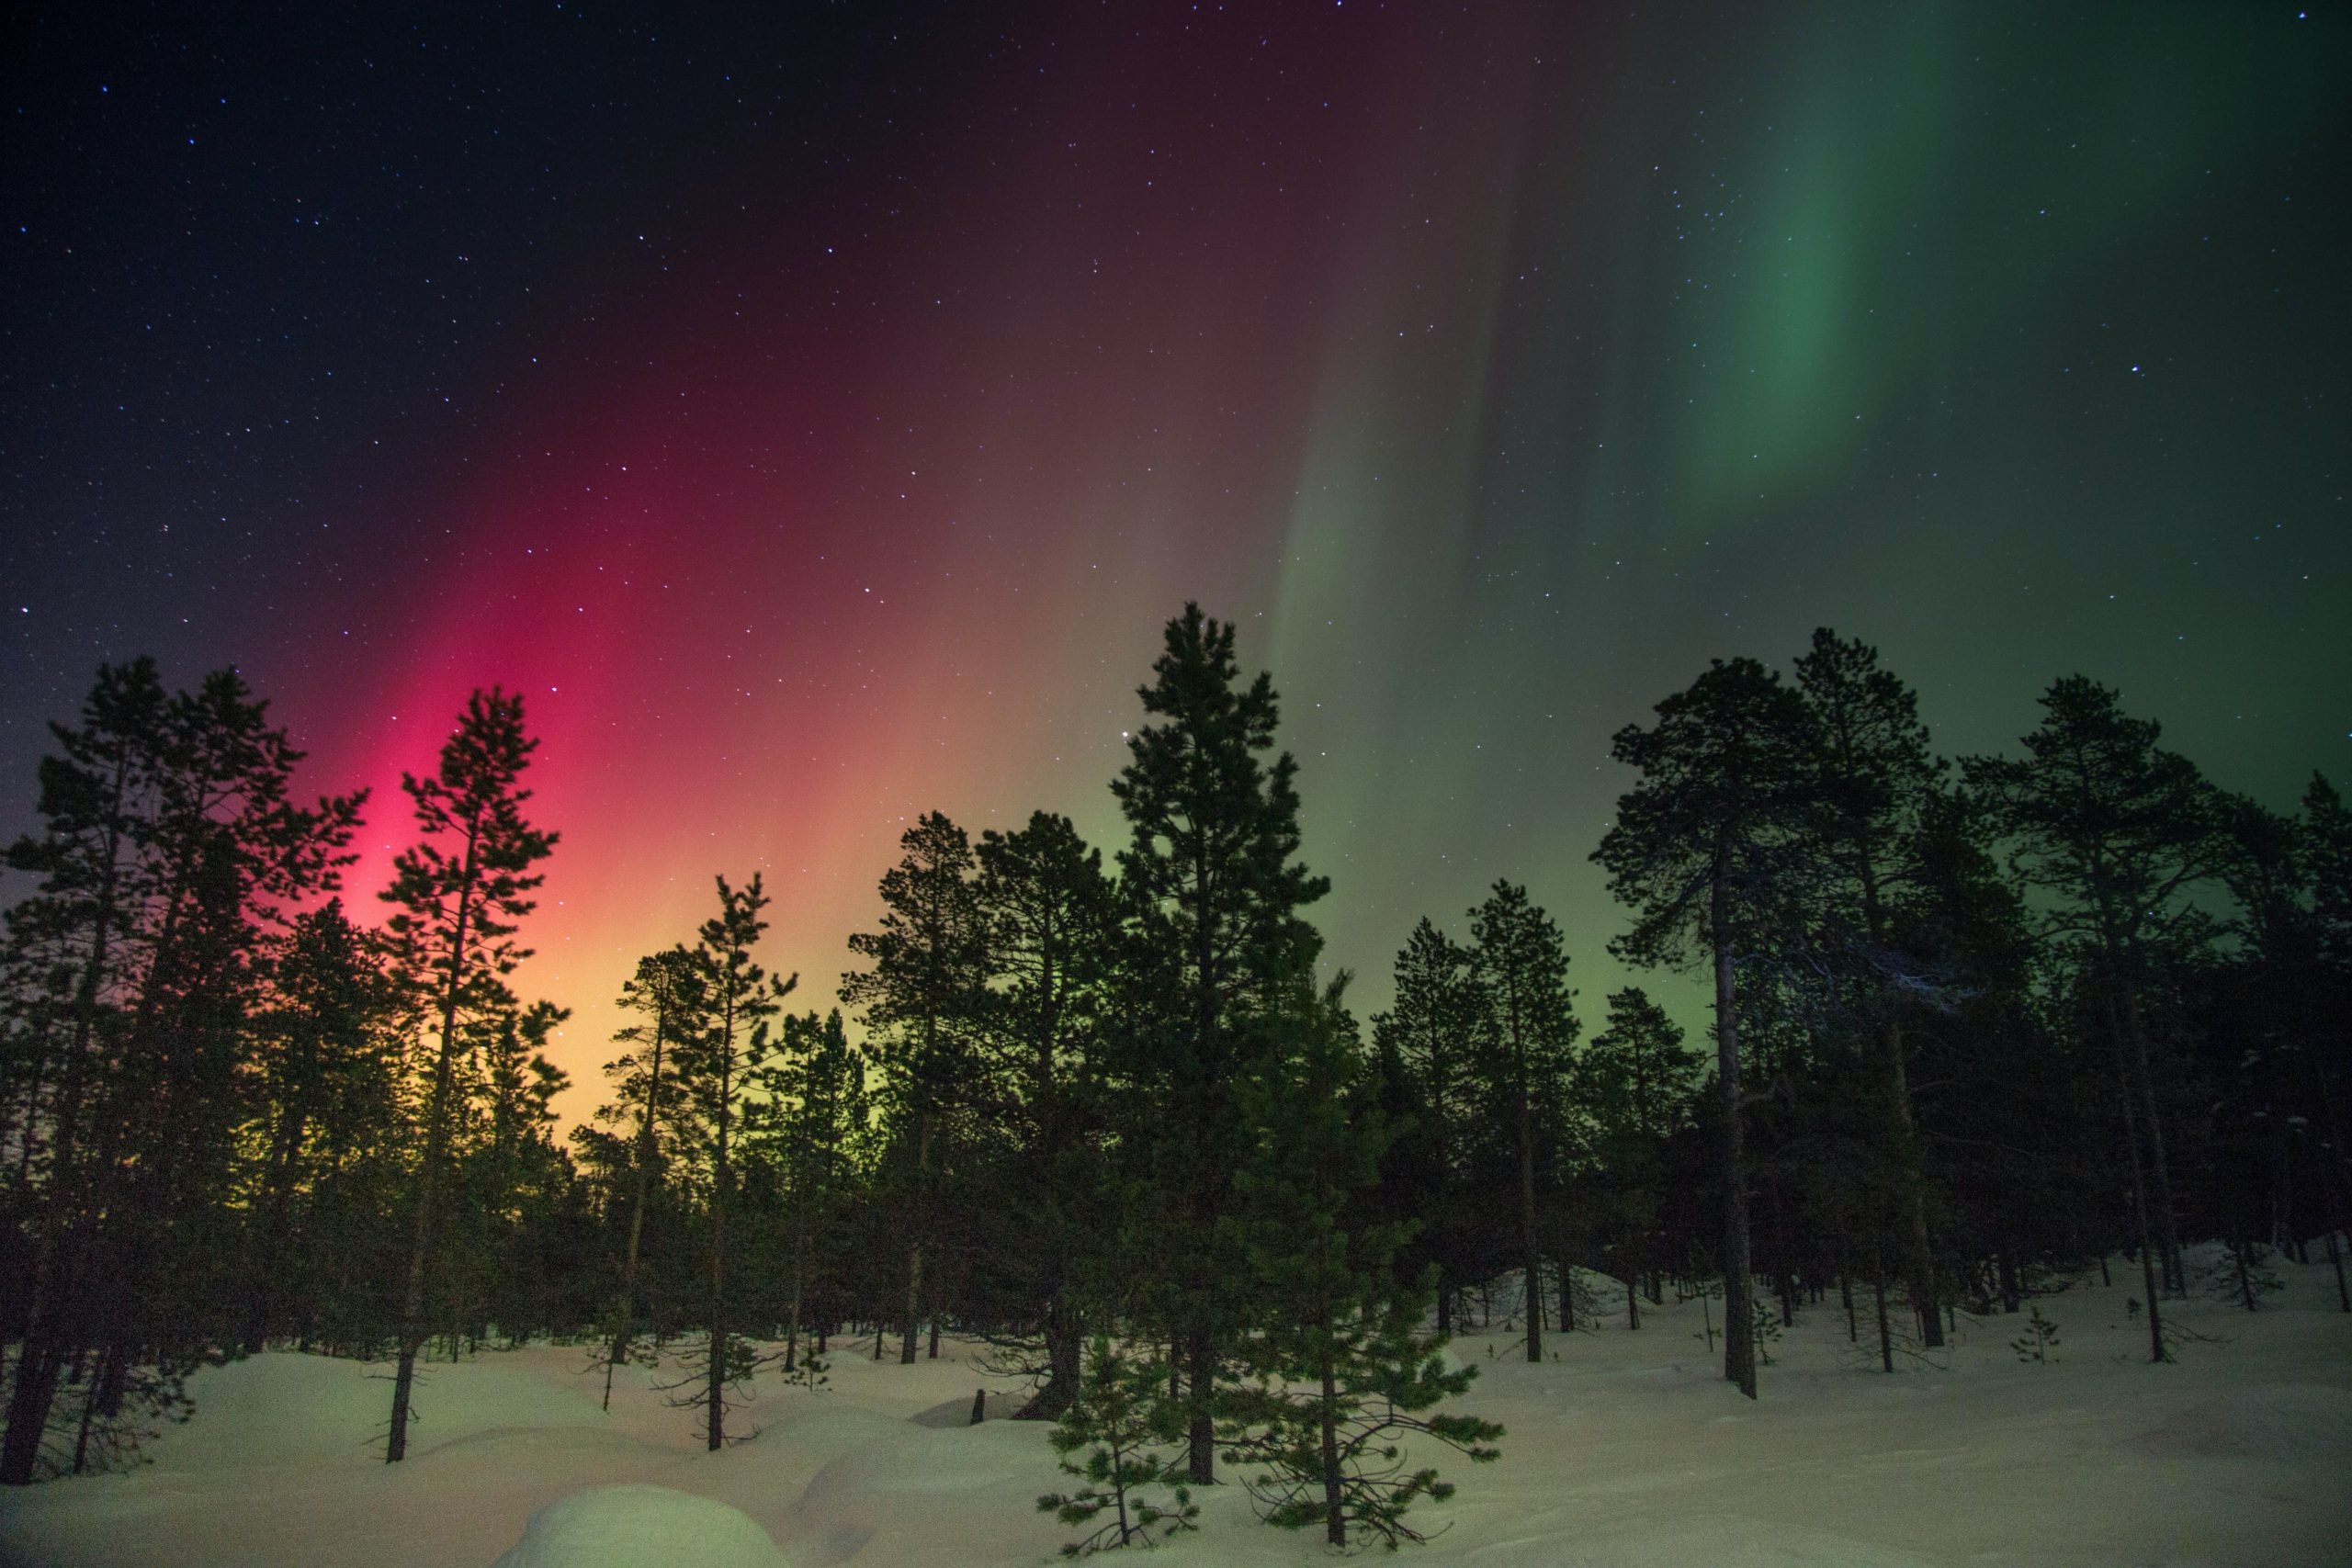
How to Photograph Northern Lights with iPhone? (Real-Time Calculator)
How to Photograph Northern Lights with iPhone? (Real-Time Calculator)
Stop guessing. Most “guides” give you static settings like “10 seconds exposure.”
This is often wrong.
The Northern Lights are a dynamic, moving subject. If the solar wind is fast, a 10-second exposure will result in a blurry green soup. If the moon is bright, high ISO will wash out your photo.
We built the Photon Engine below. It connects to 6 live data sources (NASA/NOAA) to calculate the exact shutter speed and ISO you need for the current conditions.
Why These Settings? (The Science)
Our engine made specific decisions based on the live environment. Here is the breakdown:
1. The Shutter Speed (4 – 6 SEC)
This was calculated based on the Solar Wind Velocity (407.9 km/s).
- If the wind is >500 km/s: The aurora is “dancing” rapidly. We force a short shutter speed (1-3s) to freeze the motion. This preserves the defined “pillars” and structure of the lights.
- If the wind is <350 km/s: The aurora is a slow, static arc. We allow a long shutter speed (10s+) to gather more light without blurring the image.
2. The ISO Sensitivity (400)
This was calculated based on the Moon Phase & Cloud Reflection.
- High ISO (3200): Used when the sky is pitch black. It maximizes sensor gain to see faint colors.
- Low ISO (400-800): Used when the Moon is bright (>50% illumination). If we used ISO 3200 tonight, the moonlight would turn the sky blue/white, ruining the contrast.
3. Hardware Safety (OPTIMAL)
Lithium-ion batteries rely on chemical reactions that slow down in the cold.
Current Temp: 0.7°C.
If the temperature drops below -10°C, your battery voltage will sag, potentially shutting down the phone at 30% charge. Keep the phone in an internal pocket against your body heat between shots.
3 Pro Tips for iPhone Aurora Photography
1. The “Cross” Focus Trick
The iPhone struggles to autofocus on the dark sky. Point your camera at the brightest star (or a distant street light) first. Tap and hold the screen until “AE/AF LOCK” appears in yellow. Then, recompose your shot towards the aurora.
2. Shoot in RAW (ProRAW)
Go to Settings > Camera > Formats and enable Apple ProRAW. A JPG image deletes 90% of the color data. A RAW file keeps it all, allowing you to bring out the deep purples and pinks in editing later.
3. The Timer Rule
Even tapping the screen causes micro-vibrations that blur the stars. Set a 3-second timer. Tap the shutter, remove your hand, and let the phone stabilize before it takes the picture.
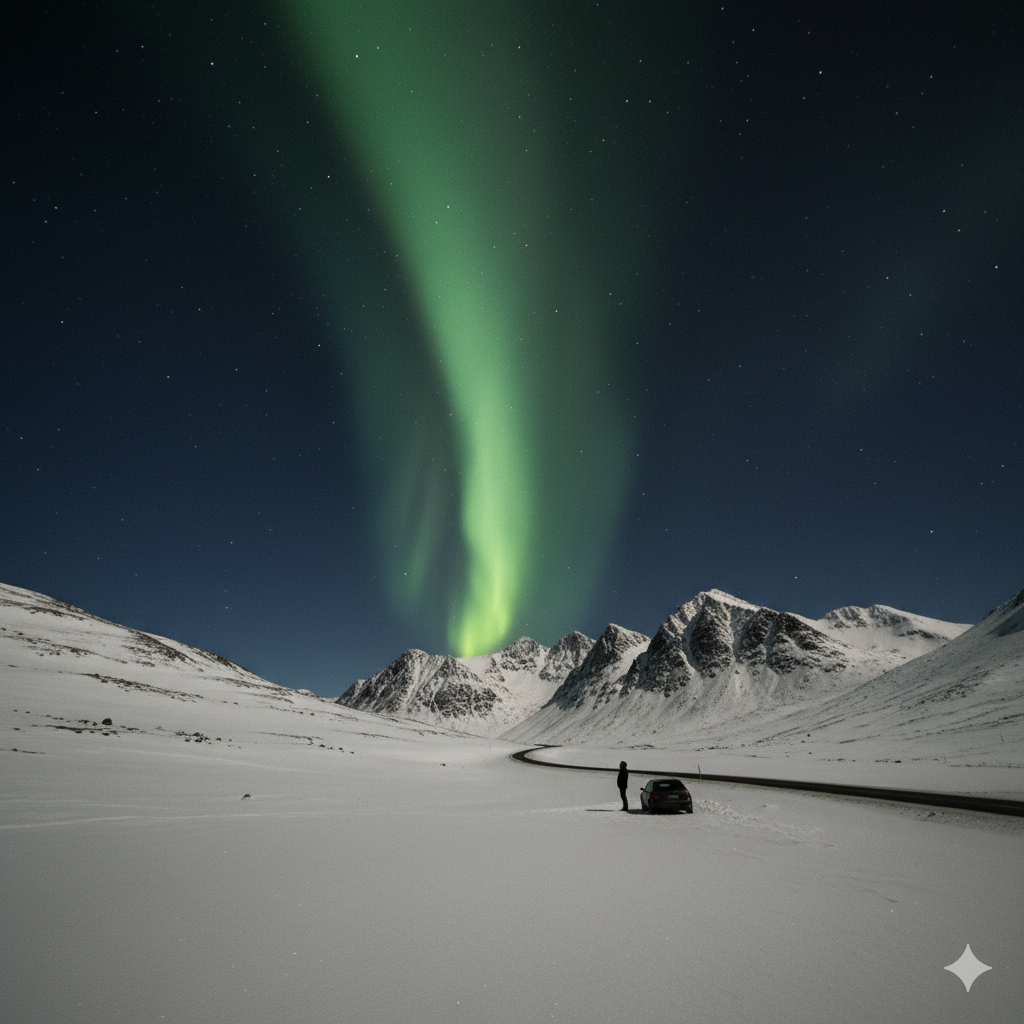
Where Are Northern Lights Visible Tonight?
Where Are Northern Lights Visible Tonight? (Global Leaderboard)
The question isn’t just “Where are they?” — it is “Where can I actually see them?”
Most websites just show you a green overlay on a map. This is misleading. A map doesn’t tell you if it is currently raining in Reykjavik, or if there is heavy fog in Tromsø, or if the sun is still up in Fairbanks. You could travel to the “perfect” spot on the map and see absolutely nothing but grey clouds.
To solve this, we developed the ACCI (Aurora Contrast & Clarity Index).
This proprietary algorithm runs a real-time competition between the world’s top Aurora Capitals. It fuses space weather data with hyper-local atmospheric data to tell you exactly where the viewing conditions are best right now.
The 3 Pillars of Visibility (How We Calculate This)
To see the Northern Lights, you need a “Triple Lock” of conditions. If even one of these is missing, you will not see the show.
1. The Energy Source (Hemispheric Power)
We monitor the Total Hemispheric Power (GW). This measures the sheer volume of electricity hitting the atmosphere.
- Below 15 GW: The aurora is weak and thin. You need to be directly under the oval (high latitudes) to see it.
- Above 50 GW: The aurora is roaring. It expands South and becomes brighter, capable of burning through light pollution.
2. The “Invisible” Blocker (Atmospheric Visibility)
This is the metric most apps ignore. You can have 0% clouds and still see nothing. Why? Mist, Haze, and Fog.
If the atmospheric visibility drops below 5km, the air itself becomes thick. The aurora light scatters, turning into a muddy grey soup. Our ACCI score heavily penalizes locations with low visibility, even if they report “clear skies.”
3. The Cloud Layering
Not all clouds are created equal.
- Low Clouds (Cumulus): These are thick and opaque. They block 100% of the view.
- High Clouds (Cirrus): These are thin and wispy. You can often see bright auroras through them. They act like a soft diffusion filter.
Our algorithm distinguishes between these layers, giving a better score to locations with only high clouds compared to those with low clouds.
Strategic Advice: What To Do With This Data
If your location has a High Score (>70):
Don’t wait. Go out immediately. These conditions (Clear air + Active Solar Wind) are fleeting. Look North, and if you don’t see anything with your eyes, try taking a test photo with your phone (Night Mode ON).
If your location has a Low Score (<30):
Check the “Reason” in the dashboard.
– If it says “Blocked by Clouds,” you need to drive. Look for a “hole” in the cloud map.
– If it says “Solar Activity Low,” be patient. Wait for a “Substorm” (a sudden burst of activity) which can happen even on quiet nights.
– If it says “Daylight,” go get some coffee. You need to wait for Nautical Twilight.
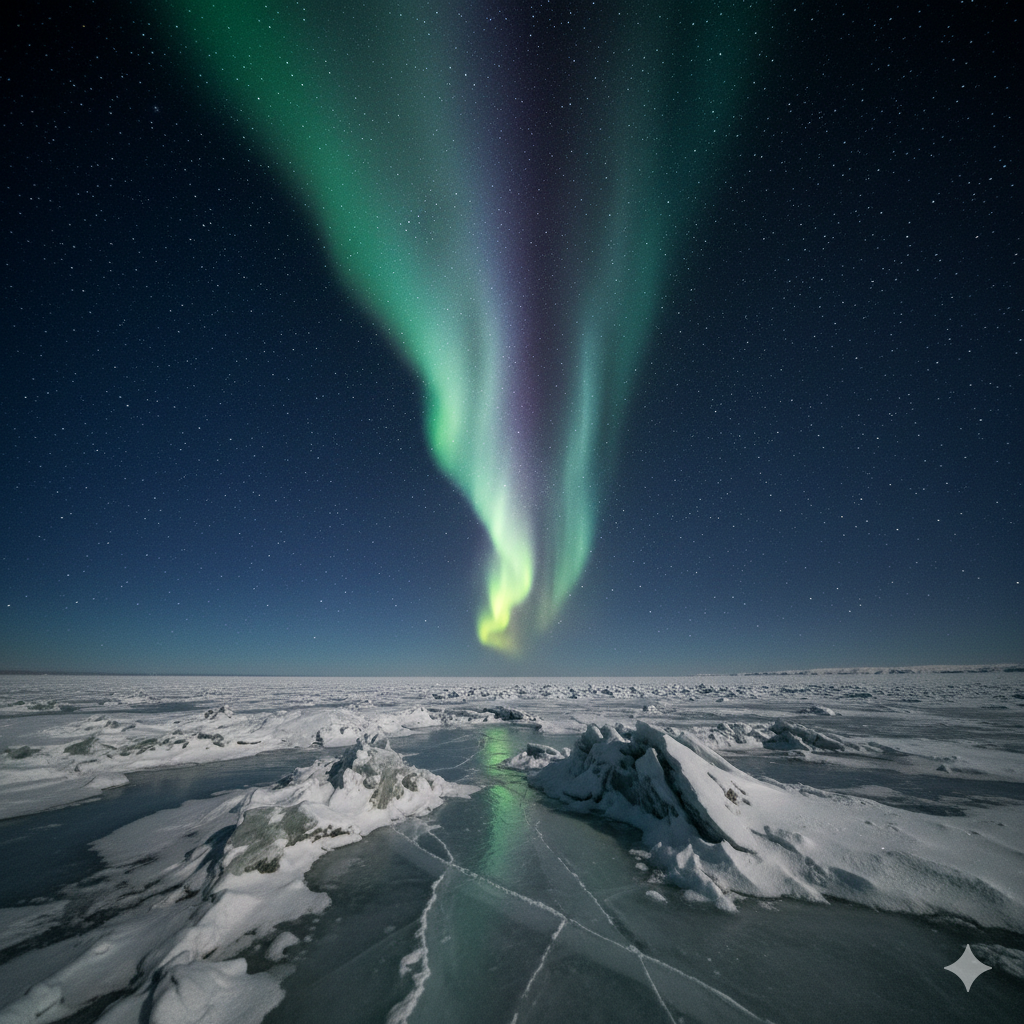
What are northern lights and solar flares?
What Are the Northern Lights and Solar Flares?
The serene, dancing lights of the Aurora Borealis seem a world away from the violent, fiery surface of the Sun. Yet, these two phenomena are directly connected in a cosmic cause-and-effect relationship that spans 93 million miles of space. The story of the Northern Lights doesn’t begin in our atmosphere, but with powerful explosions on our home star.
Understanding the Northern Lights requires looking at two key solar events: solar flares and their powerful cousins, Coronal Mass Ejections (CMEs). This guide will break down what each phenomenon is and how they work together to create Earth’s most spectacular natural light show.
The Sun's Activity: Cause and Effect
To understand the aurora, we first need to understand the Sun’s dynamic and sometimes explosive behavior. The Sun constantly sends out a stream of particles, but certain events can turn this gentle stream into a powerful storm.
What is a Solar Flare?
A solar flare is a tremendous explosion on the surface of the Sun, occurring when magnetic energy that has built up in the solar atmosphere is suddenly released. This event releases a massive burst of radiation, which travels at the speed of light. This means the light and energy from a solar flare reach Earth in just over eight minutes. While flares are incredibly powerful, they are not the main cause of the aurora. Think of a flare as the ‘muzzle flash’ of a cannon—an incredibly bright and intense burst of light and energy that signals an event has happened. It’s what comes next that truly powers the Northern Lights.
What is a Coronal Mass Ejection (CME)?
Often accompanying a solar flare is a Coronal Mass Ejection (CME). If the flare is the cannon’s flash, the CME is the ‘cannonball’. A CME is a massive cloud of plasma and magnetic field that is hurled from the Sun’s corona into space. This cloud of charged particles travels much slower than a flare’s radiation, taking anywhere from 1 to 3 days to cross the vast distance to Earth. It is this enormous, energetic cloud of solar material that, when aimed at Earth, dramatically interacts with our planet’s magnetic field and is the primary driver behind strong, widespread, and vibrant auroral displays.
The Solar Wind: A Constant Flow
Even when there are no flares or CMEs, the Sun constantly emits a stream of charged particles called the solar wind. This wind flows outward in all directions at speeds of around one million miles per hour. The solar wind is responsible for the ‘everyday’ auroras that occur regularly in the polar regions, often visible only from high-latitude locations like northern Scandinavia, Alaska, and Canada. A CME is essentially a massive, fast-moving, and dense wave within this solar wind, capable of overpowering Earth’s defenses and creating a geomagnetic storm that lights up the sky.
From Solar Storm to Earthly Light Show
The journey of particles from the Sun to our atmosphere is a multi-step process, culminating in the beautiful lights we see. Earth’s own magnetic field plays the crucial role of both protector and guide.
The Collision with Earth’s Magnetosphere
When a CME or a fast solar wind stream reaches Earth, it first collides with our planet’s protective magnetic shield, the magnetosphere. This invisible field, generated by Earth’s molten core, deflects the vast majority of harmful solar particles. However, a powerful CME can compress and rattle this shield, transferring huge amounts of energy into it. The magnetosphere channels this influx of energetic particles along its magnetic field lines, directing them down towards the weakest points in the shield: the North and South magnetic poles.
Creating the Aurora’s Glow
The grand finale occurs in Earth’s upper atmosphere, at altitudes of 60 to over 200 miles (100-320 km). As the captured solar particles are funneled towards the poles, they slam into atoms of oxygen and nitrogen. These collisions ‘excite’ the atmospheric atoms, giving them a temporary boost of energy. To return to their normal state, the atoms must release this excess energy in the form of light particles called photons. Billions upon billions of these collisions create the shimmering, dancing curtains of light we know as the aurora. The intensity of the solar event directly impacts the brightness and extent of the display.
Quick Facts
- Solar flares are bursts of radiation (light) that reach Earth in 8 minutes.
- Coronal Mass Ejections (CMEs) are clouds of particles that are the primary cause of strong auroras, taking 1-3 days to reach Earth.
- The Northern Lights are caused by these solar particles colliding with oxygen and nitrogen in our upper atmosphere.
- Earth’s magnetic field (the magnetosphere) protects us and funnels these particles toward the poles.
- A stronger solar event, like a large CME, leads to a more intense and widespread aurora, sometimes visible at much lower latitudes.
- The Sun operates on an ~11-year cycle of activity, with a ‘solar maximum’ period featuring more frequent flares and CMEs.
- The everyday, faint aurora is caused by the Sun’s constant ‘solar wind’.
Frequently Asked Questions (FAQ)
Q: Does every solar flare cause Northern Lights? A: No. A solar flare itself doesn’t cause the aurora. It’s the associated CME that does, and the CME must be aimed towards Earth to have an effect. Many flares and CMEs are directed away from our planet.
Q: Are solar flares and CMEs dangerous to people on Earth? A: No, people on the ground are protected by the magnetosphere and atmosphere. However, very strong geomagnetic storms can disrupt satellites, radio communications, and power grids. Astronauts in space are more exposed.
Q: What is the ‘solar cycle’? A: The solar cycle is the Sun’s approximately 11-year cycle of magnetic activity. It goes from a quiet period (solar minimum) to a very active period (solar maximum), where flares and CMEs are much more common, resulting in more frequent auroras.
Other Books
- NASA – What Is a Solar Flare?
- NOAA Space Weather Prediction Center – Coronal Mass Ejections (CME)
- Space.com – Solar Flares: What Are They & How Do They Affect Earth?

How To Capture Northern Lights With Camera?
How To Capture Northern Lights With Camera
Professional aurora photography isn’t just about camera settings; it’s about Atmospheric Physics.
Your settings must change based on the speed of the solar wind and the clarity of the air.
- Fast Aurora: Needs fast shutter (2-5s) or it blurs.
- High Humidity: Needs lens heaters or careful checking for fog.
- High Clouds: Diffuse the stars, requiring sharper focus checks.
Below is the Aurora Photographer’s Cockpit. It pulls live data from 4 separate weather and space APIs to calculate the exact constraints you are shooting under right now.
LIVE DATA
413 km/s
Slow Moving
8.4 nT
Very Faint
Crystal Clear
Visibility: 21.0km
Clear
Dew Point Spread: 7.1°C
APERTURE
MAX SHUTTER
ISO
FOCUS
Deep Dive: The Data Points
1. Aurora Speed vs. Shutter Speed
Our cockpit analyzes the Solar Wind Speed (km/s). If this number is high (>600 km/s), the aurora curtains are moving rapidly. If you use a standard 15-second exposure, those beautiful curtains will turn into a green smear. The cockpit calculates the “Max Shutter” to freeze that motion.
2. The Dew Point Spread (Lens Safety)
Look at the “Lens Safety” metric above. This calculates the difference between the Air Temperature and the Dew Point. If this number is small (<2°C), moisture will condense on your cold front lens element within minutes. Pro Tip: If the alert is flashing, keep hand warmers attached to your lens barrel.
3. Magnetic Power (Bz)
The “Bz” value tells us the brightness intensity. A negative number means bright aurora. If the number is positive (North), the aurora will be faint. The cockpit adjusts the recommended ISO automatically: High ISO (3200+) for faint aurora, Low ISO (800-1600) for bright storms to reduce noise.

How strong are the northern lights right now?
How Strong Are The Northern Lights Right Now?
If you are only looking at the Kp Index, you are looking at old data. To know exactly how strong the aurora is right now, you need to look at the magnetic field data coming from satellites 1 million miles away.
Specifically, we look at the Bz (Interplanetary Magnetic Field). Think of this as a “Magnetic Door.”
- Bz is Negative (South): The door is OPEN. Solar wind pours in. Aurora is strong.
- Bz is Positive (North): The door is LOCKED. Solar wind bounces off. Aurora is weak.
Below is our Pro-Level Magnetic Dashboard showing the live status of this door.
🧲 Live Magnetic Gate Status
Real-time DSCOVR Satellite Data
2.8 nT
North (Closed)
409 km/s
Normal
2.5 p/cm³
Normal
10.6 nT
Total Field
Extreme Storm
How To Read This Data (Like a Pro)
1. The Bz (Direction) – The Most Important Number
This is the “Latch” on the door.
– If you see a Negative Number (e.g., -10 nT), get your camera ready. The further negative it goes, the stronger the storm.
– If you see a Positive Number (e.g., +10 nT), the aurora will likely fade away, even if the Kp index is high.
2. The Bt (Strength)
This is how hard the wind is pushing on the door. A high Bt (over 15 nT) combined with a negative Bz creates the most violent and colorful displays.
3. Speed & Density
This is the fuel. High speed (>500 km/s) creates purple/pink colors. High density (>10 p/cm³) creates brightness.
Frequently Asked Questions
Q: Can the Bz change quickly?
A: Yes. It can flip from North to South in seconds. This is why the aurora often “dances” or explodes suddenly, then fades away just as fast.
Q: What is a “Substorm”?
A: When the Bz stays South (Negative) for a long time, energy builds up in Earth’s magnetic tail. Eventually, it snaps back like a rubber band, releasing massive energy. This is a substorm, and it creates the brightest, fastest-moving auroras.
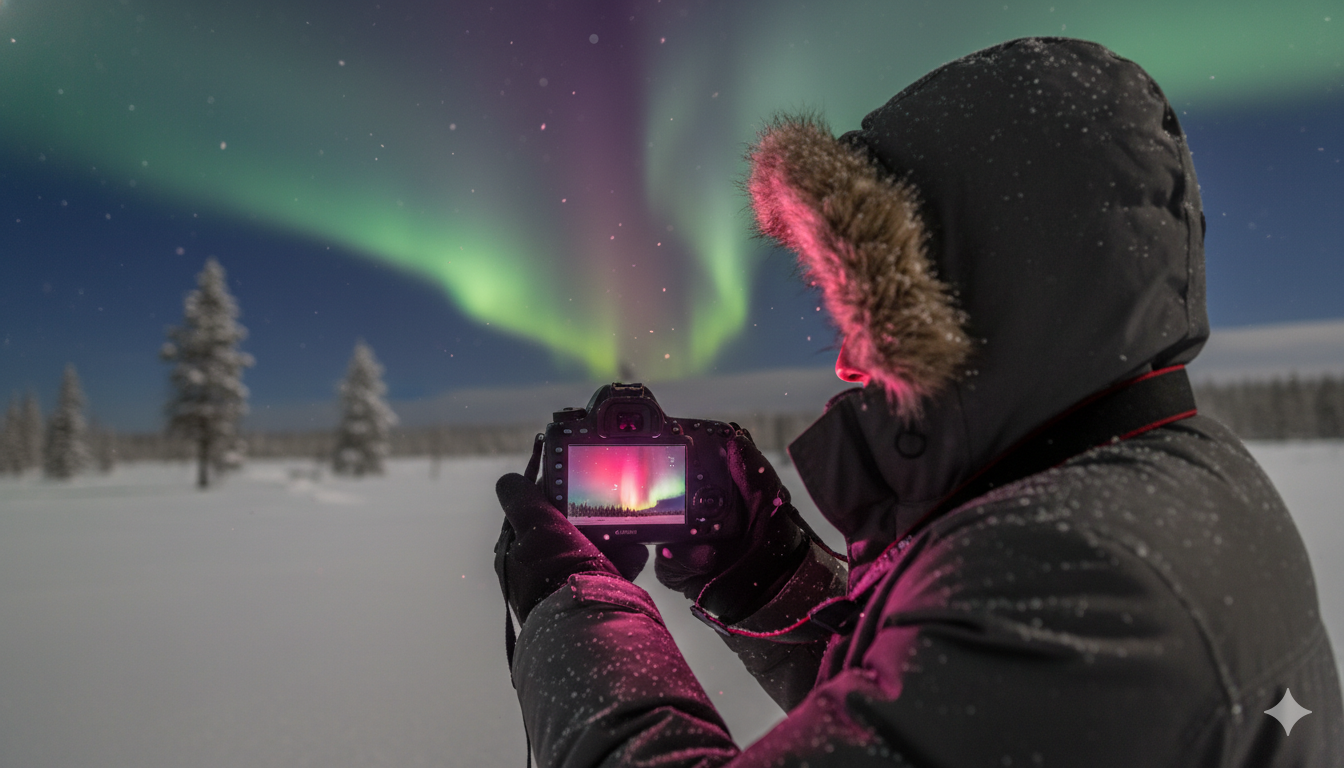
What Are The Northern Lights Colors?
What Are The Northern Lights Colors?
Most people expect the Northern Lights to be green. And usually, they are. But during intense solar storms, the sky can explode into shades of pink, purple, red, and even blue.
The colors you see depend on two invisible factors happening in space right now:
1. Which gas is being hit (Oxygen or Nitrogen).
2. How hard it is being hit (Solar Wind Speed).
Below is our Live Aurora Palette, which analyzes real-time satellite data to predict which colors are physically possible in the sky at this exact moment.
🎨 Live Aurora Palette
Based on real-time Solar Wind Speed (408.7 km/s) and Density (2.52 p/cm³).
95% Chance
Dominant. The standard color caused by excited Oxygen.
25% Chance
Low chance. Only visible in active outbursts.
5% Chance
Very Rare. Requires a massive geomagnetic storm.
The Science of Aurora Colors
💚 Green (The Most Common)
Cause: Low-altitude Oxygen (60-150 miles up).
Why: Our eyes are most sensitive to green light, and oxygen is abundant at this altitude. When the solar wind hits these atoms, they emit a specific wavelength of green light (557.7 nm).
💜 Purple & Pink (The Fast Movers)
Cause: Nitrogen (below 60 miles).
Why: To get this low in the atmosphere, the solar wind particles need to be moving very fast (usually over 600 km/s). They “punch” through the oxygen layer and hit the nitrogen below, causing it to glow pink or purple. This is often seen at the very bottom of aurora curtains.
❤️ Red (The Rare Beauty)
Cause: High-altitude Oxygen (above 150 miles).
Why: At very high altitudes, oxygen is less dense. It takes a long time for these atoms to emit red light. If the solar wind is too dense or active, it interrupts this process. Therefore, pure red auroras are rare and usually only seen during massive geomagnetic storms.
Frequently Asked Questions
Q: Why do cameras see more color than my eyes?
A: Human eyes are not good at seeing color in the dark (our “cones” shut down). Cameras use long exposures to collect light over several seconds, revealing the true vibrant colors that our eyes perceive as faint grey or white.
Q: What is the rarest color?
A: Blue. It requires nitrogen to be hit at very high energies during extremely violent solar storms. It is almost never seen by the naked eye.
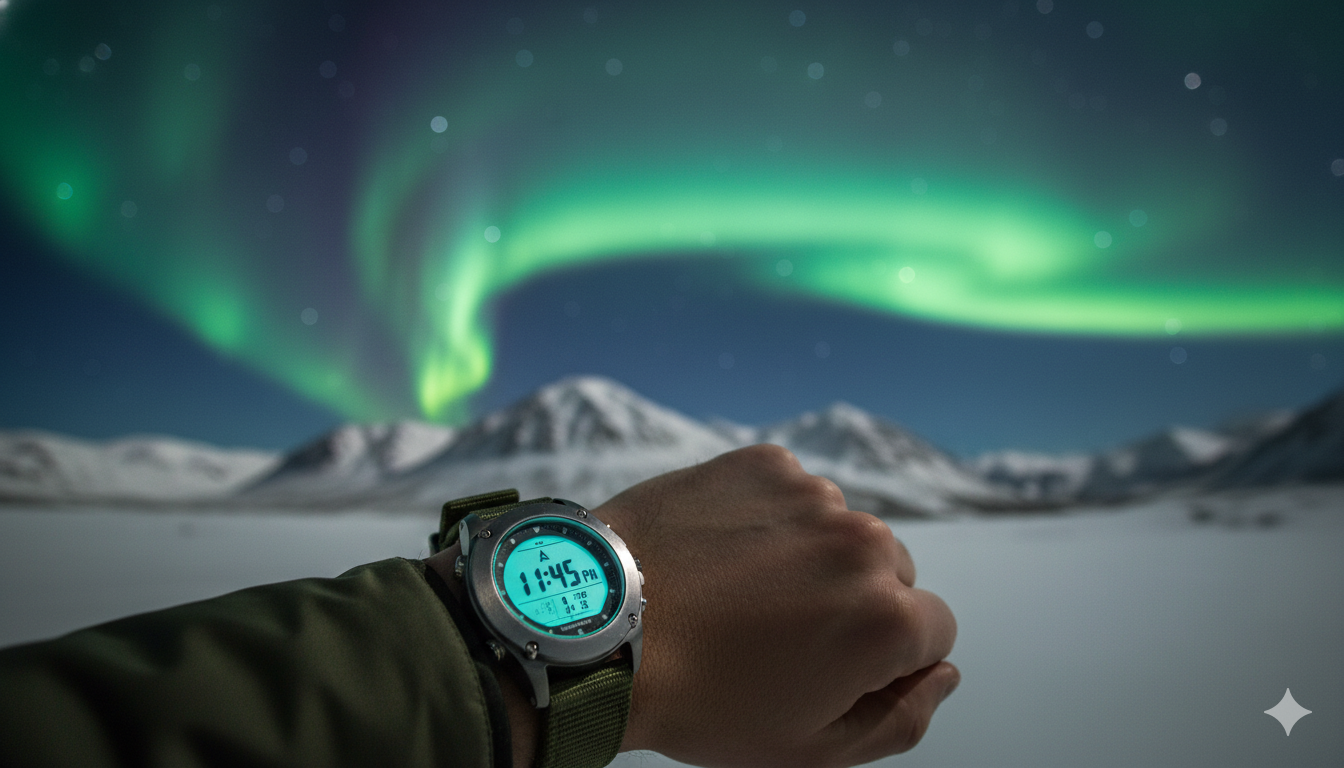
What Time Are Northern Lights Visible Tonight?
What Time Are Northern Lights Visible Tonight?
Knowing exactly what time to go outside is the difference between freezing in the cold for hours or seeing the show of a lifetime.
Unlike a standard weather forecast, seeing the aurora requires a “Triple Lock” of conditions:
1. Darkness: It must be post-sunset (nautical twilight).
2. Activity: The Kp index must be high enough.
3. Clarity: Cloud cover must be low.
Below is our real-time Hourly Aurora Forecast for tonight, which automatically processes these three factors to give you the best viewing window.
🕐 Tonight’s Hourly Forecast
Reykjavik Time
Data: NOAA & Open-Meteo
Understanding The Timing
The “Magnetic Midnight” Rule
Scientifically, the aurora is most active during “Magnetic Midnight.” This is not 12:00 AM on your clock. In Iceland and much of Northern Europe, Magnetic Midnight usually occurs between 22:00 (10 PM) and 01:00 (1 AM). This is when the Earth’s magnetic field lines are best aligned to funnel solar particles into the atmosphere.
Why Early Morning can be Good
If a “substorm” occurs, the aurora can explode into color at any time of darkness. We often see massive displays at 3:00 AM or 4:00 AM when most people have gone to sleep. Check the graph above—if you see green bars in the early morning hours, set an alarm!
Frequently Asked Questions
Q: Can I see them as soon as the sun sets?
A: Usually, no. You need “True Darkness.” Even if the sun sets at 5 PM, you might need to wait until 6:30 PM for the sky to be dark enough for the aurora colors to pop.
Q: Does the timeline update?
A: Yes, this page updates every hour with the latest data from NOAA satellites and local weather stations.
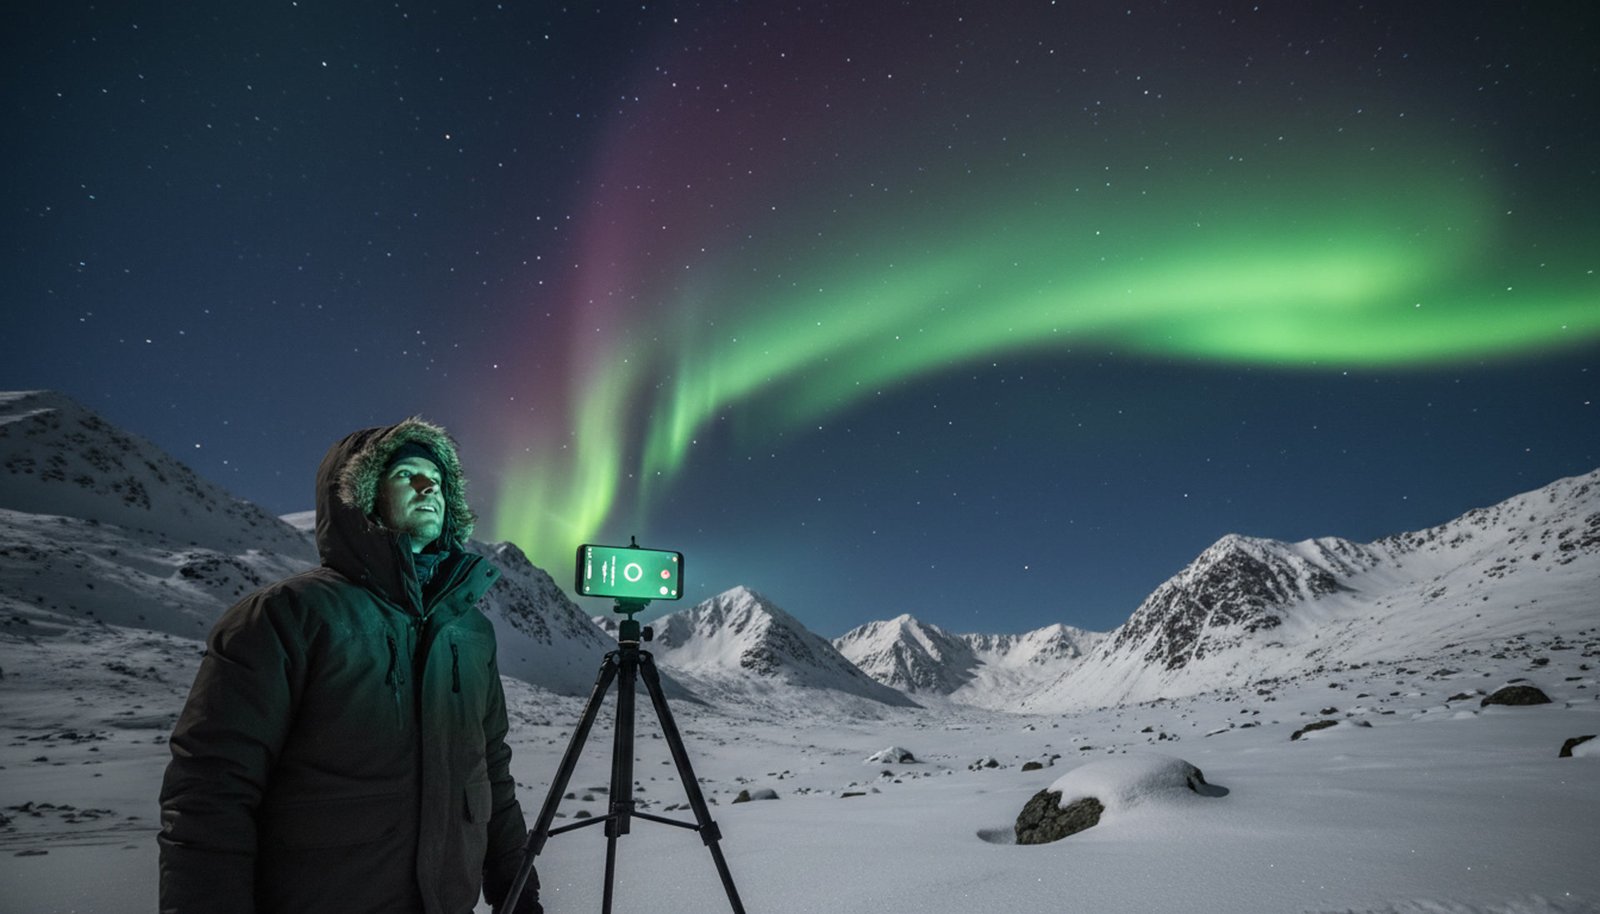
How to capture northern lights with Samsung?
How to Photograph the Northern Lights with a Samsung Phone
Gone are the days when you needed a bulky DSLR to capture the magic of the Aurora Borealis. Modern smartphones, especially high-end Samsung Galaxy devices, have incredibly capable cameras that can produce breathtaking astrophotography. With the right knowledge and a few key settings, you can turn your phone into a powerful tool for Northern Lights photography.
This guide will walk you through the essential gear, the exact camera settings in Pro Mode, and pro tips to help you bring home unforgettable images of the celestial dance. Get ready to master your Samsung’s camera and capture the night sky like never before.
Essential Gear and Preparation
Before you even touch your phone’s camera settings, having the right accessories is crucial. The techniques for aurora photography rely on stability and long exposure times, which are impossible to achieve handheld.
A Sturdy Tripod is Non-Negotiable
This is the single most important piece of gear. To capture the faint light of the aurora, your phone’s camera shutter needs to stay open for several seconds. Any movement during this time, even the slightest hand shake, will result in a blurry, smeared photo. A sturdy tripod with a secure phone mount eliminates this movement, allowing the camera sensor to soak in the light and produce a sharp, clear image. Don’t try to prop your phone on a rock or a car hood; the stability of a tripod is essential for crisp, professional-looking results. Invest in a decent one—it will make all the difference.
Remote Shutter or Built-in Timer
Even with a tripod, the simple act of tapping the shutter button on your screen can introduce a tiny vibration that blurs the image. To avoid this, you need a hands-free way to take the picture. The easiest method is to use the built-in camera timer. Set it to 2 or 5 seconds; this gives the phone enough time to stop vibrating after you press the button. If you have a Samsung phone with an S Pen, you can use its button as a wireless remote shutter, which is an excellent option. Alternatively, a cheap Bluetooth remote shutter works perfectly as well.
Power Bank and Warm Gear
Cold weather is the enemy of battery life. The freezing temperatures common during aurora viewing can drain your phone’s battery in a fraction of the normal time. A fully charged portable power bank is a lifesaver, ensuring you don’t run out of juice at a critical moment. It’s also wise to keep your phone in a warm pocket when you’re not actively shooting. Remember to dress warmly yourself! Patience is key in aurora photography, and you’ll be standing outside in the cold for a long time.
Mastering Samsung's Pro / Expert RAW Mode
Auto mode won’t work for the Northern Lights. You need full manual control, which is found in Samsung’s ‘Pro’ or ‘Expert RAW’ camera modes. Here are the exact settings to dial in.
Step 1: Set Shutter Speed (S)
Shutter speed determines how long the camera’s sensor is exposed to light. For the aurora, you need a long exposure. Start with a shutter speed of 10 seconds. If the aurora is faint and slow-moving, you can increase this to 15, 20, or even 30 seconds to gather more light and make it appear brighter. If the aurora is very bright and dancing quickly, a shorter shutter speed of 5-8 seconds might be better to capture its detailed shapes without them blurring together. Experiment to see what works best for the conditions.
Step 2: Adjust ISO
ISO measures the sensor’s sensitivity to light. A higher ISO makes the image brighter but also introduces more digital ‘noise’ or graininess. A good starting point for aurora photography is ISO 800 or 1600. If your photo is still too dark with a 15-second shutter, you can try pushing the ISO up to 3200, but be aware that image quality will start to degrade. The goal is to find the right balance between a bright enough image and an acceptable amount of noise. Always start with a lower ISO and only increase it if necessary.
Step 3: Nail Manual Focus (MF)
Your phone’s autofocus will fail in the dark; it will hunt for something to lock onto and never find it. You must use manual focus (MF). In Pro Mode, slide the focus control all the way to the infinity symbol (it looks like a small mountain). This sets the focus for distant objects, like the stars and the aurora. To confirm your focus is sharp, point your phone at the brightest star or a distant light, zoom in on the screen, and make sure it looks like a sharp point of light. Once set, don’t touch the focus again.
Step 4: Set White Balance (WB)
Leaving white balance on auto can sometimes result in the sky looking brownish or yellow. To get those classic deep blues and vibrant greens, set your white balance manually. A good starting point is a Kelvin temperature between 3500K and 4500K. This cooler temperature will counteract light pollution and render the colors of the aurora more accurately. You can adjust this setting live to see what looks best on your screen before you take the shot. Avoid the ‘AWB’ (Auto White Balance) setting for the most consistent results.
Quick Facts
- A sturdy tripod is absolutely essential to prevent blurry photos during long exposures.
- Use Pro Mode or Expert RAW to get full manual control over the camera.
- Set a long shutter speed, typically between 10 and 30 seconds.
- Start with an ISO between 800 and 1600, increasing only if necessary.
- You must use Manual Focus (MF) and set it to infinity (the mountain icon).
- Shoot in RAW format for maximum flexibility when editing your photos later.
- Use the 2-second timer or an S Pen to trigger the shutter without shaking the phone.
Frequently Asked Questions (FAQ)
Q: Can I just use Night Mode instead of Pro Mode? A: While Night Mode is great for cityscapes, it’s not ideal for the aurora. It often tries to brighten shadows too much and can produce unnatural-looking results. Pro Mode gives you the precise control needed to capture the aurora accurately.
Q: What is the ‘Expert RAW’ app and do I need it? A: Expert RAW is a separate, free app from Samsung for newer Galaxy S-series phones. It offers even more advanced controls and saves files with more image data, making it perfect for those who want to seriously edit their photos in software like Adobe Lightroom.
Q: My photos are still blurry, even on a tripod. What’s wrong? A: If your photo is blurry, it’s almost always due to one of two things: camera shake or incorrect focus. Ensure you are using a timer or remote shutter to take the picture. Then, double-check that your manual focus is set precisely to infinity.
Q: Should I turn my screen brightness down? A: Yes, it’s a great idea. A bright phone screen will ruin your night vision, making it harder to see the faint aurora with your own eyes. Turn your screen brightness down as low as you can while still being able to see the controls.
Other Books
- Samsung’s Official Guide to the Expert RAW App
- NOAA Space Weather Prediction Center – Aurora Forecast
- PetaPixel Guide to Smartphone Astrophotography
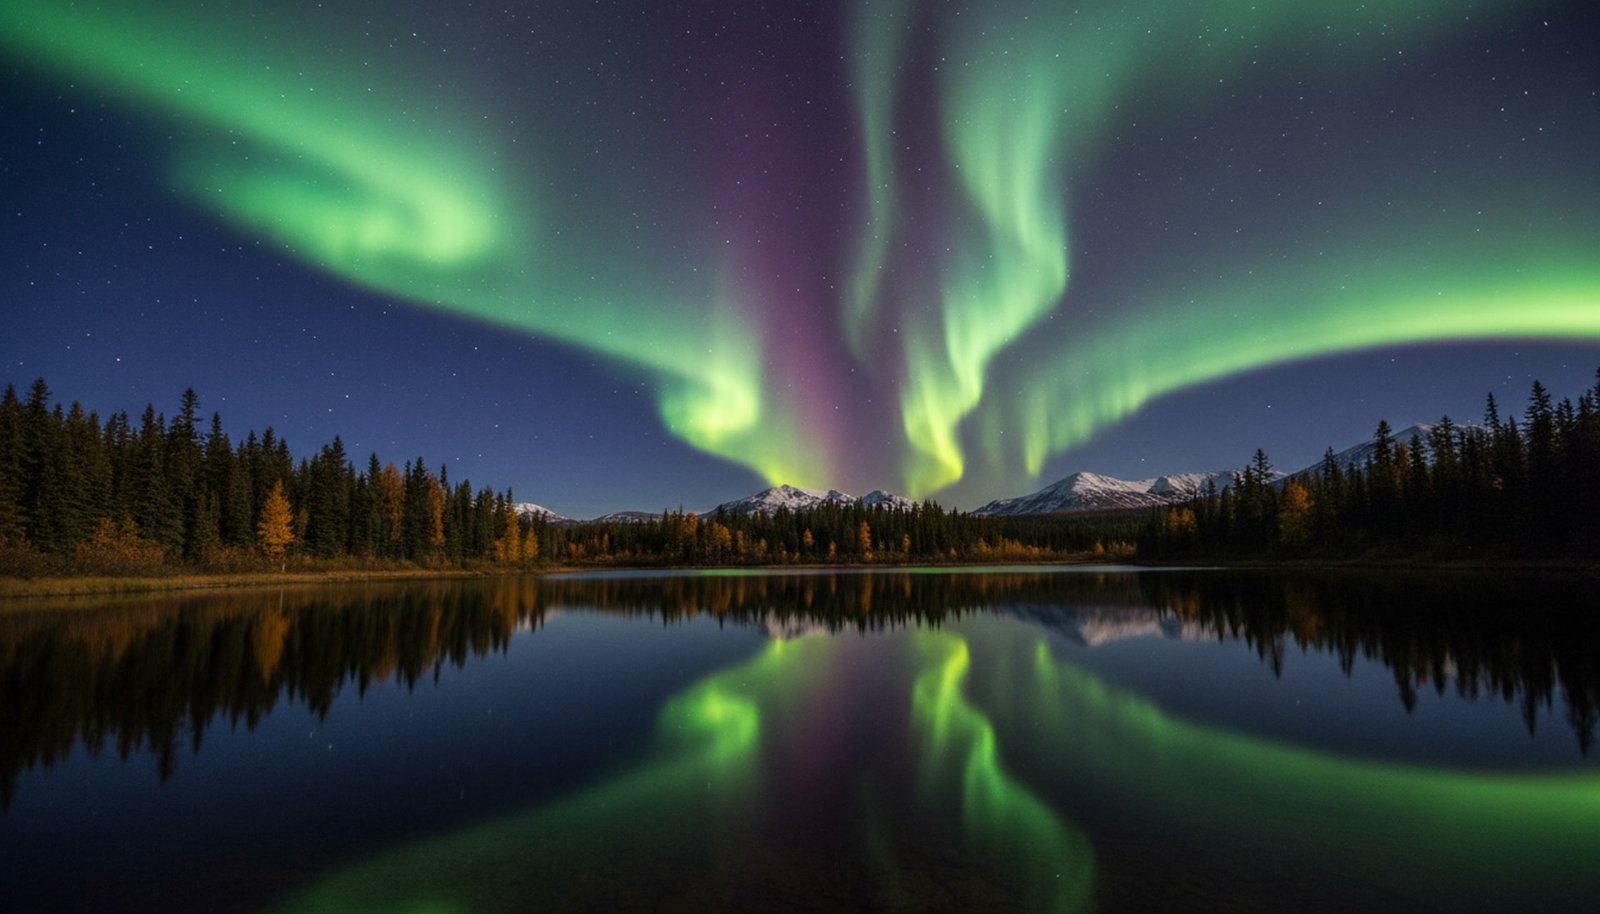
What is northern lights season?
What Is the Northern Lights Season?
Many travelers dream of seeing the Northern Lights, but a common question is, ‘When is the season?’ Unlike the four traditional seasons, the aurora season isn’t dictated by Earth’s weather but by its position in space and, most importantly, by darkness. The Northern Lights are technically happening year-round, but the perpetual daylight of the Arctic summer, known as the ‘Midnight Sun’, renders them completely invisible.
The true Northern Lights season is the period when the nights are long and dark enough for the celestial display to become visible. This window offers incredible opportunities, but certain times within it can increase your chances of witnessing a truly spectacular show.
Defining the Aurora Viewing Season
The concept of an aurora ‘season’ is based on one primary factor: the ability to see them from Earth. This depends on a combination of darkness, geographical location, and clear skies.
The Core Requirement: Darkness
The fundamental requirement for seeing the Northern Lights is a dark sky. In the Arctic Circle, the sun doesn’t set for several weeks or months around the summer solstice (June). This phenomenon, the Midnight Sun, creates 24-hour daylight, making it impossible to see the relatively faint light of the aurora. The season begins in late August as astronomical twilight returns, bringing dark nights back to the polar regions. It continues through winter and ends around mid-April when the Midnight Sun begins to return. Therefore, the aurora season is simply the period of sufficient darkness, typically spanning about eight months.
Geographic Location: The Auroral Zone
Even during the darkest winter months, your location is critical. The Northern Lights occur most frequently and intensely within a band known as the Auroral Zone or ‘Auroral Oval’. This region is typically situated between 65 and 72 degrees North latitude. Prime viewing locations fall within this zone, including northern Norway (Tromsø), Swedish Lapland (Abisko), Finland, Iceland, northern Canada (Yellowknife), and Alaska (Fairbanks). Being inside this zone during the dark season maximizes your probability of a sighting, as the aurora is often directly overhead. Outside this zone, you would need a much stronger geomagnetic storm to see the lights on the horizon.
The Solar Cycle’s Influence
While not defining the season, the Sun’s own activity cycle plays a huge role in the *intensity* of the lights. The Sun goes through an approximately 11-year solar cycle, moving from a period of low activity (solar minimum) to high activity (solar maximum). During a solar maximum, the sun produces more sunspots, solar flares, and Coronal Mass Ejections (CMEs), which are the primary drivers of strong auroras. We are currently approaching a solar maximum, predicted for 2024-2025, meaning the auroras during this period are expected to be more frequent and powerful than they have been in over a decade.
The Best Times Within the Season
While the entire eight-month window offers a chance to see the lights, certain periods are statistically better due to scientific and meteorological reasons.
The Equinox Effect: September & March
Statistically, the weeks surrounding the autumnal equinox (September) and the spring equinox (March) often experience a higher frequency of geomagnetic storms. This phenomenon is known as the ‘Russell-McPherron effect’. During the equinoxes, the orientation of Earth’s magnetic field is best positioned to interact with the solar wind, allowing more solar particles to breach our magnetic defenses and create auroras. These months offer a fantastic balance of long, dark nights and a higher probability of intense, active displays, making them a favorite for seasoned aurora chasers.
The Deep Winter: December to February
The period from December to February offers the longest and darkest nights of the year, providing the maximum possible viewing window each day. This is the classic ‘winter wonderland’ experience, with deep snow cover that beautifully reflects the aurora’s glow. The primary challenge during these months can be the weather. Extreme cold can be a factor, and in some coastal regions like Norway, this period can have a higher chance of cloud cover. However, in continental interiors like Swedish Lapland or Alaska, skies are often clearer, making it a prime time for viewing.
Shoulder Months: August/September & March/April
The ‘shoulder’ months at the beginning and end of the season have unique advantages. In late August and September, the weather is milder, and landscapes are not yet covered in deep snow, allowing for different activities like hiking. You can even see the aurora reflected in open lakes before they freeze. Similarly, late March and April offer longer daylight hours for daytime excursions, with still plenty of darkness for aurora hunting at night. These months provide a great compromise between comfortable travel conditions and excellent chances of seeing the Northern Lights.
Quick Facts
- The Northern Lights viewing season is from late August to mid-April.
- The ‘season’ is defined by darkness, as the 24-hour daylight of the Arctic summer makes the aurora invisible.
- The best viewing locations are within the ‘Auroral Zone’, between 65-72 degrees North latitude.
- The weeks around the September and March equinoxes often see an increase in aurora activity.
- The 11-year solar cycle dictates the overall strength and frequency of auroras, with a peak expected around 2024-2025.
- December to February offers the longest, darkest nights but can have colder and cloudier weather.
- The ideal time of night for viewing is typically between 10 PM and 2 AM local time.
Frequently Asked Questions (FAQ)
Q: Can I see the Northern Lights in the summer? A: No, it is generally impossible to see the Northern Lights in the Arctic during the summer months (late May to early August). The ‘Midnight Sun’ means the sky never gets dark enough for the aurora to be visible.
Q: Does a full moon ruin the chances of seeing the aurora? A: A full moon can make the sky brighter, washing out faint auroras. However, a strong and vibrant aurora display will still be clearly visible. For the best viewing and photography, planning a trip around the new moon is ideal.
Q: What time of night is best for aurora viewing? A: The most active aurora displays often occur between 10 PM and 2 AM local time. This is because the part of Earth you are on is best positioned under the Auroral Oval during these hours.
Q: Is the aurora season the same for the Southern Lights? A: Yes, the principle is the same. The Southern Lights (Aurora Australis) season corresponds to the Antarctic winter, roughly from March to September, when the southern polar regions experience darkness.
Other Books
- University of Alaska Fairbanks – Aurora Forecast
- Space.com – When, Where and How to See the Northern Lights
- NOAA – Space Weather Enthusiasts Dashboard
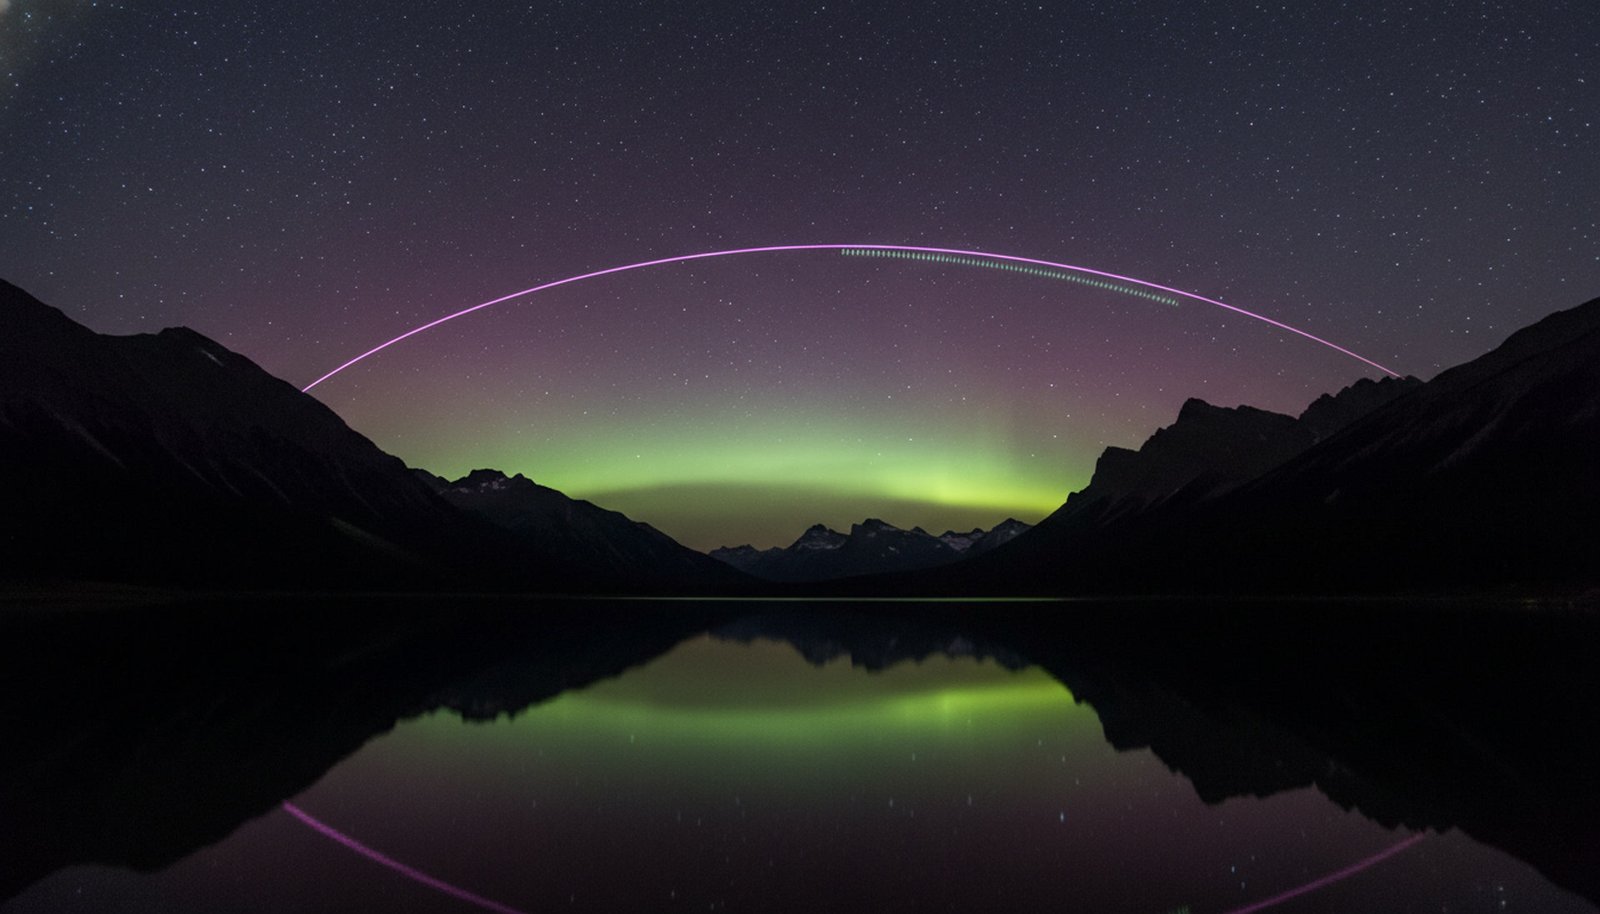
What are northern lights (Steve phenomenon)?
What is the STEVE Phenomenon (and How Is It Different from the Aurora)?
For centuries, we’ve been captivated by the dancing green curtains of the Aurora Borealis. But recently, a new and mysterious celestial feature has joined the conversation: a thin, purple ribbon of light nicknamed ‘STEVE’. First brought to the attention of scientists by citizen sky-watchers, STEVE is not an aurora, but an entirely different kind of atmospheric glow.
This article demystifies this beautiful phenomenon, explaining what STEVE is, how it’s formed, and how it stands apart from its more famous cousin, the Northern Lights. We’ll explore its unique appearance, the cutting-edge science behind it, and how you might be able to spot it yourself.
Understanding the Classic Aurora
To understand why STEVE is so unusual, it’s important to first remember what makes a ‘normal’ aurora. The classic Northern Lights are a well-understood spectacle with a clear cause and appearance.
The Cause: A Rain of Solar Particles
The traditional Aurora Borealis is created when charged particles from the sun, carried on the solar wind, are funneled by Earth’s magnetic field towards the poles. These high-energy electrons and protons then collide with gas atoms in our upper atmosphere, primarily oxygen and nitrogen. This collision excites the atoms, and as they calm down, they release their excess energy in the form of light. Think of it as a cosmic ‘rain’ of particles lighting up our atmospheric gases like a giant neon sign. The strength and intensity of this particle rain directly influence how bright and active the aurora becomes.
The Appearance: Diffuse Curtains of Light
The visual result of this particle rain is the familiar auroral display: broad, shimmering curtains of light that can stretch across the sky. The most common color is a vibrant green, produced by oxygen collisions at specific altitudes. These lights often appear within a predictable region known as the auroral oval, a ring-shaped zone centered on the magnetic poles. While they can dance and move rapidly, their form is typically diffuse and widespread, lacking the sharp, narrow structure that defines STEVE. They are a direct visual representation of solar energy interacting with our planet’s protective magnetic shield.
STEVE: A Different Kind of Light Show
STEVE looks and behaves differently from the aurora because its underlying physical mechanism is fundamentally distinct. It’s not a story of falling particles, but of a super-fast, super-hot river of gas.
What is STEVE?
STEVE stands for Strong Thermal Emission Velocity Enhancement. This scientific backronym was created after citizen scientists humorously named the phenomenon ‘Steve’ from the animated movie ‘Over the Hedge’. Unlike the aurora, STEVE is a visual manifestation of a subauroral ion drift (SAID). This is an incredibly fast-flowing, narrow stream of plasma (hot, ionized gas) moving at speeds over 13,000 mph (21,000 km/h) through the ionosphere. The intense friction and heat generated by this river of gas cause it to glow, creating the distinct ribbon of light we see from the ground.
Appearance and Location
STEVE’s appearance is its most defining feature. It manifests as a remarkably narrow, well-defined ribbon of mauve or pale purple light, often stretching from east to west for hundreds of miles. It can last from 20 minutes to over an hour. Crucially, STEVE appears at lower latitudes than the main auroral display, meaning you could see it from places like southern Canada or the northern United States, south of the main auroral oval. Sometimes, STEVE is accompanied by a separate feature: a series of green, vertical stripes nicknamed the ‘picket fence’, which is still being studied but may be caused by a more traditional particle-rain mechanism.
Key Differences from the Aurora
The distinction is clear. Cause: Aurora is from a ‘rain’ of particles, while STEVE is from a fast, hot river of gas. Color: Aurora is typically green, red, or blue, while STEVE’s main feature is a mauve-purple ribbon. Location: Aurora is in the auroral oval, while STEVE is equatorward (south) of it. Shape: Aurora is made of broad, diffuse curtains, while STEVE is a sharp, narrow arc. While they are both driven by the same overall geomagnetic activity from the sun, they are two separate phenomena that can sometimes appear in the sky on the same night, telling different parts of the same space weather story.
Quick Facts
- STEVE stands for ‘Strong Thermal Emission Velocity Enhancement’.
- It is NOT a type of aurora; it is a separate atmospheric phenomenon with a different cause.
- STEVE is a glowing, fast-moving river of hot gas (plasma) in the ionosphere.
- It appears as a narrow, distinct ribbon of purple or mauve light.
- STEVE is often seen at lower latitudes than the typical Northern Lights.
- The phenomenon was first documented and named by citizen scientists before being formally studied.
- It is sometimes accompanied by a green ‘picket fence’ structure, which may have a different origin from the main purple ribbon.
Frequently Asked Questions (FAQ)
Q: Where does the name ‘STEVE’ come from? A: The name was playfully suggested by citizen scientists from the Alberta Aurora Chasers, inspired by a scene in the animated film ‘Over the Hedge’ where characters name an unknown object ‘Steve’. Scientists later created the backronym ‘Strong Thermal Emission Velocity Enhancement’ to fit the name.
Q: Can I see STEVE and the aurora at the same time? A: Yes, it’s quite common for them to appear during the same geomagnetic event. STEVE will typically appear further south (more equatorward) than the main auroral display, so you might see the green glow of the aurora on the northern horizon and the purple ribbon of STEVE higher in the sky.
Q: Is STEVE a rare phenomenon? A: STEVE is considered less common than the aurora, but it’s being reported more frequently now that both scientists and the public know what to look for. Citizen science platforms have been crucial in gathering more data on its frequency and appearance.
Other Books
- NASA: The Aurora, the Magnetosphere, and STEVE
- ESA: Swarm probes mysterious sky streaks
- Aurorasaurus – Citizen Science Project for Aurora and STEVE sightings

What is northern lights series about?
What is the 'Series' of Events That Creates the Northern Lights?
When we watch the Northern Lights, we’re seeing the grand finale of a cosmic story—a series of events that connects the Sun directly to our sky. This natural spectacle isn’t a single occurrence but the result of a dynamic process involving immense energy, vast distances, and the fundamental physics of our solar system. Understanding this ‘series’ transforms the viewing experience from simple wonder into a deeper appreciation for the powerful forces at play.
This guide breaks down the entire process, from the initial solar eruption to the final, shimmering curtains of light, explaining each step in this celestial chain reaction.
Part 1: The Solar Broadcast
The entire story of the aurora begins with our star, the Sun. It acts as the engine, constantly sending out the energy and particles that are the essential ingredients for the Northern Lights.
The Source: Solar Activity
The Sun’s surface is a turbulent place. It constantly emits a stream of charged particles, primarily electrons and protons, known as the solar wind. This wind flows outward in all directions. However, the intensity of this wind isn’t constant. The Sun goes through an approximately 11-year cycle of activity, moving from a quiet solar minimum to a very active solar maximum. During active periods, events like solar flares (intense bursts of radiation) and Coronal Mass Ejections (CMEs) (massive clouds of solar plasma) can occur. It is these powerful CMEs that are responsible for the most intense and widespread aurora displays on Earth.
The Journey: The Interplanetary Voyage
Once ejected from the Sun, these particles begin their journey across the 93 million miles (150 million km) to Earth. The regular solar wind travels at speeds around 1 million mph (1.6 million km/h), typically taking 2 to 4 days to reach our planet. However, a fast-moving CME can make the trip in as little as 18 hours. During this voyage, the cloud of particles carries with it a piece of the Sun’s magnetic field, known as the Interplanetary Magnetic Field (IMF). The orientation of this field is a crucial factor in determining whether a strong aurora will occur when it finally reaches Earth.
The Arrival: A Clash with Earth’s Shield
Earth is protected from the constant barrage of solar wind by its magnetosphere, an invisible magnetic shield generated by the planet’s molten core. When the solar wind arrives, the magnetosphere deflects most of it. However, if the arriving IMF is oriented opposite to Earth’s magnetic field (a ‘southward Bz’), the two fields can connect. This process, called magnetic reconnection, opens a gateway, allowing huge amounts of energy and particles to be transferred from the solar wind and funneled down the magnetic field lines toward the polar regions. This is the critical step that powers up the auroral light show.
Part 2: The Atmospheric Light Show
After the solar particles have been captured and guided by the magnetosphere, the final and most beautiful part of the series begins in Earth’s upper atmosphere.
The Collision: Creating Light from Gas
As the energized particles are funneled towards the poles, they accelerate and plunge into Earth’s upper atmosphere at incredible speeds. Here, between 60 to 200 miles (100-320 km) high, they collide with atoms and molecules of gas, primarily oxygen and nitrogen. These collisions transfer energy to the atmospheric atoms, putting them in an ‘excited’ state. To return to their normal state, the atoms must release this excess energy. They do so by emitting a tiny particle of light, called a photon. When billions of these collisions happen simultaneously, the combined light of all those photons creates the aurora we see.
The ‘Episodes’: Different Aurora Shapes
The aurora is not static; it’s a dynamic, evolving display. The ‘series’ can feature different ‘episodes’ or forms. It often begins as a simple, quiet arc stretching across the sky. As the energy input increases, this arc can develop into moving, shimmering curtains or ‘drapes’ of light that seem to dance. During the most intense periods of a geomagnetic storm, known as a substorm, the aurora can explode across the entire sky, forming a dazzling, overhead corona where the lights appear to radiate from a single point. These changing shapes reflect the complex and shifting interactions between the solar wind and the magnetosphere.
Quick Facts
- The aurora is a multi-step ‘series’ of events, not a single phenomenon.
- It begins with the Sun releasing charged particles, either as a steady ‘solar wind’ or a powerful ‘CME’.
- The journey to Earth for these particles typically takes 1-4 days.
- Earth’s magnetic field (magnetosphere) acts as a shield but also funnels particles toward the poles.
- The light is created when solar particles collide with oxygen and nitrogen atoms high in the atmosphere.
- The intensity and form of the aurora, from a simple arc to a dancing curtain, depend on the level of solar activity.
- The most powerful auroras are caused by Coronal Mass Ejections (CMEs) from the Sun.
Frequently Asked Questions (FAQ)
Q: Does this ‘series’ of events happen every night? A: Yes, the basic process of solar wind interacting with the magnetosphere happens constantly. However, the strength of this interaction varies greatly, so a visible aurora is not guaranteed every night, especially at lower latitudes.
Q: What is a geomagnetic storm? A: A geomagnetic storm is a major disturbance of Earth’s magnetosphere that occurs when a very efficient exchange of energy from the solar wind happens. These storms are often caused by CMEs and result in intense, widespread auroras.
Q: How long does a typical aurora display last? A: An auroral display can be brief, lasting only 10-15 minutes, or it can be a series of events that lasts for several hours. The most active periods, called substorms, typically last for about 30-60 minutes at a time.
Other Books
- NOAA Space Weather Prediction Center – The Science of the Aurora
- SpaceWeatherLive – What is a Coronal Mass Ejection (CME)?
- University of Alaska Fairbanks – Aurora Science & Information
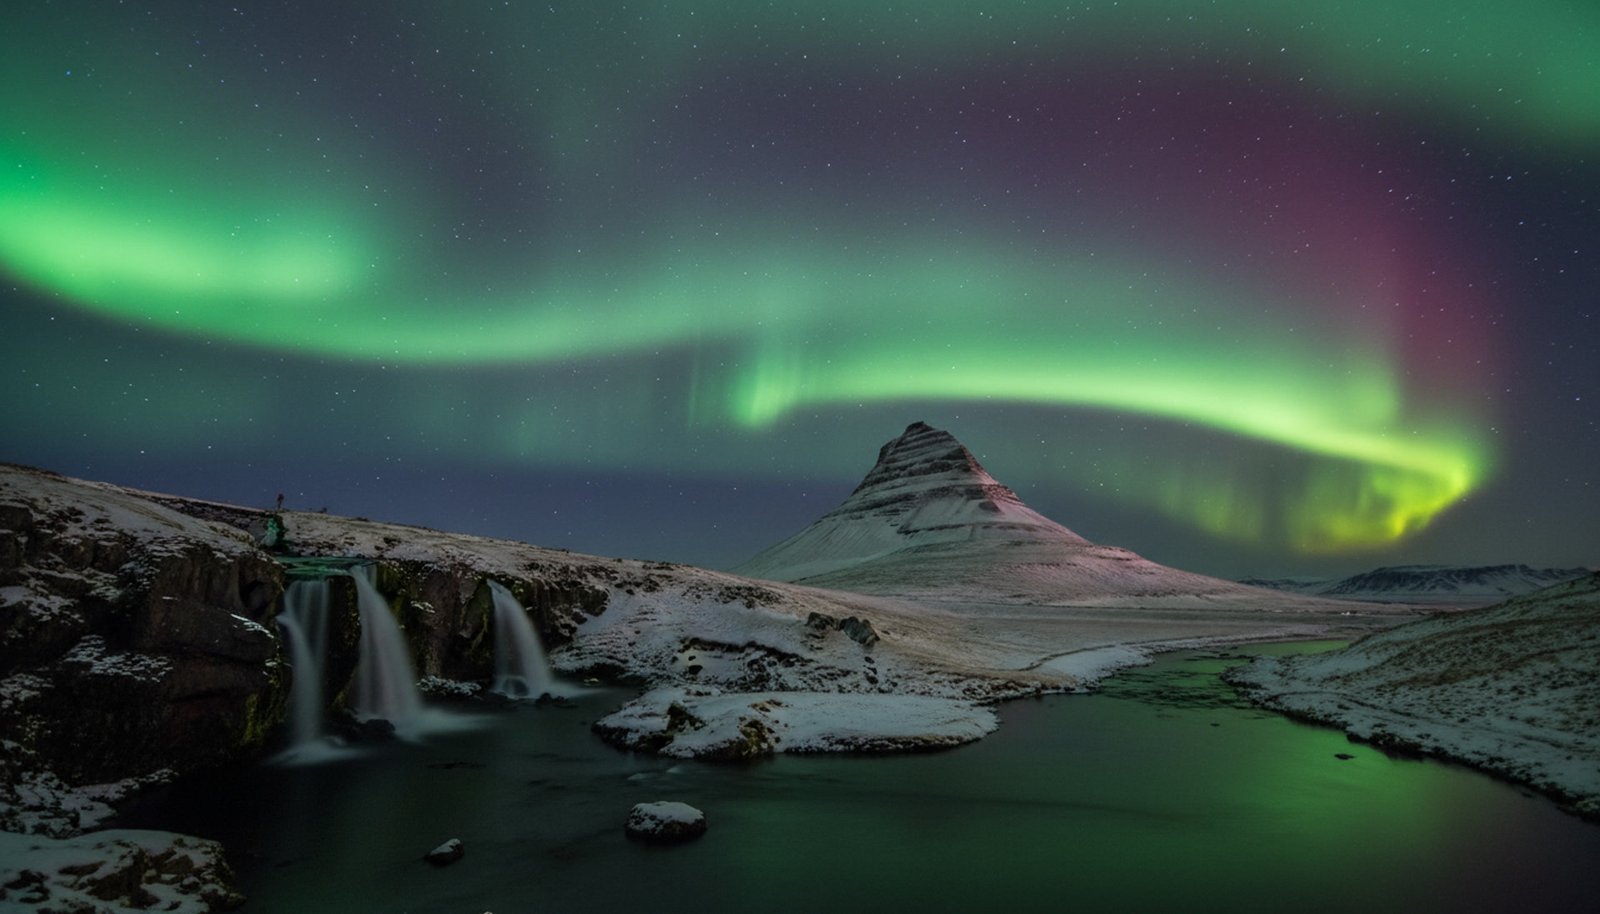
What is northern lights season in Iceland?
What Is the Northern Lights Season in Iceland?
Iceland’s position just below the Arctic Circle makes it one of the world’s premier destinations for witnessing the Aurora Borealis. However, timing your visit is everything. The ‘Northern Lights season’ isn’t about when the aurora is active—it’s always happening—but rather about when Iceland has enough darkness for us to see it.
Understanding this distinction is the key to planning a successful aurora-hunting trip. This guide breaks down the official season, the peak months, and the essential factors you need to align for a chance to see the sky dance.
Understanding Iceland's Aurora Season
The aurora season is dictated entirely by the amount of daylight. Iceland’s extreme seasonal shifts, from the 24-hour daylight of the ‘Midnight Sun’ to the deep darkness of winter, create a distinct window for aurora viewing.
The Official Season: Late August to Mid-April
The generally accepted season for Northern Lights in Iceland begins in late August and stretches to mid-April. This is when astronomical twilight returns, meaning the sky gets truly dark for at least a few hours each night. In late August, you might only have a couple of hours of darkness around midnight, but by late September, the nights are long and dark. The season ends in mid-April as the Midnight Sun begins to take hold, bathing the sky in perpetual twilight or daylight and making the relatively faint aurora impossible to see. The periods around the equinoxes (September/October and March/April) are often cited by aurora hunters as times of potentially increased geomagnetic activity, which can lead to more intense displays.
The Peak Months: September to March
While the season is long, the peak viewing period is from September through March. These months offer the most significant advantage: maximum darkness. During the winter solstice in December, Iceland may only experience 4-5 hours of daylight, providing a vast window of over 19 hours of darkness for potential aurora sightings. This extended darkness dramatically increases your odds, as you don’t have to stay up until a specific hour; the show could start as soon as the sun sets. The trade-off is that these months can also bring more challenging weather, with a higher chance of storms and cloud cover. Autumn and early spring often provide a good balance of long dark nights and more stable weather conditions.
Why Not in Summer? The Midnight Sun
From mid-April to mid-August, Iceland experiences the phenomenon of the Midnight Sun. Due to its high latitude, the sun does not set below the horizon for a significant period, especially from late May through July. Even when it does dip slightly, the sky never achieves true darkness, remaining in a state of bright twilight. The Northern Lights are still occurring high in the atmosphere during this time, driven by the constant stream of solar wind, but they are completely washed out by the ambient light. It’s like trying to see the stars during the daytime—they are still there, but the brightness of the sun makes them invisible to our eyes. Therefore, planning an aurora trip during the Icelandic summer is not feasible.
Maximizing Your Chances During the Season
Simply visiting during the right season isn’t a guarantee. Seeing the aurora requires a perfect alignment of three key factors: solar activity, clear skies, and darkness.
Check Both Forecasts: Aurora and Cloud Cover
Two forecasts are critical for a successful hunt. First is the aurora forecast, which measures geomagnetic activity, often using the Kp-index (a scale from 0 to 9). A Kp of 3 or higher is generally good for Iceland. The second, and equally important, is the weather forecast. A Kp-7 storm is useless if there’s a thick blanket of clouds blocking the view. Use the Icelandic Met Office website, which provides both a cloud cover map and an aurora forecast. Look for clear patches in the cloud map and head in that direction. Remember that Icelandic weather is notoriously fickle and can change rapidly, so check the forecasts frequently throughout the evening.
Escape Light Pollution
While it’s sometimes possible to see a strong aurora from Reykjavik, your experience will be infinitely better if you get away from city lights. Light pollution washes out fainter auroras and reduces the vibrancy of the colors. Even a 20-30 minute drive out of the city can make a massive difference. Popular spots near the capital include Þingvellir (Thingvellir) National Park or the Reykjanes Peninsula. For the best conditions, head to more remote areas like the South Coast near Vík, the Snæfellsnes Peninsula, or the Westfjords. The darker your surroundings, the more detail and color your eyes will be able to perceive in the night sky.
Be Patient and Persistent
The aurora is a natural phenomenon and operates on its own schedule. It can appear for five minutes and vanish, or it can dance across the sky for hours. The key is patience. Don’t just pop your head outside for a moment and give up. Find a good, dark spot, get comfortable, and be prepared to wait. It’s recommended to dedicate at least 3-4 nights of your trip to aurora hunting to increase your chances of catching a clear night with good activity. Many people miss the show because they go to bed too early. The most common viewing times are between 10 PM and 2 AM, but activity can peak at any time during the dark hours.
Quick Facts
- Iceland’s Northern Lights season is from late August to mid-April.
- The peak months with the longest nights are September through March.
- No auroras are visible from May to mid-August due to the 24-hour daylight of the Midnight Sun.
- Success requires three conditions: darkness, clear skies, and solar activity (a good Kp-index).
- Always check both the weather forecast for cloud cover and the aurora forecast for geomagnetic activity.
- Escaping city light pollution is crucial for seeing the best colors and fainter displays.
- Patience is essential; plan to spend several hours and multiple nights on your aurora hunt.
Frequently Asked Questions (FAQ)
Q: Can I see the Northern Lights from Reykjavik? A: Yes, if the aurora is particularly strong (Kp 4 or higher), it can be visible from Reykjavik. However, the city’s light pollution will significantly diminish the experience. For the best views, it is highly recommended to travel at least 20-30 minutes outside the city.
Q: What time of night is best for seeing the aurora in Iceland? A: The most common time to see the Northern Lights is between 10 PM and 2 AM local time, as this is often when the sky is darkest. However, the aurora can appear at any time during dark hours, so it’s best to start looking as soon as the sky is completely dark.
Q: Do I need a tour to see the Northern Lights in Iceland? A: A tour is not strictly necessary if you rent a car and are comfortable driving in Icelandic conditions. However, guided tours are an excellent option as the guides are experts at reading forecasts, finding the best dark-sky locations, and navigating potentially icy roads.
Other Books
- Icelandic Met Office – Aurora Forecast
- Guide to Iceland – Northern Lights Information
- NOAA Space Weather Prediction Center – Planetary K-index

How Can You See the Northern Lights?
How Can You See the Northern Lights? A Practical Guide
Witnessing the Aurora Borealis is a breathtaking experience that tops many travel bucket lists. These ethereal ribbons of light dancing across the night sky are a reward for those who venture into the cold, dark north. But seeing them isn’t just about luck; it’s about preparation and understanding what creates the perfect viewing opportunity.
This guide breaks down the essential elements for a successful aurora hunt, from choosing your destination to reading the forecasts. By combining the right location, conditions, and timing, you can dramatically increase your chances of experiencing one of nature’s most spectacular displays.
The Three Pillars of Aurora Hunting
Successfully seeing the Northern Lights depends on three critical factors aligning perfectly. If one of these is missing, your chances drop significantly. Think of them as the essential pillars supporting your viewing experience.
Pillar 1: The Right Location (Geomagnetic Latitude)
The aurora occurs in a ring around the Earth’s magnetic poles, known as the auroral oval. To see it, you need to be underneath or very close to this oval. This zone generally falls between 65 and 72 degrees North geomagnetic latitude. Key destinations within this zone include Fairbanks, Alaska; Yellowknife, Canada; most of Iceland; and the northern parts of Norway, Sweden, and Finland. It’s important to note that geomagnetic latitude is slightly different from geographic latitude. The further north you go, the better your chances, as the aurora can appear directly overhead rather than just on the horizon. Choosing a location within this prime viewing band is the single most important decision you’ll make.
Pillar 2: The Right Conditions (Darkness & Clear Skies)
The aurora is a relatively faint phenomenon, so you need two environmental conditions: darkness and clear skies. For darkness, you must get away from city light pollution, which can easily wash out the display. Even a bright full moon can diminish the visibility of fainter auroras, so planning your trip around the new moon phase is ideal. Clear skies are non-negotiable; clouds will block the view completely, as the aurora happens far above them in the upper atmosphere. This is why checking the local weather forecast is just as important as checking the aurora forecast. The best viewing season is from September to March, simply because the nights are longest and darkest.
Pillar 3: The Right Activity (Solar Forecast)
The aurora’s intensity is directly linked to activity on the Sun. A strong solar wind or a Coronal Mass Ejection (CME) hitting Earth’s magnetic field will produce a vibrant and active display. Scientists measure this geomagnetic activity using the Kp-index, a scale from 0 to 9. A Kp of 1-2 might produce a faint glow in the far north, while a Kp of 5 or higher indicates a geomagnetic storm, making the lights brighter and visible from lower latitudes. You can check short-term forecasts using apps and websites like NOAA’s Space Weather Prediction Center. A strong forecast significantly boosts your odds, turning a potential no-show into an unforgettable night.
Practical Tips for Your Viewing Night
Once you’ve planned your trip and the forecasts look promising, it’s time to head out. Here’s how to make the most of your night under the stars.
What to Bring and Wear
Patience is the most important thing to bring, but proper gear is a close second. Dress in warm layers, as you may be standing outside in freezing temperatures for hours. Insulated boots, gloves, a hat, and a thermal base layer are essential. For photographers, a tripod is non-negotiable to get sharp, long-exposure shots. A camera with manual settings (or a modern smartphone with a good night mode) is required. Also, bring a headlamp with a red light setting; red light preserves your night vision, allowing you to see the faint aurora more clearly. A thermos with a hot drink can also make the wait much more comfortable.
How to Look and What to Expect
When you arrive at your dark-sky location, turn off all lights and allow your eyes at least 15-20 minutes to fully adjust to the darkness. The aurora most commonly appears in the northern part of the sky, so orient yourself in that direction. Be aware that a faint aurora can initially look like a wispy, greyish cloud to the naked eye. Your camera’s sensor is more sensitive to the green light and will often pick up the color before you can. Be patient. Auroral displays often come in waves, with periods of calm followed by bursts of intense activity. The show can last for a few minutes or go on for hours, so don’t leave after the first sighting.
Quick Facts
- The best viewing locations are inside the ‘auroral zone’, between 65-72° North latitude.
- Travel between September and March for the longest and darkest nights, which are essential for viewing.
- You must have clear, cloud-free skies and be far away from city light pollution.
- Check both the weather forecast and the aurora forecast (Kp-index) before heading out.
- A faint aurora can look like a grey, moving cloud to the naked eye; a camera will reveal its color.
- Patience is crucial. Be prepared to wait for hours in the cold for the lights to appear.
- A tripod is essential for photography, and a headlamp with a red light helps preserve your night vision.
Frequently Asked Questions (FAQ)
Q: Can I see the Northern Lights with a full moon? A: Yes, it’s possible to see the aurora during a full moon, especially if the display is very strong. However, the bright moonlight will wash out fainter details and make the overall experience less vibrant.
Q: Do I need a special camera to photograph the aurora? A: A camera with manual controls (DSLR or mirrorless) is ideal for high-quality photos. However, many modern smartphones have excellent ‘Night Mode’ capabilities that can capture impressive images of the aurora, especially when mounted on a tripod.
Q: How long does an aurora display typically last? A: The duration is highly variable. A minor display might last only 15-30 minutes. A major geomagnetic storm can produce waves of auroral activity that last for several hours through the night.
Q: What is the best time of night to see the aurora? A: While the aurora can appear at any time during the dark hours, the most active displays often occur between 10 PM and 2 AM local time. However, it’s best to be ready anytime after true darkness falls.
Other Books
- NOAA Space Weather Prediction Center – Official Aurora Forecast
- Space.com – A Guide to Aurora Viewing
- Icelandic Met Office – Cloud Cover and Aurora Forecast
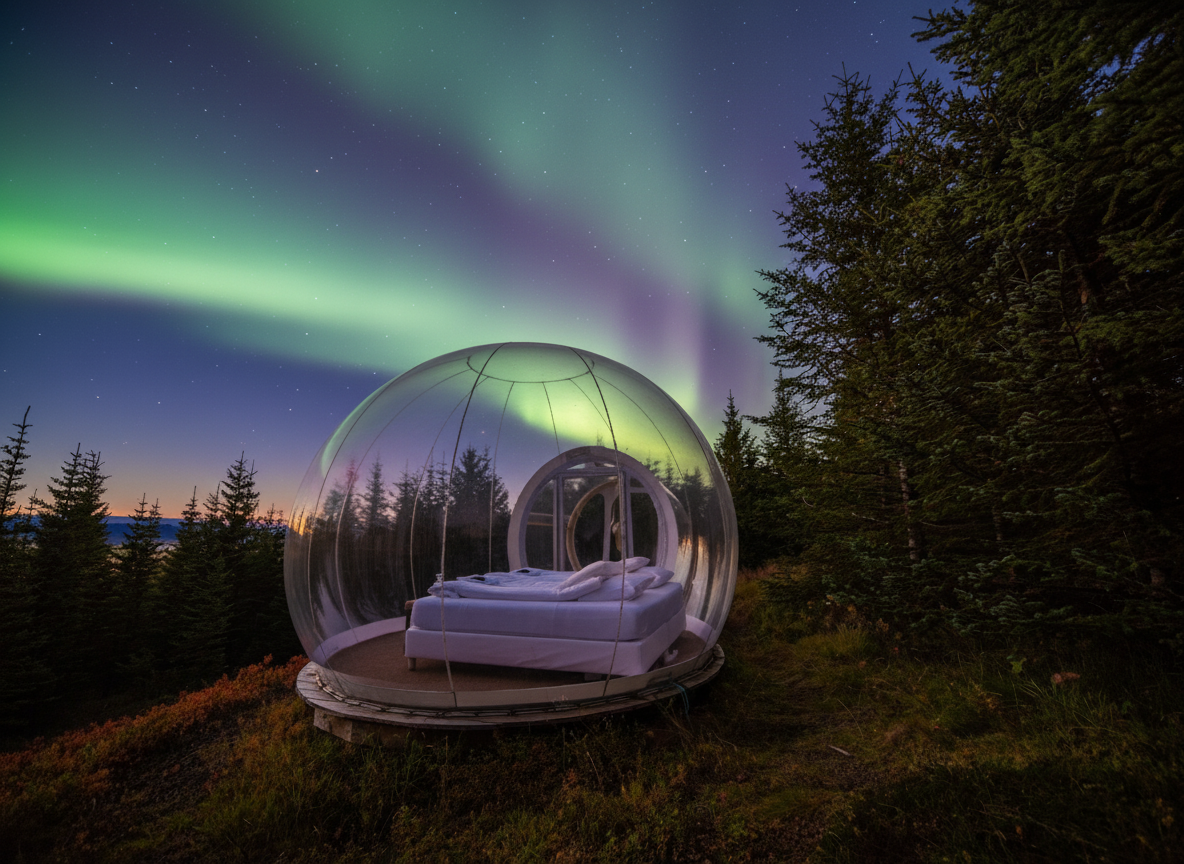
Where Can You See the Northern Lights?
Where Can You See the Northern Lights?
The Northern Lights, or Aurora Borealis, appear in a specific geographic pattern around Earth’s magnetic poles. While they can occasionally be seen farther south during strong solar storms, there are reliable “aurora hotspots” where you have the best chance of witnessing this incredible natural phenomenon.
The Auroral Oval: Where the Magic Happens
The Northern Lights occur in an oval-shaped band centered around the magnetic North Pole, not the geographic North Pole. This “Auroral Oval” typically spans between 60° and 75° latitude, but expands southward during periods of high solar activity.
What Makes a Location Good for Aurora Viewing?
Three key factors determine whether you’ll see the Northern Lights in a specific location:
1. Geographic Latitude
You need to be within or near the Auroral Oval. The closer you are to the magnetic poles, the better your chances.
2. Darkness & Weather
You need clear, dark skies. Light pollution from cities can wash out the aurora. The best viewing spots are away from city lights with minimal cloud cover.
3. Solar Activity
The strength of the aurora depends on solar wind and geomagnetic storms. Higher Kp-index values mean the aurora is stronger and visible farther south.
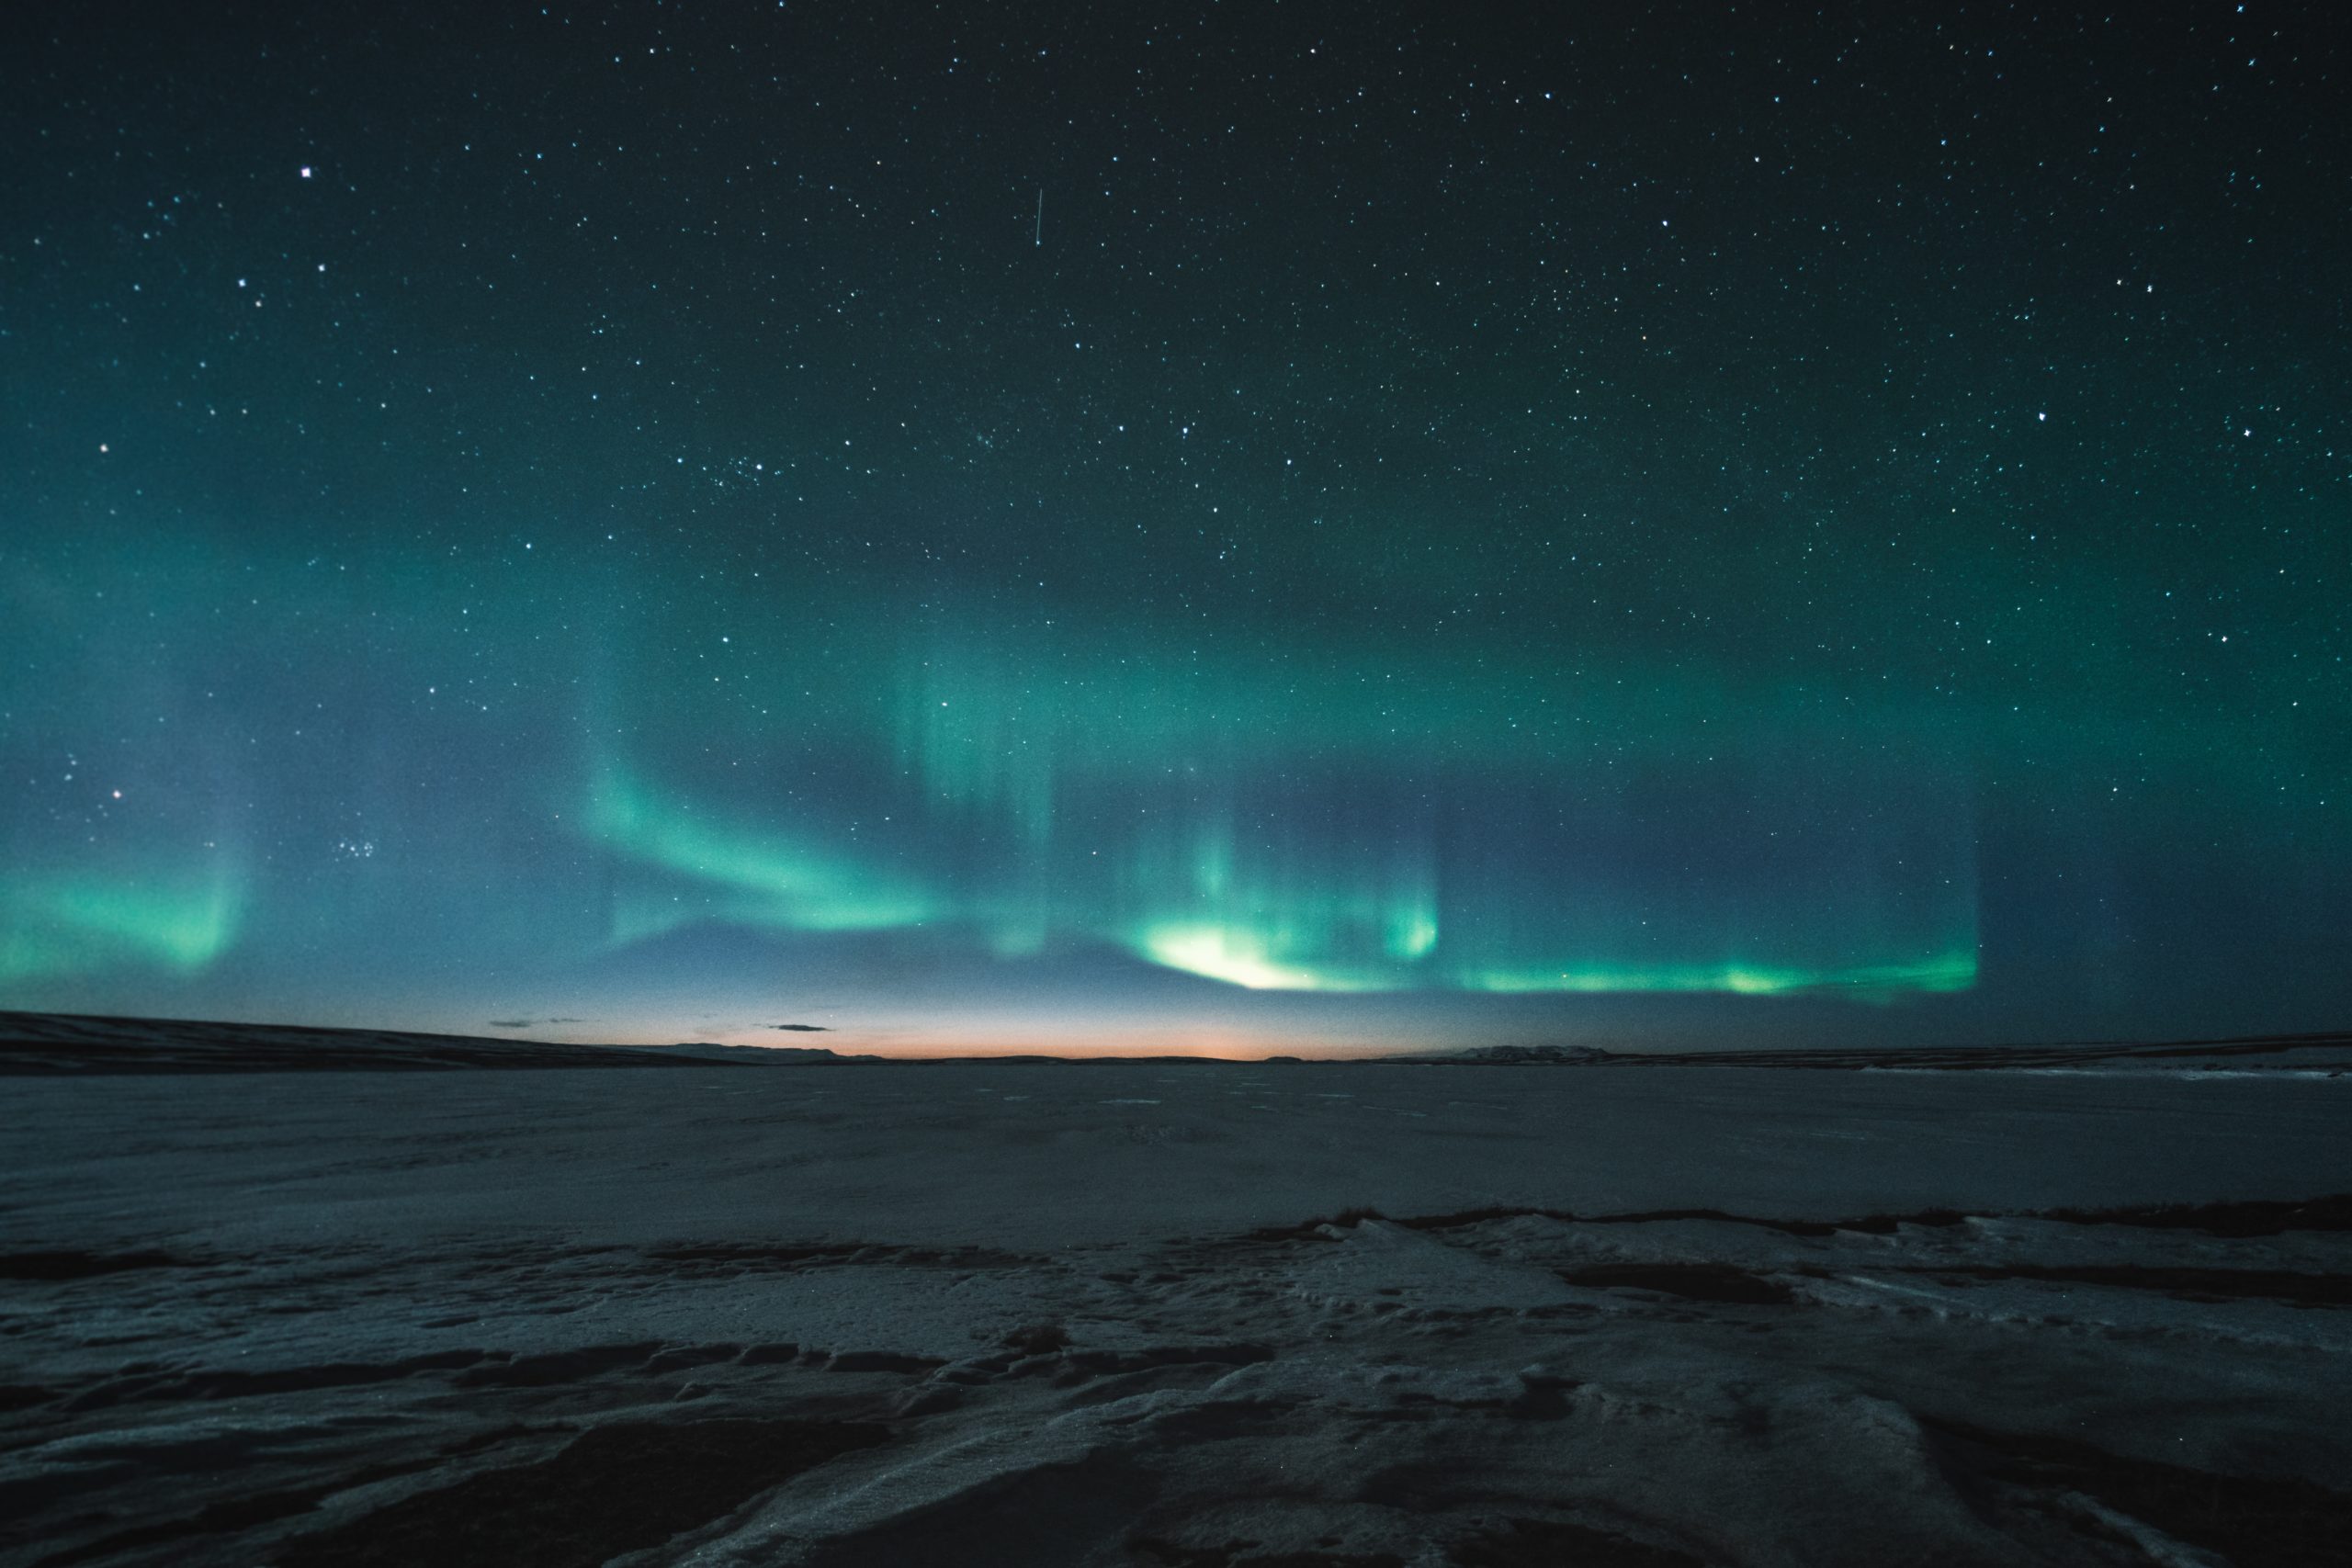
The Best Time to see Northern Lights in Iceland
Let’s get down to business: When IS the best time to see northern lights in Iceland?
Finding out the best time to see northern lights in Iceland is one of the penultimate quests of every visitor. One of the biggest draws to visit, they are also one of the most difficult activities to plan. Although it would be great to easily pinpoint how and when (and where!) to see them, there are quite a few variables involved in a successful sighting.
Things like season, weather/cloud cover, length of stay/time spent hunting, solar activity, and a bit of luck. We’ll explore these factors a bit more through the article, but to give you the paraphrased rundown:
- Season: mid-August to early April
- Weather: Little to no cloud cover
- Length of stay: 5-7 days (On average, if the weather is cooperating and you are spending most evenings looking for auroras, you may have somewhere around 2.5-3 opportunities to see an aurora. This is of course conditional on if you are willing to move around and if you are here during stormy weather, but typically a week gives you a few chances to try for a sighting.)
- Solar Activity: This far north we can see fairly low activity, as we lay within the 3rd band of the kP chart. In theory, this means that activity needs to occur at a kP 3 level to be visible in Iceland, but due to the rapidly changing development of this forecasting system and the interpretation of data, it does happen often that lower levels of activity are visible here. We’ve gotten lucky on a 0 night before, and so can you! Natural phenomena do tend to be unpredictable, even after years of scientific study.)
Luckily, there are a lot of fantastic things to do in Iceland and it’s always best to think of seeing the northern lights as an added bonus. Depending on where in the season you visit, there are plenty of extra activities to plan your trip around.
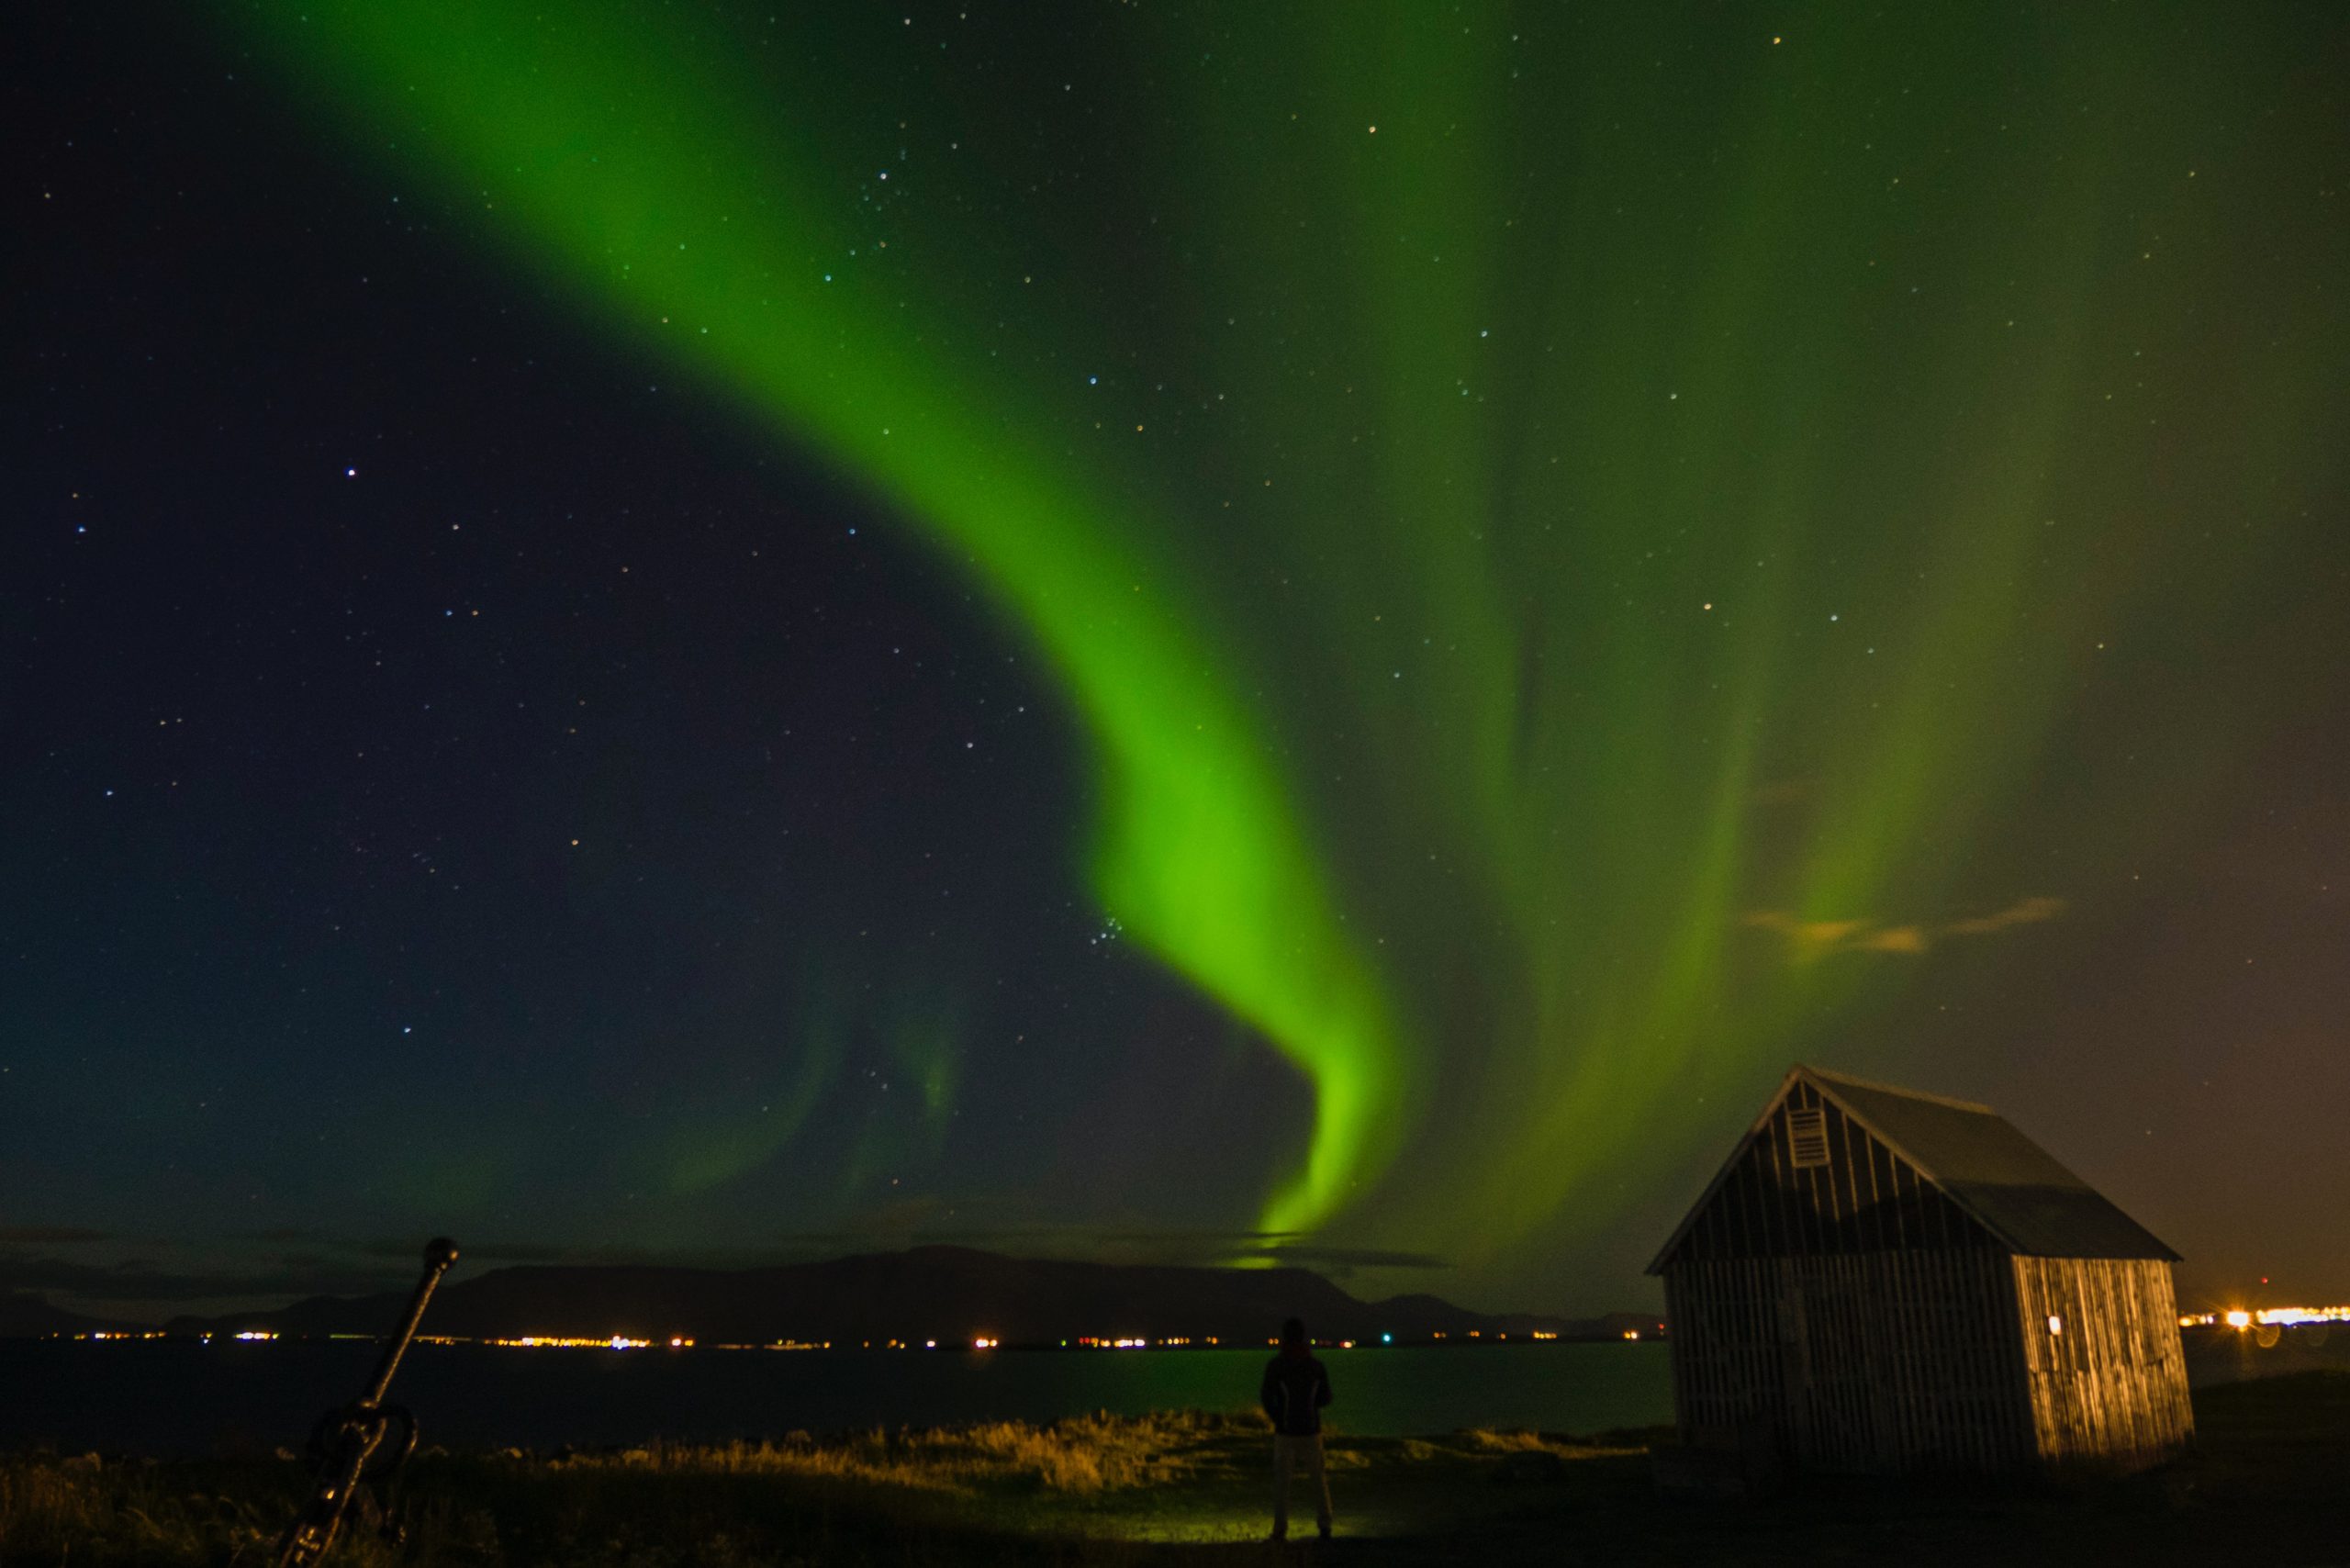
What Are The Northern Lights?
First, a little bit of background on the aurora. The northern lights are the result of electrically charged particles from the sun colliding with gaseous particles in the Earth’s atmosphere, causing displays of bright, colorful dancing lights.
They are visible in the magnetic polar regions of the northern and southern hemispheres (they are known as Aurora Australis in the south) and they can range in color from white, green, red, pink, and purple.
Depending on your own personal color processing, these colors can appear differently to you than to your neighbor, which is a curious thing to explore when viewing an aurora with a friend.
These colors are created by the collision of the particles with different gases, and so it is not impossible for rarities like yellow, orange, blues, and reds can occur. Due to color frequency, some of these are harder to see than others.
According to the Northern Lights Centre in Canada, scientific studies have found that the northern and southern Auroras often occur at the same time as mirror images.
This of course means that the Auroras are often happening, even if they aren’t visible to us down on the ground. There are theories that while these occurrences may be happening simultaneously, they may be more like siblings, than twins, in appearance.
The best time to see Northern Lights in Iceland can vary depending on conditions. But because of the length of our light cycle, the good news is that there’s a perfect piece of the auroral season for everyone.
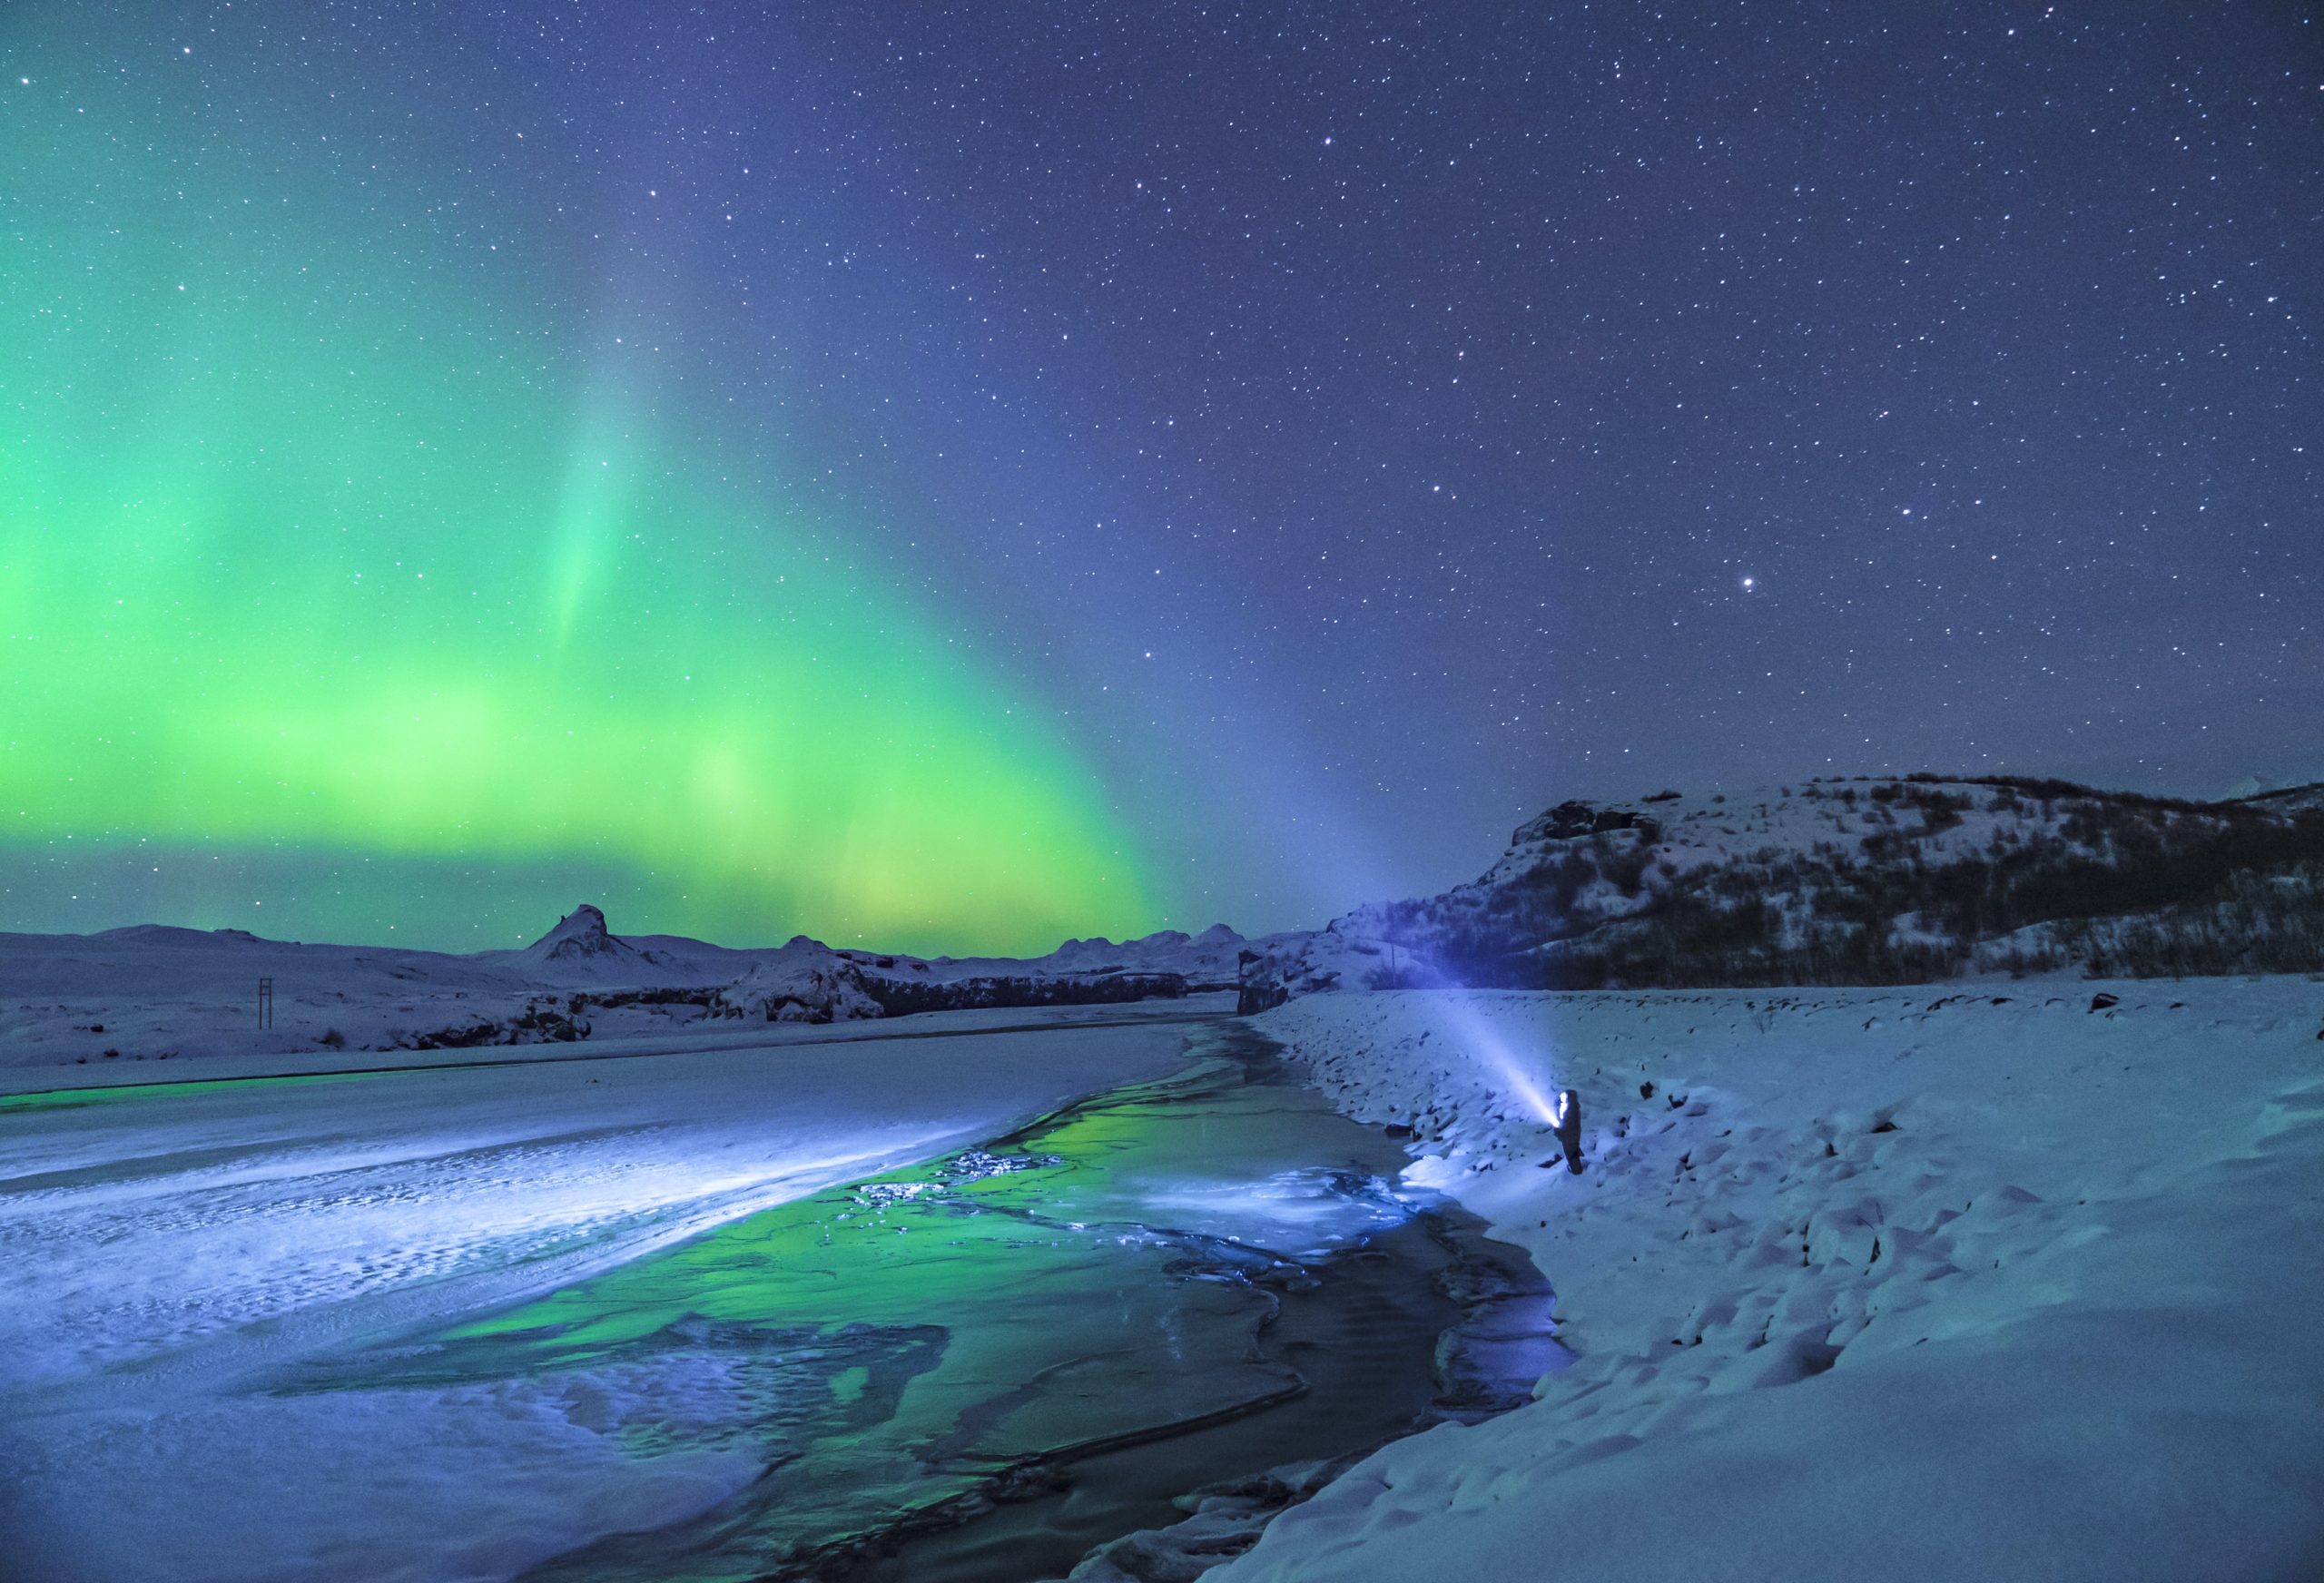
The difficulty here is that a great deal of this activity would only be visible primarily from Antarctica, which does not host a very large population. This means that the qualitative observation of the Aurora Australis is not quite as large as that of the Aurora Borealis, in the north. We are getting closer, though!
In the northern hemisphere, the lights are best seen from Iceland, Finland, Greenland, northern Norway and Sweden, Siberia, the Canadian territories, and Alaska. Thanks to the latitude of the North American continent in relation to the magnetic pole, the lights have been seen as far south as New Orleans!
This is a rare and remarkable thing and is the gift of large solar storms. Here in Iceland, seeing the northern lights is most certainly annual and regular, although still difficult at times to predict.
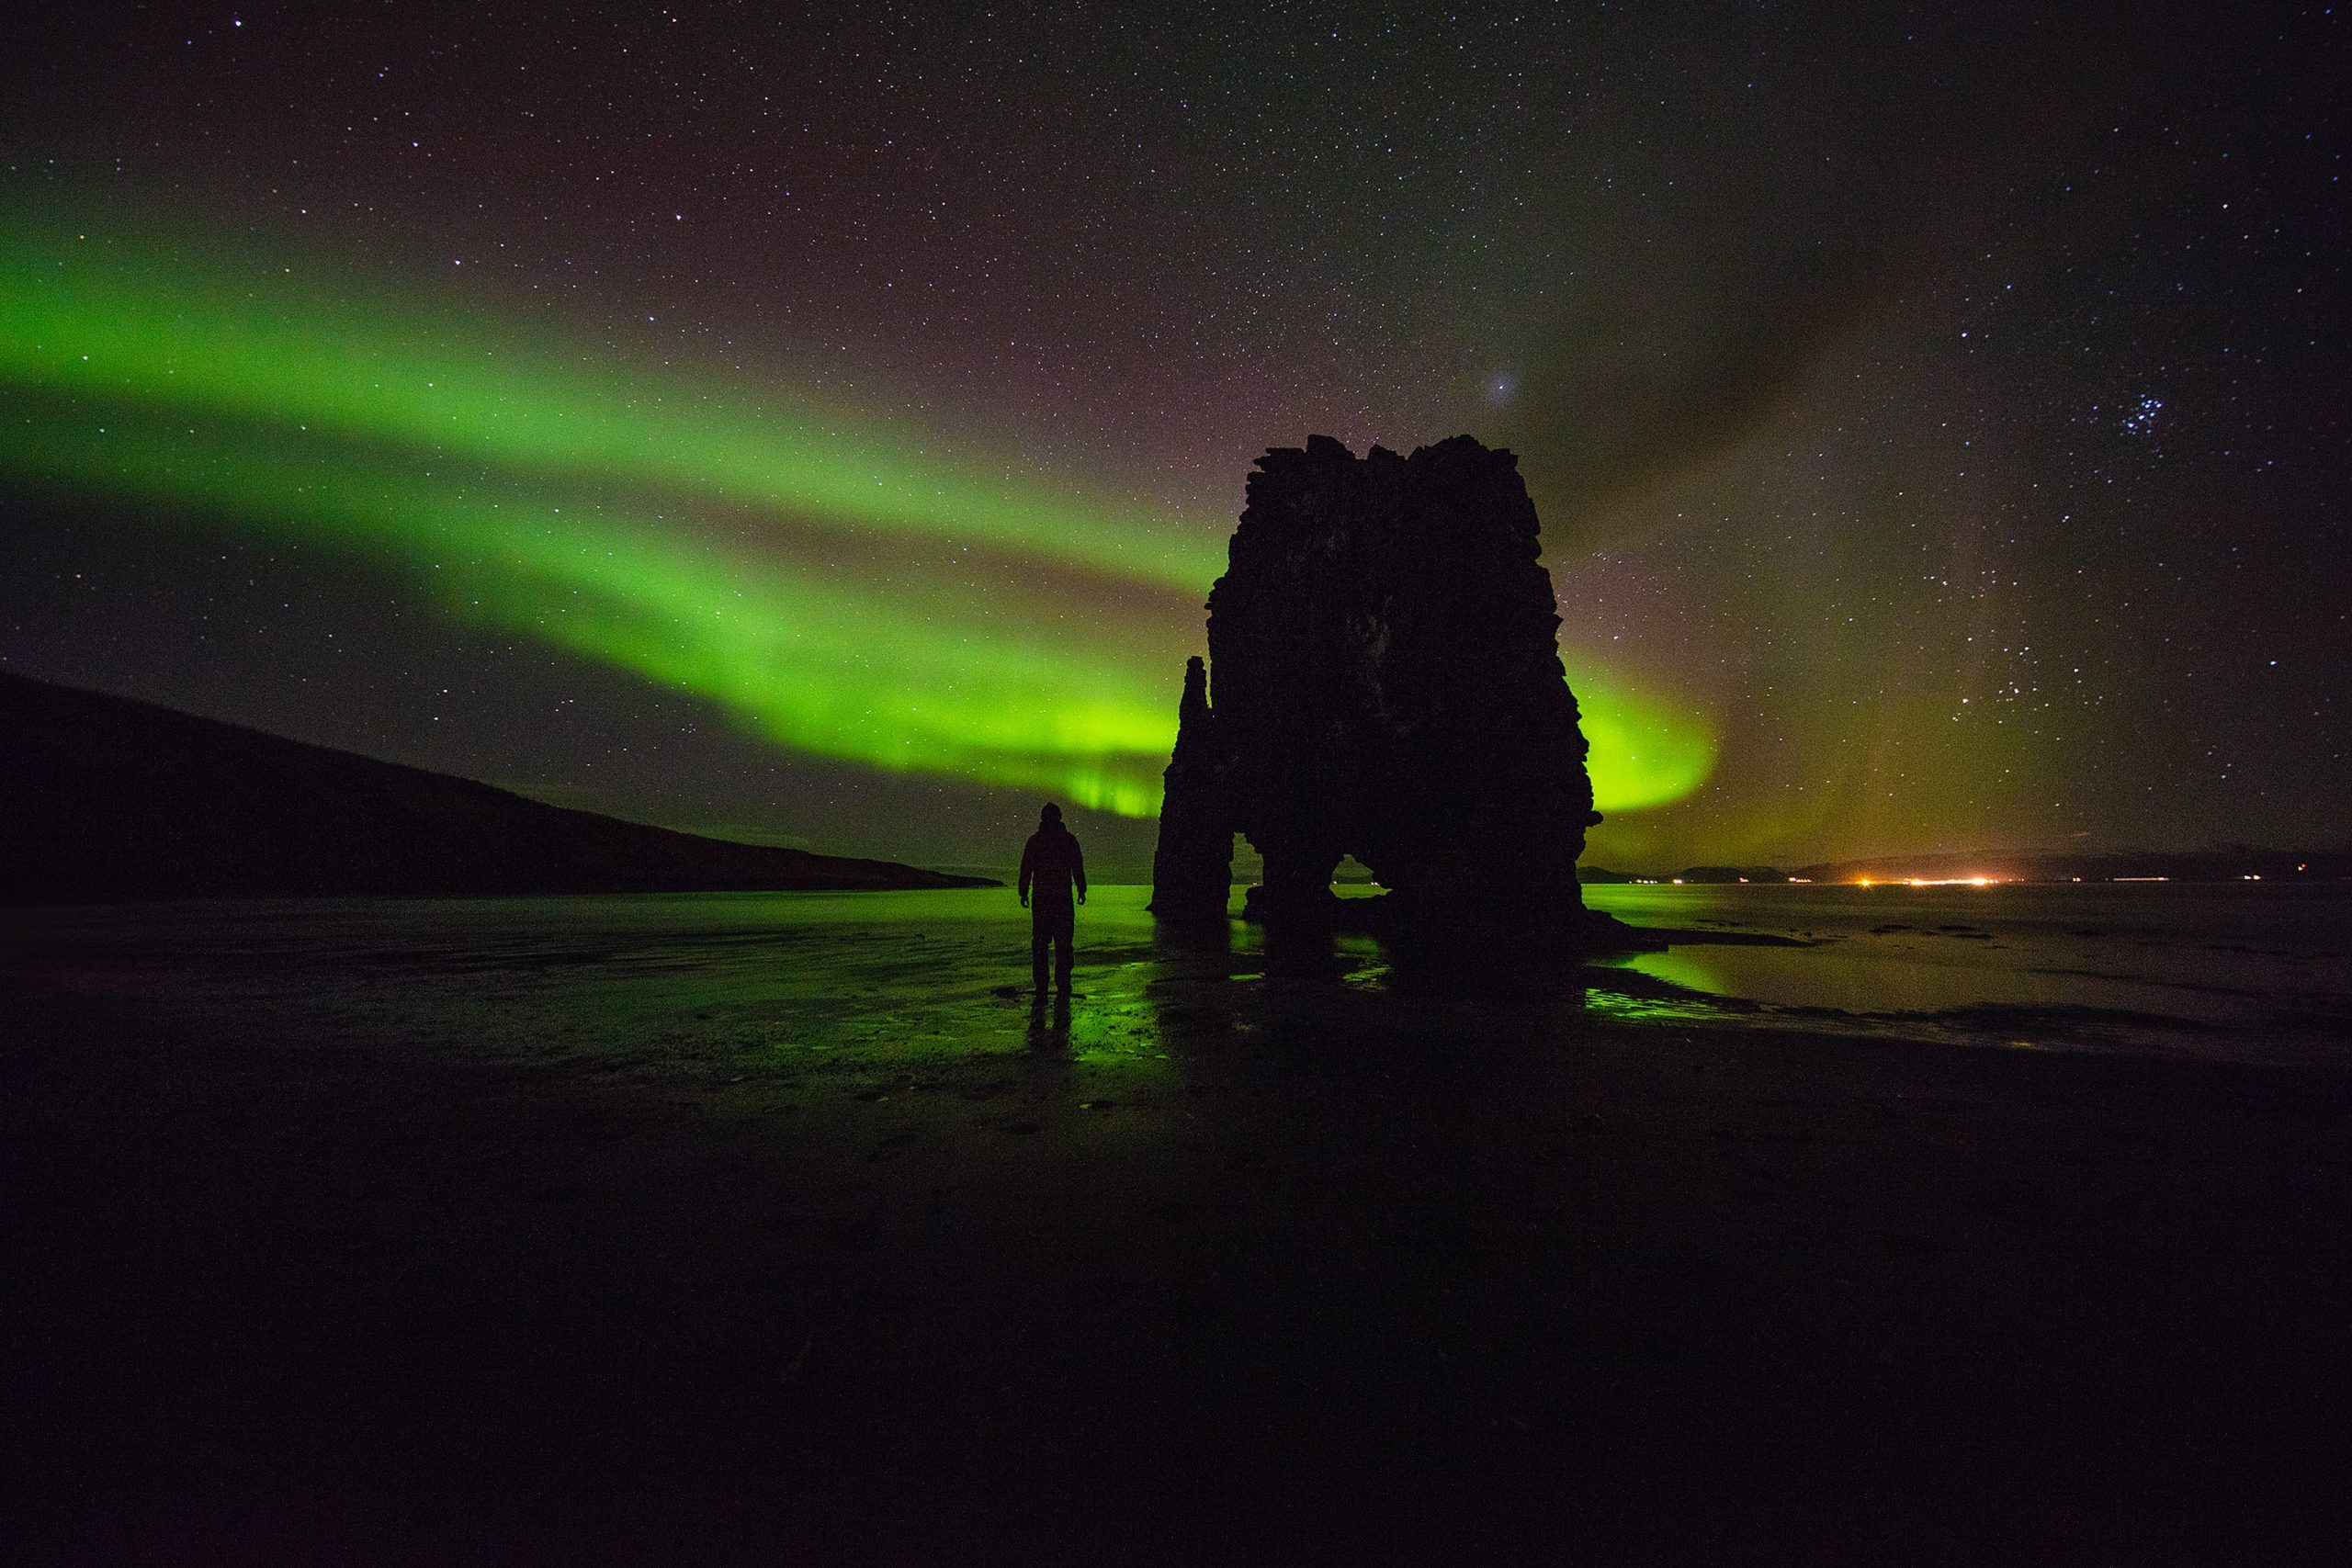
The Best Time To See The Northern Lights In Iceland
As mentioned early, to see the northern lights in Iceland, it is important first to be here in the correct season, which is mid-August to early April. (It is not impossible to see the lights in early August or mid-April, but typically it would be too bright before and after that timeframe.
It is always good to remember when dealing with a wonder of the natural world, that there are exceptions for every single thing. The aurora may have a season, but that season is only bound to our light cycle. Auroral activity can happen at ANY time, we just lack the proper darkness to view it outside of that time frame.)
And speaking of darkness, guaranteed darkness is the first most important factor. The best season to see the northern lights in Iceland with solid darkness is from September to March, as these are the months where there are full dark nights.
Some sources will recommend December to February, as they are the darkest months with the longest possible window to see the lights, however, these sources often fail to take into account that these months can have the most volatile weather.
This can be a stormy time of year, which often complicates domestic travel and creates a great deal of cloud cover. This is why many aurora hunters prefer Spring (March) and Autumn (mid-August to November), as it is a milder time of year.
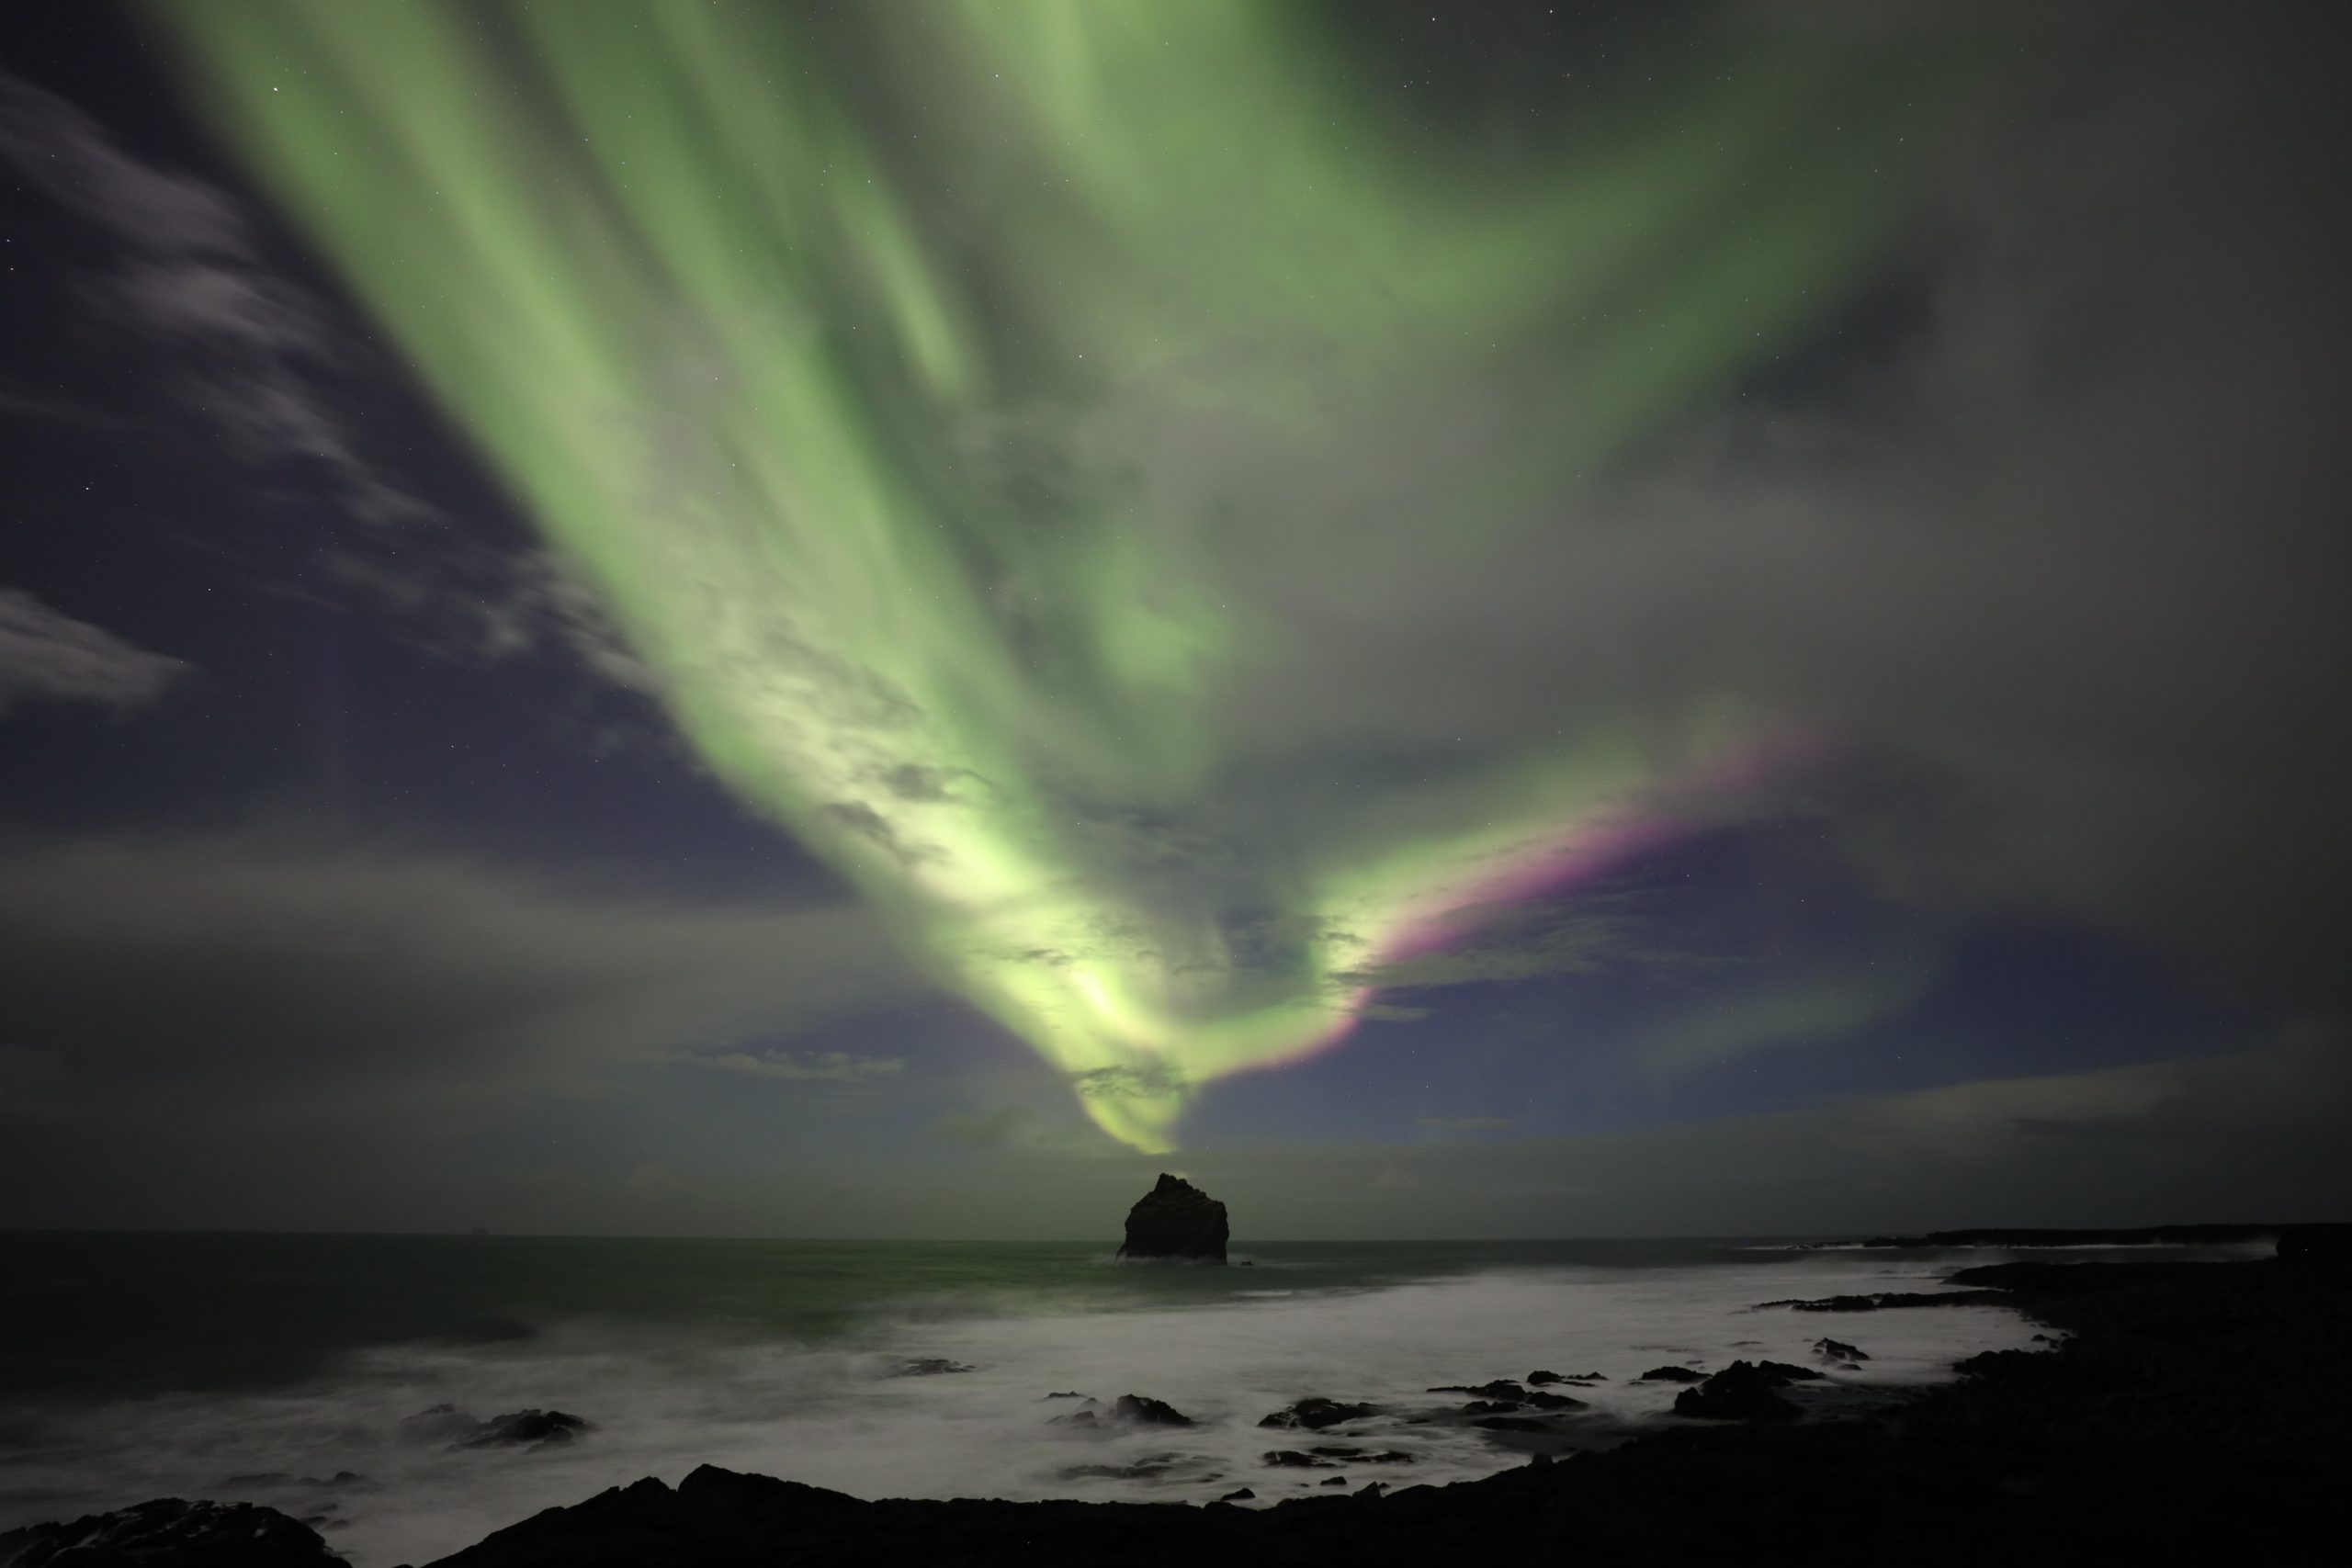
The length of time you choose to stay in Iceland is also an important factor. To increase your odds of seeing the lights, it is recommended you stay a minimum of seven nights in the country. The northern lights usually tend to be very active for two to three nights, then low for four to five nights, in ongoing cycles.
Naturally, not everyone can take long trips and Iceland is a renowned stopover destination, but if the northern lights are on your bucket list, it helps to have a few extra nights to explore.
(It’s also clever to start looking early in your trip, as opposed to saving your aurora excursions for a grand finale! Many tours allow a re-try if you have a less than fruitful night, so it is wise to give yourself some time to try again.)
Given that the factors for viewing the aurora have to all be aligned, the longer time you spend in the country, the higher your chances are of seeing them.
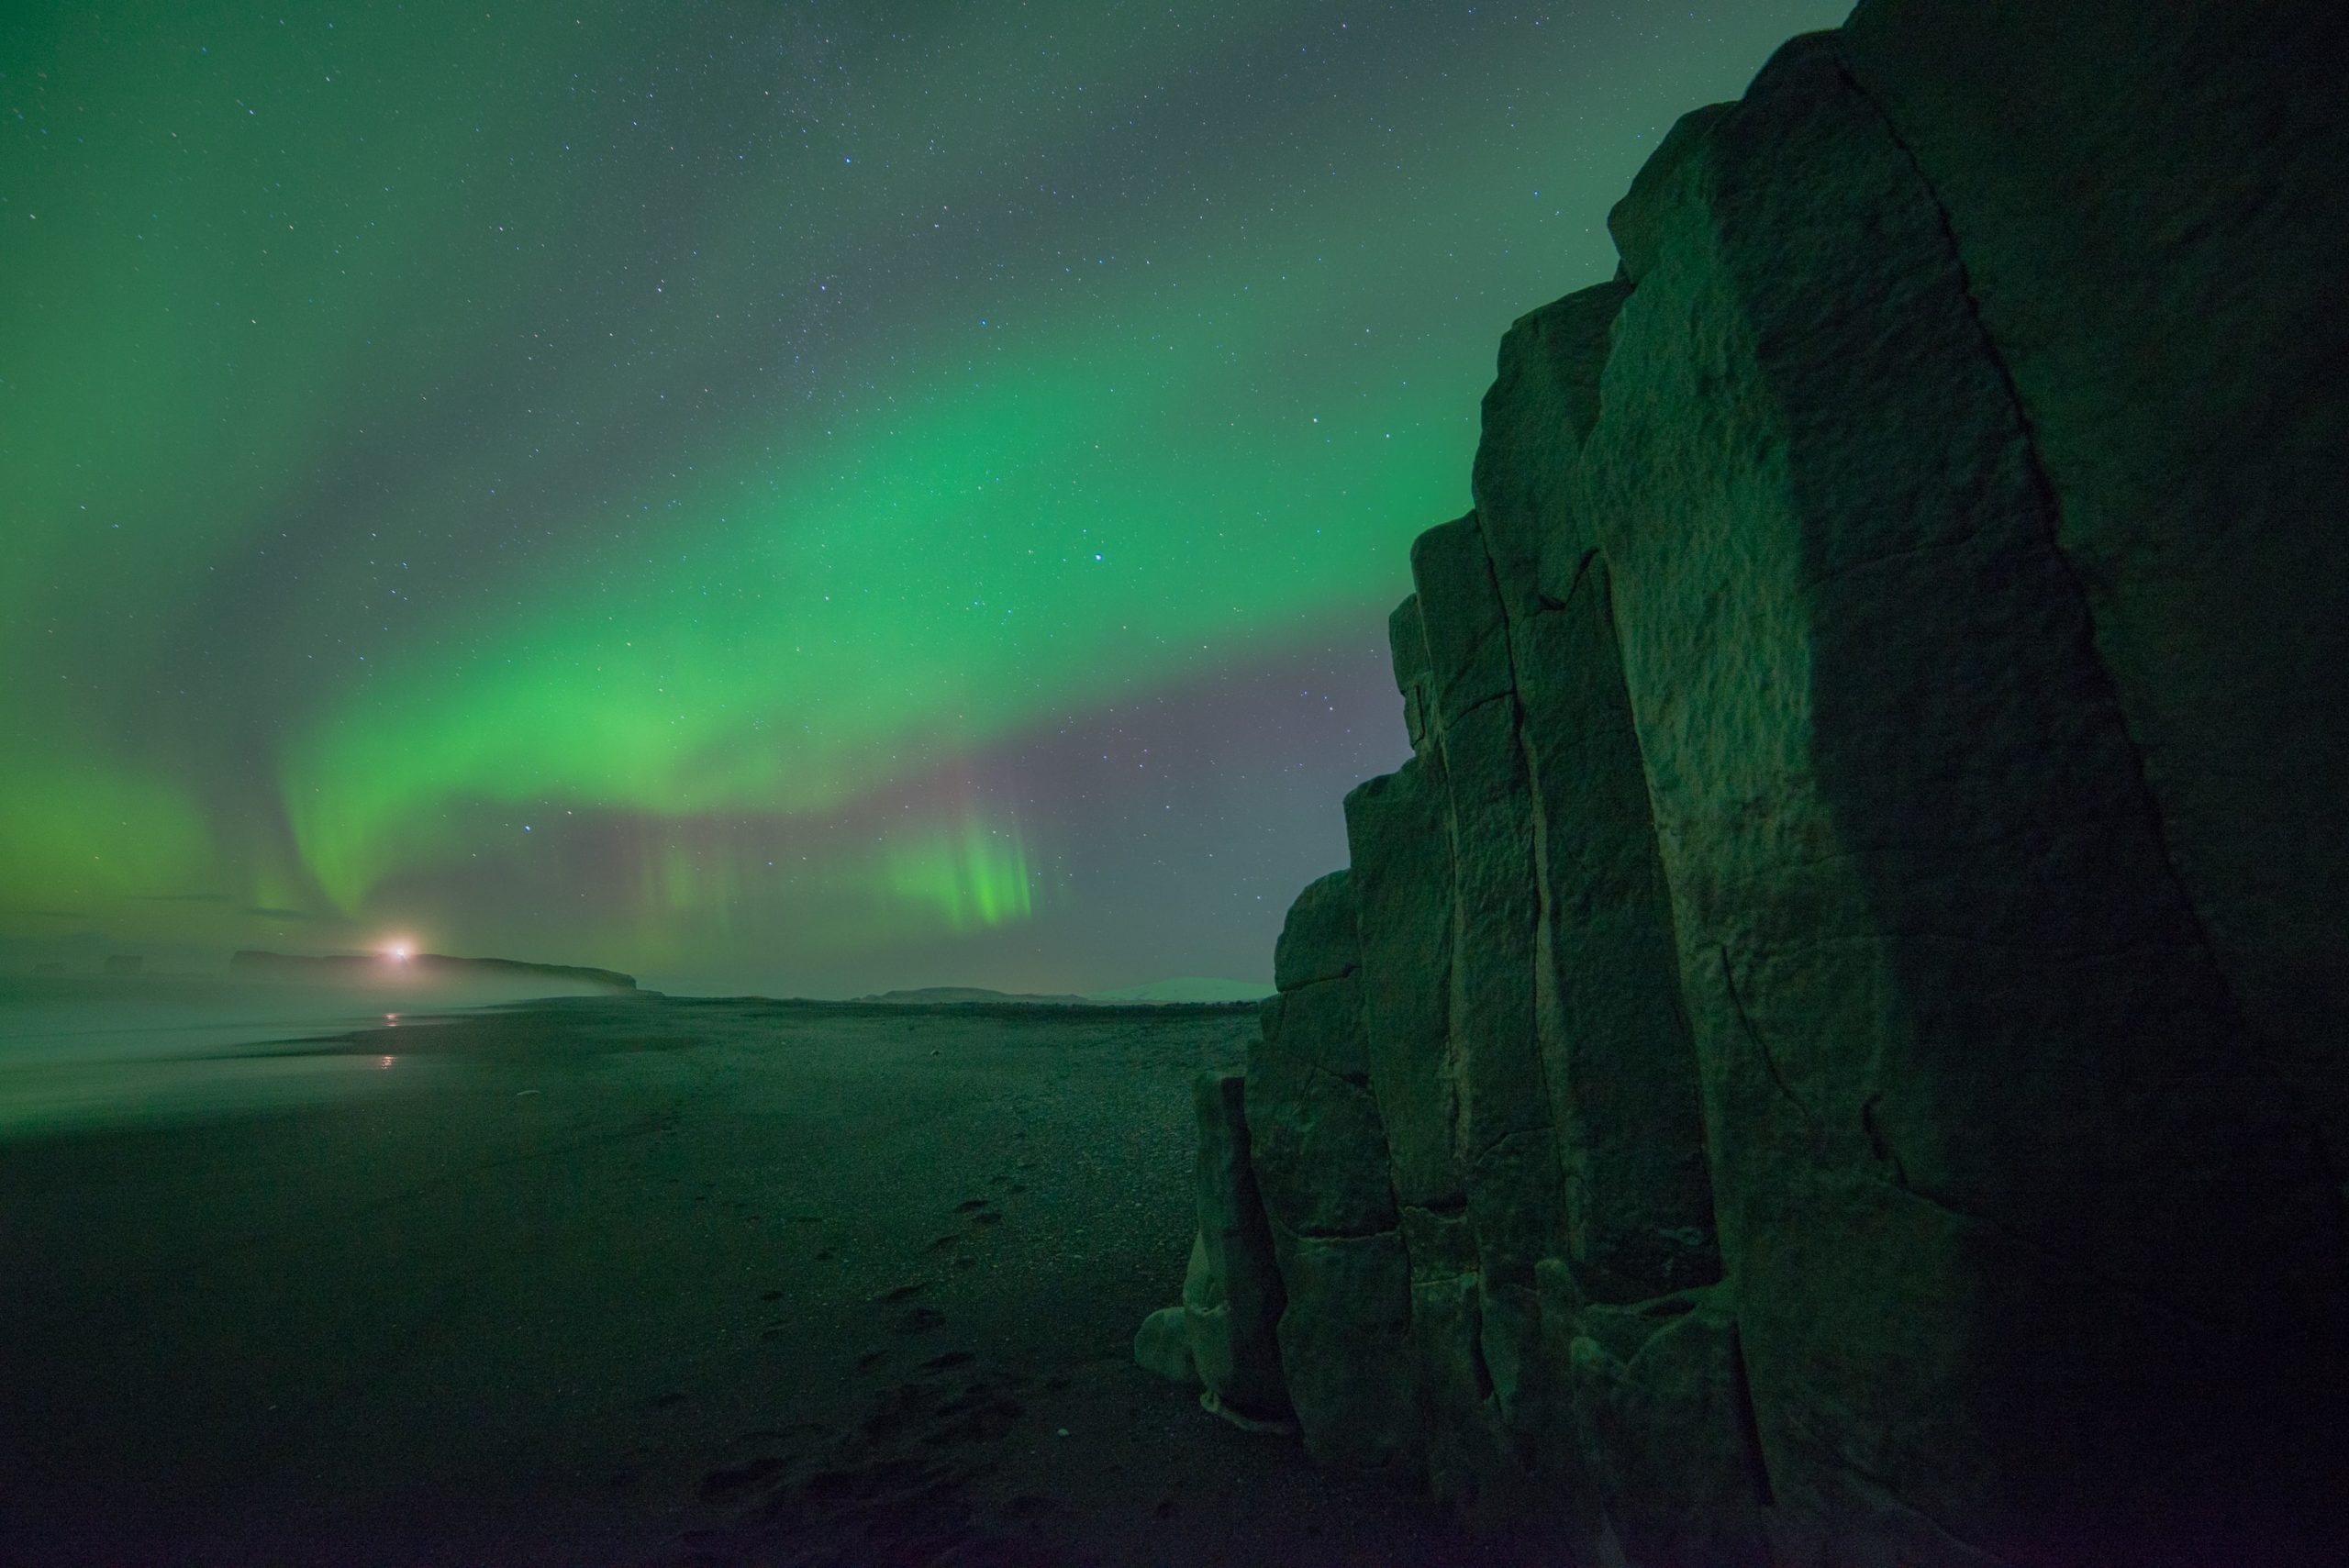
The weather is another important factor, but not necessarily for the reason that you may think. Since Iceland is a small north Atlantic island, it is subject to fierce and rapidly changing weather. The old cliché “if you don’t like the weather, wait five minutes” could not be truer of this country.
In order to see the northern lights, the skies need to be very clear. This often coincides with some of our coldest nights, since clear dark weather in Iceland usually means temperatures near or below freezing.
On warmer nights, there is usually precipitation or at least quite a bit of cloud coverage. Many people connect the northern lights with cold temperatures, but this is not required for their visibility.
The aurora happens above our weather system, so these things are only tangentially related. As long as the skies are clear, we can see the show.
Checking the different forecasts in the days leading to your trip to Iceland will give you an idea of your chances of seeing the lights.
Services like the aurora forecast from the Icelandic Meteorological Office are very useful. When you use this forecast, you are looking for the white spaces on the forecast map, instead of the green or colored areas on the map.
These white areas indicate the clarity of the sky, as opposed to layers of cloud cover which are denoted by a color spectrum. You can also see the predicted amount of solar activity on a 0-9 kP scale.
This scale is not always 100% accurate, so it is important to use it as a guideline, instead of an imperative. If you can see the sky in your area, it is worth having a look.
This is of course one of many tools, and these forecasts can all help to lend a bigger picture of what is truly a global event.
When we watch the aurora from one area, we are only seeing a small shard of a planetary occurrence, and so you can imagine how hard it is for a forecast to pinpoint the visibility of such a large thing in such a small area.
As the old saying goes, location location location! People are always looking for the best spot to watch from, and due to cloud cover and the unpredictable movement of auroral activity, the truth is that there is no singular good spot. However, you can make sure that your spot is less affected by the little gifts of mankind.
Once in a while, the northern lights will take Reykjavík by surprise and they are so strong that the city lights don’t matter, but most of the time, it’s best to get away from all the street lights and car headlights.
Taking your visit out of the capital and into the countryside further increases your chances of catching a show, and makes the whole experience a bit more magical.
There are many great small towns to visit around the country with beautiful country hotels and guesthouses, just steps from pure un-modernized nature where there is no light pollution. Fortunately, Iceland is a small place, so it doesn’t take much time to get out of the city light, and into some true darkness.
One of our favorite northern lights hotels in Iceland is the Bubble hotel, on the Golden Circle and the South Coast. We love the Bubbles for their convenient location near popular landmarks,
but also because it gets so incredibly dark there. In one of the comments on Tripadvisor, a client wrote: “I just walked outside of the hotel, just [a] few meters and it was simply pitch dark. So pitch dark I could not find myself.”
To be in complete darkness in the embrace of nature is amazing in itself, but it certainly is a great spot for aurora watching. (And a warm one, as well! Can’t miss the show if you’re in a transparent house!)
When choosing a trajectory to explore, you’ll want to make sure that you have chosen a direction based on cloud cover for that night. Many guides plan their excursions this way and choose their route because of these areas of clarity.
There are quite a few gorgeous towns just off of Route 1 within three hours of Reykjavik that you can head off in the direction of. For aurora hunters headed north/northeast, we can suggest the national park Thingvellir, Borgarnes, Akranes, and even Stykkishólmur.
You can also venture back out towards Keflavík and enjoy the vastness of the Reykjanes peninsula, or head south to the black sand beaches of Vík, the cozy town of Selfoss, of the coastal villages of Eyrarbakki or Thorlákshöfn. No matter where the skies are clear, there will be quite a few stops you can make.
Always take care to make sure that you are pulling over in spaces that are designated stopping points, and not stopping in the middle of the road or in a place where traffic may not expect you. Many accidents occur this way and are not the ideal experience for any hopeful aurora hunter.
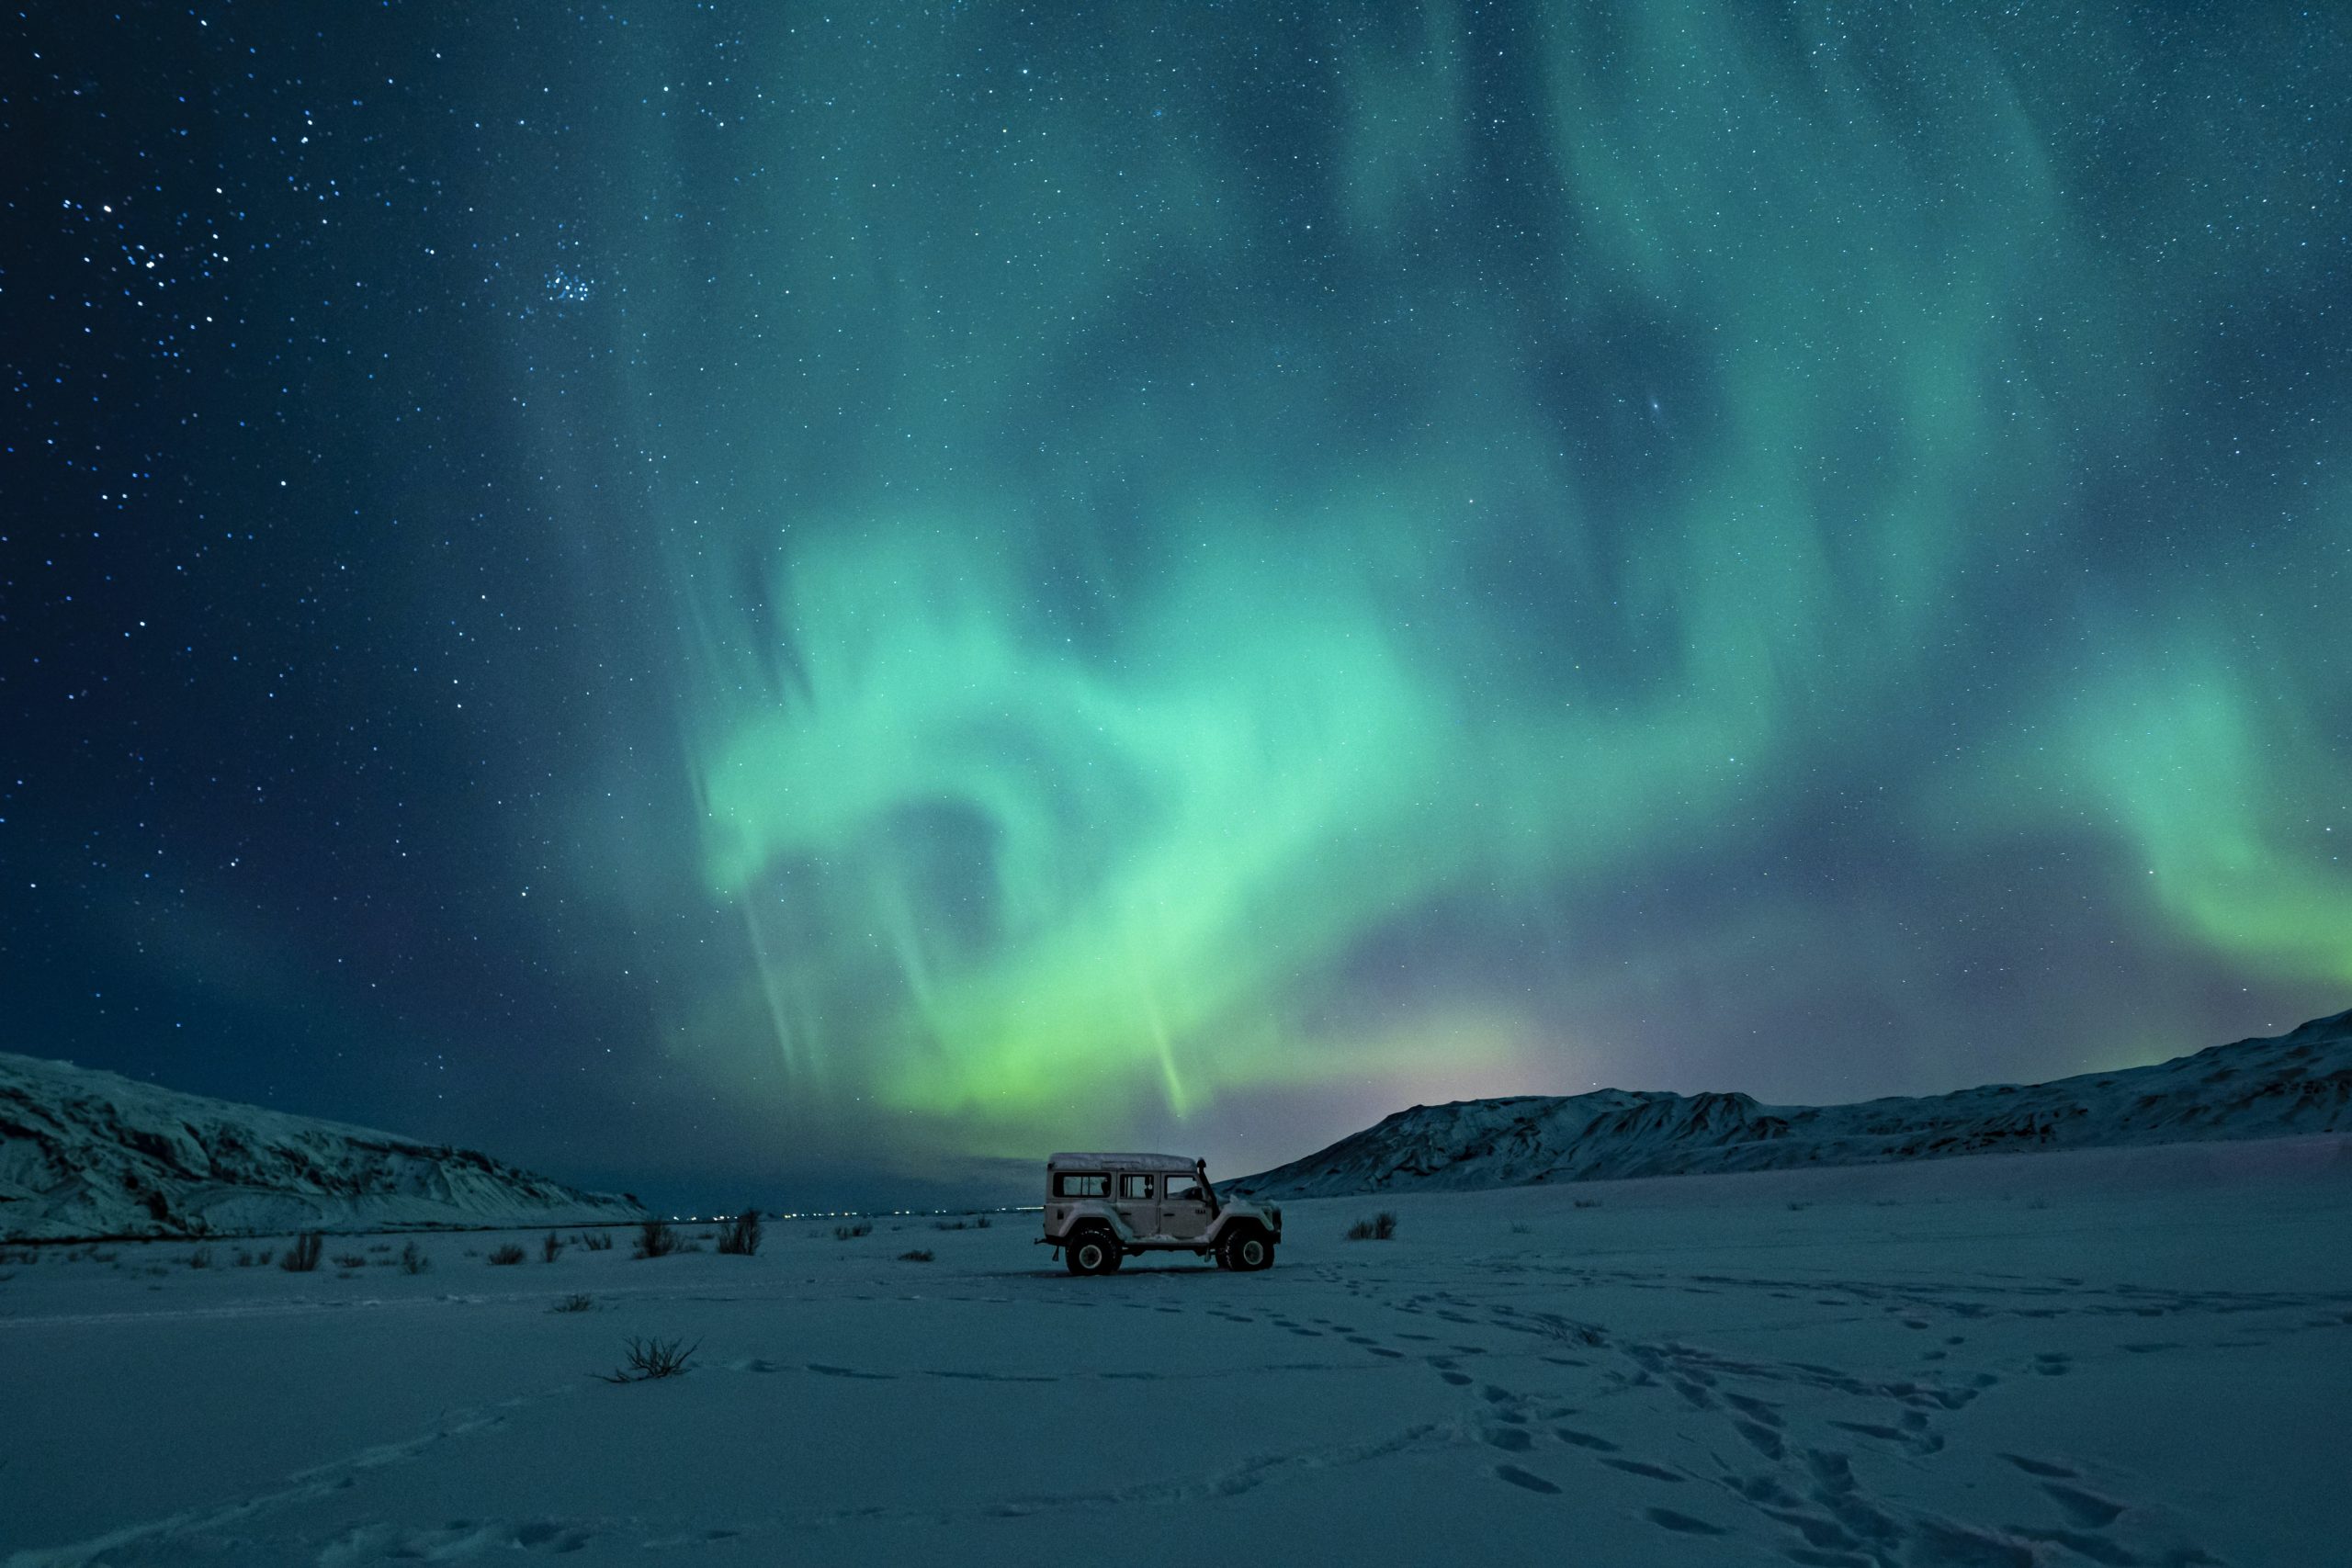
Guided Tours vs. Self-Driving: The Showdown
One big question that many people have is whether to go on guided tours or to self-drive around to find the lights. Both of these options have their pros and cons and some people end up doing a combination of both, which can be a cool way to inform your own process.
Guided tours have the advantage of being led by experts and drivers who closely follow the forecasts and have a keen knowledge of the road conditions and terrain. These are people that go out most nights and have quite a bit of experience under their belts.
Depending on the type of tour that you book, they may even have knowledge of the stars, nighttime photography, or the folklore of the northern lights in this area.
(This can also be a really nice experience if you don’t want to do any driving or route mapping. They take care of it for you, and they have to decide the route differently every night!)
Of course, guided tours can be subject to change based on unpredictable conditions, and do cancel if they feel the conditions are not optimal. This can be a challenge for a very tightly planned trip, so try to book your excursions earlier in your vacation to leave time for re-scheduling.
A self-drive can also be a good option, but only if the driver is very familiar with winter roads. Icelandic roads can be very icy as soon as September hits, so it’s important for drivers to be experienced and comfortable in all weather conditions.
It is also very important to follow road regulations and safety precautions given by your rental company and the Icelandic Association for Search and Rescue. Provided you are comfortable with this, building your own driving itinerary to go hunt down the lights can be a very rewarding adventure.
You will have a lot more freedom to hit the road on a whim if you see that the weather conditions are good near you and take on all the activities and sightseeing you want at your own leisure.
Of course, you have to be willing to do a lot more research on your own and be diligent to watch the skies closely, but you can stop to get snacks or go to the bathroom whenever you want! (Not to mention, if you want to stay out until 3 AM, you can! The guided tours typically last around 3 hours on average, so you do command a bit more freedom on a self-drive.)
If you plan to spend a considerable length of time here, combining both guided tours and self-driving can be a really excellent option.
You can stick to the easier routes on your own as you self-drive and have the same freedom to explore at your pace, but you can also treat yourself to a fun-filled adventure led by an expert guide. There are many tours that go to absolutely stunning locations to hunt for the lights, like the Jökulsárlón glacial lagoon or snowmobiling.
One other important thing to consider when coming to see the lights is bringing the appropriate attire. Remember: it will be winter! The key to dressing warmly in Iceland is lots of layers of natural fiber clothing – long underwear, cotton and wool socks, form-fitting shirts, and pants, topped off with insulated wind-and-waterproof outerwear.
If you plan on spending any amount of time outdoors, this will be crucial for keeping you heated inside and out. And don’t forget a good hat, scarf, and pair of gloves! If you forget anything though, don’t worry. Reykjavík’s main shopping street Laugavegur has many great stores where you can buy locally designed outerwear.
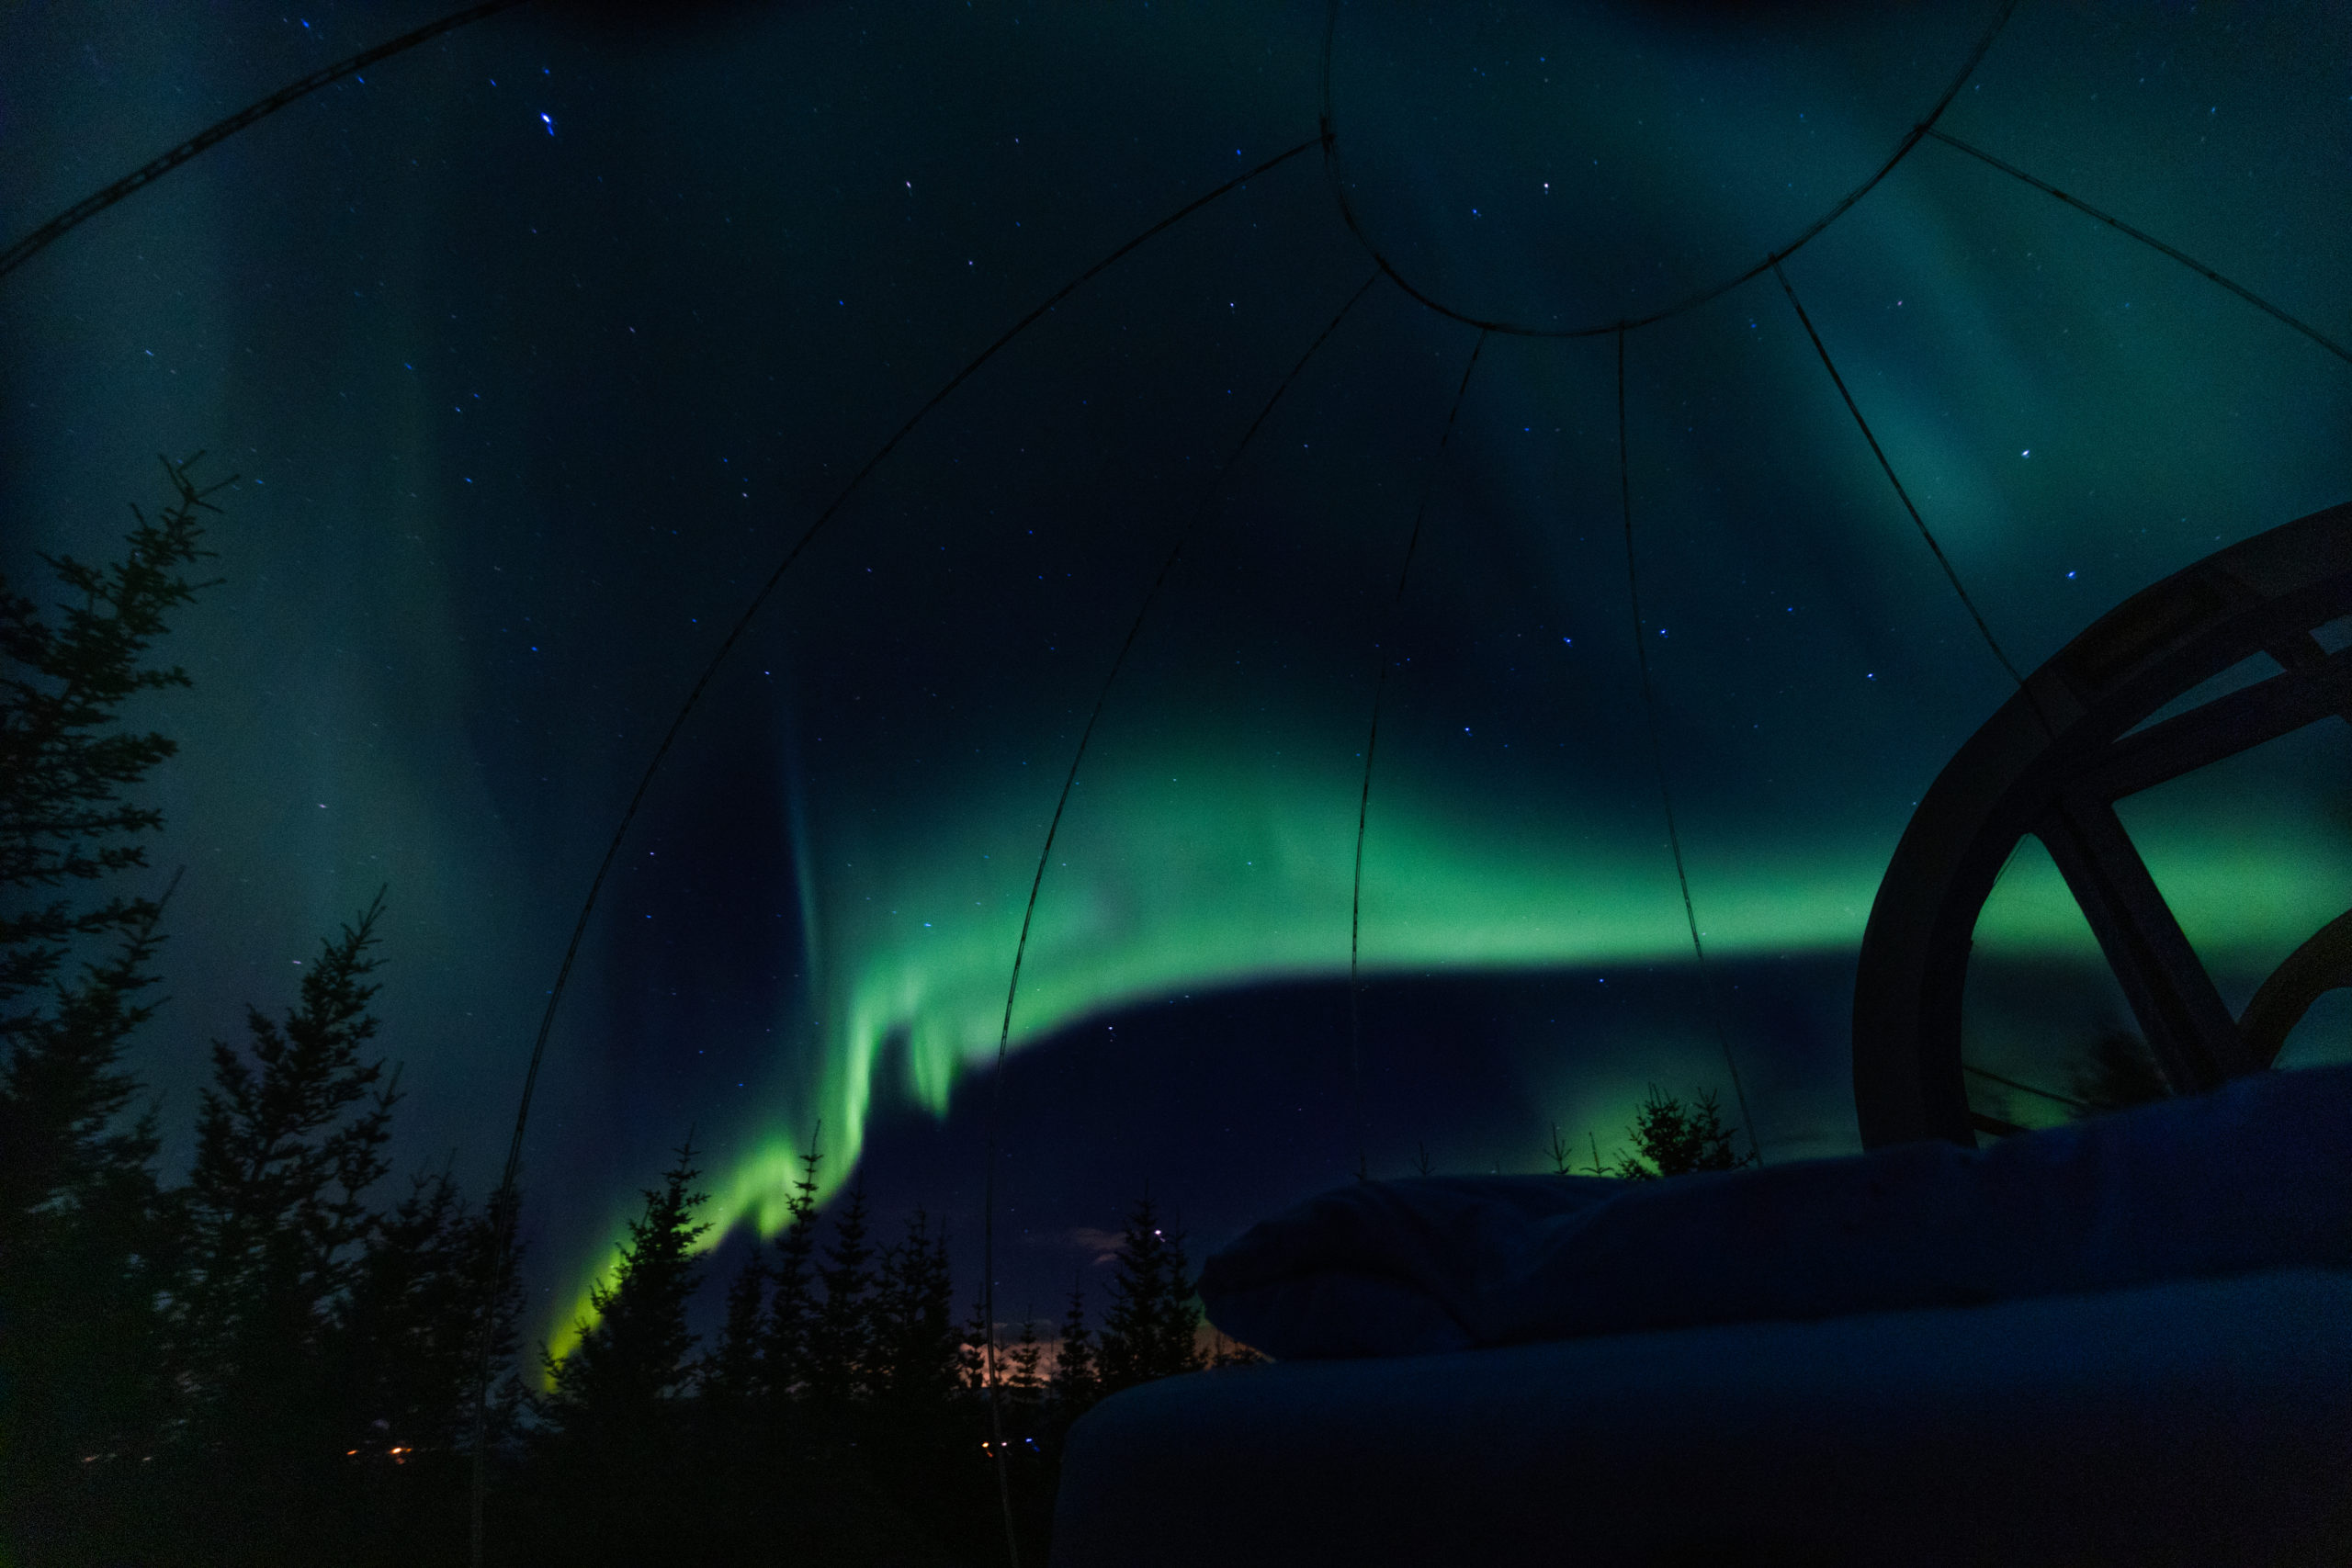
After the lights: other things to do in Iceland
At the end of the day, it’s really crucial to plan your trip around other activities and sights besides the northern lights. There are so many wonderful things to do in Iceland, and with the auroras being as fickle as they are, it would be a shame to not make the most of your visit.
There are all kinds of day trips accessible from the capital area, like the South Coast and Golden Circle routes. Easily done by guided tour or self-drive at all times of the year, these areas hold some of the country’s most notable landmarks.
On the Golden Circle route, you’ll see the Gullfoss waterfall, the original and eponymous Geysir, and the continental rift at Þingvellir national park, the first site of Iceland’s parliament.
Another favorite is the South Coast drive, home to the Seljalandsfoss and Skógarfoss waterfalls, the Reynisfjara black sand beach with its basalt column wall, and the beautiful seaside town of Vík. This little town rests sleepily under the volcano Katla, and if you visit in the summer, you may see the visiting Puffins!
For a longer drive along the south coast, continue on to see the Jökulsárlón glacial lagoon, where icebergs that break off of the great Vatnajökull glacier and float into the sea, before resting for a moment on the Diamond Beach. Each region of Iceland is home to otherworldly natural wonders, so make sure to see what you can while there’s light!
There is also a lot to see and do in the capital city of Reykjavík. Make sure to visit the Reykjavík Art Museum, a network of three separate centers housing a vast array of styles and eras of classic and modern art, each one dedicated to a famous Icelandic artist.
The National Museum of Iceland displays a fantastic permanent collection that beautifully transports you through the history of the country from the time of settlement until the present day. It also holds many temporary exhibits ranging from textile art to archeological reconstructions.
You can also indulge yourself with local cuisine, going to any number of marvelous restaurants specializing in some of Iceland’s best produce – lamb, lobster, and fish.
Then there is, of course, the city’s famous nightlife and bar scene that is not to be missed on weekends. The city goes from a quiet seaside town to an all-out rager on Friday and Saturday nights, and there are dozens of bars in the downtown area to suit every taste and fancy. Take in a bit of everything and you are sure to have a fabulous stay in this country, northern lights or not.
So now you’re ready to plan a trip! Remember the big factors: season, weather/cloud cover, length of stay/time spent hunting, and solar activity. (And of course the smaller details, like having the right gear, planning yourself some extra fun, and getting out of all that light pollution.)
With all these taken into account, hopefully, you will look up and be dazzled by the beautiful dancing lights. And if they don’t show themselves, you will still have had a great adventure in Iceland.
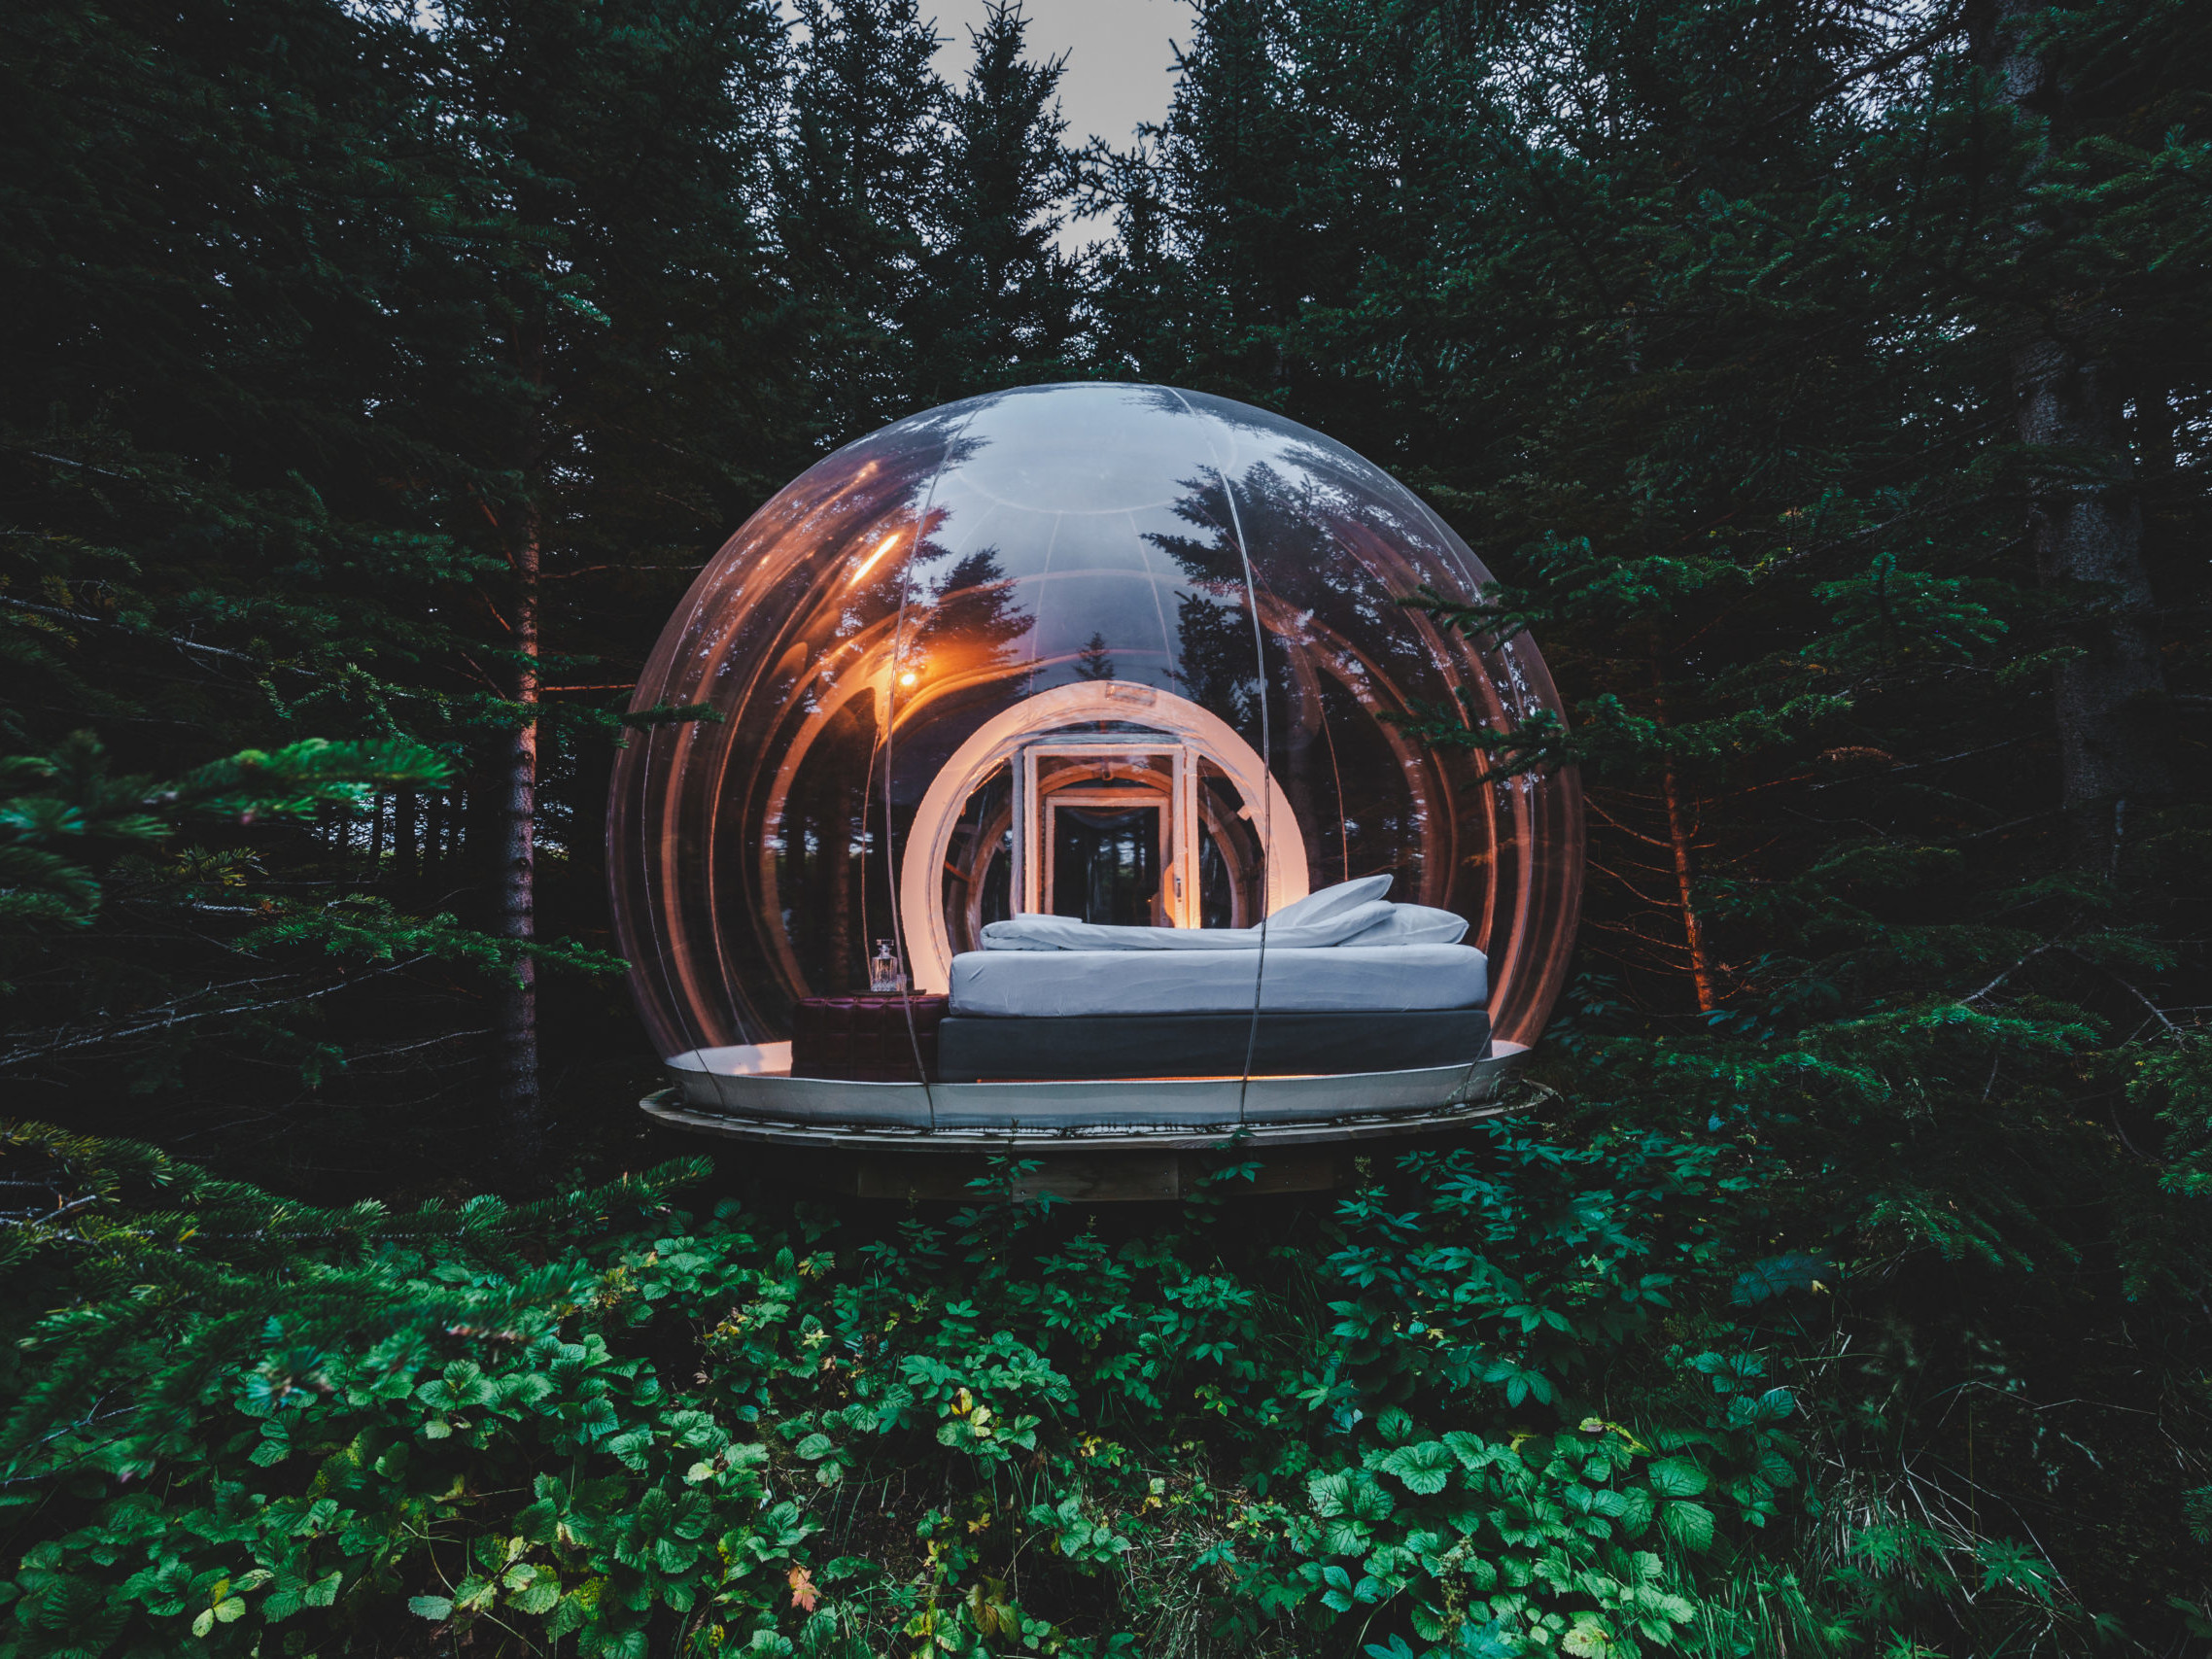
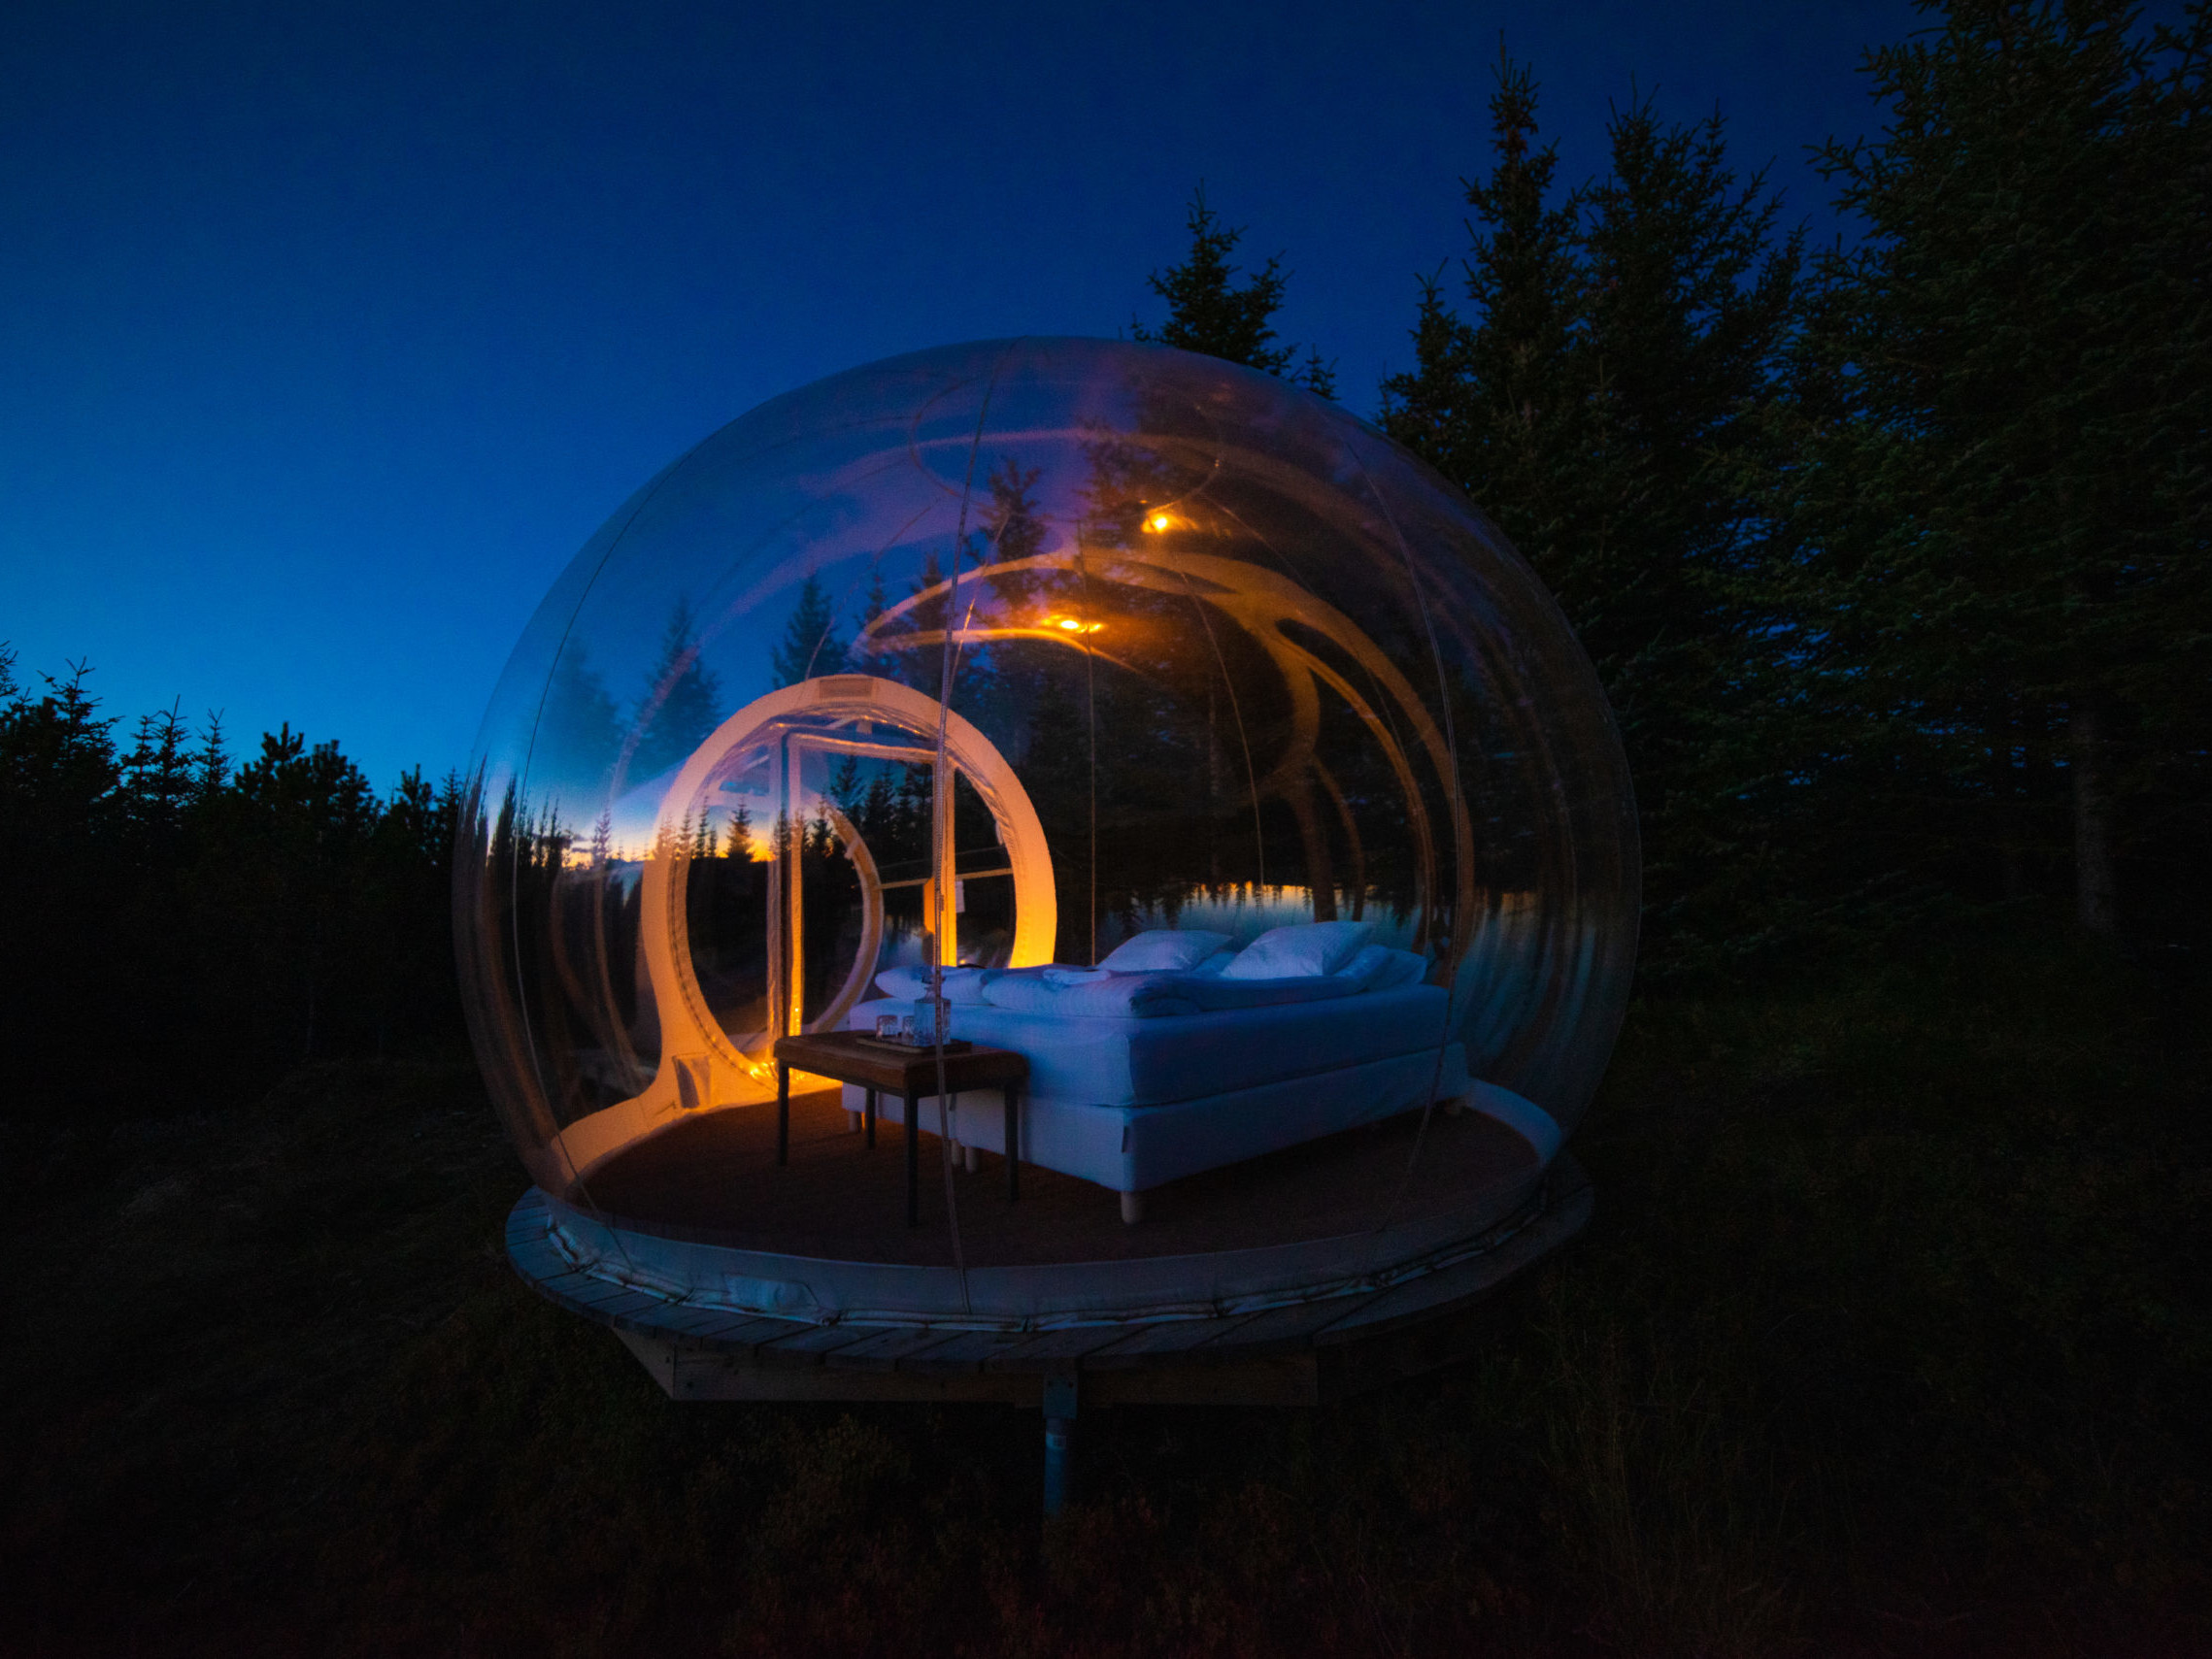

What Causes The Northern Lights - We prove the cause and effect
What Causes the Northern Lights?
What causes the Northern Lights? Most websites repeat the same scientific explanation — but here you will find something new. We not only describe the physics behind auroras; we also show the first real-time Cause → Effect model that visually proves how a solar eruption turns into Northern Lights above Iceland.
Using two live data sources — solar wind measurements and Earth’s geomagnetic response — our system draws a unique Cause & Effect Line that updates every few minutes. It allows you to see the chain reaction from the Sun to the sky, in a way no other forecast website currently offers.
This is new knowledge, built from our own API connections, and part of Airmango’s Aurora AI research project.
New Knowledge: Visual Proof of Solar Cause → Aurora Effect
For the first time, we show a live, scientific “cause-and-effect” timeline that connects:
- Solar Eruption (CME or Solar Wind Spike) →
- Travel Time Across 150 Million km →
- Arrival at Earth’s Magnetosphere →
- Geomagnetic Disturbance (Kp / Bt / Bz response) →
- Aurora Visibility in Iceland
This timeline is generated using our own data pipeline:
1. API 1: Real-time solar wind & CME data (NASA/NOAA DSCOVR & ACE satellites)
2. API 2: Geomagnetic response data (magnetometer readings + K-index updates)
These two APIs combined create new knowledge: A direct, real-time visual demonstration of cause → effect that is not available on any other Northern Lights website.
How Our Model Works (Simple Explanation)
We convert raw data into a human-friendly timeline:
- When a CME leaves the Sun, our system calculates its estimated speed.
- As it travels toward Earth, the time-to-arrival is updated.
- When it hits the magnetosphere, we detect the jump in Bt/Bz.
- The system then shows how this results in aurora probability in Iceland.
Scroll down to see our real-time Cause → Effect Line and understand — visually — how the Northern Lights are created.
🛰️ CME Tracker – Visualizing the Cause
🚀 Active Solar Storm Journeys:
🛰️ En Route Details
Awaiting next solar event…
📜 Recent CME Log
(Launched: Feb 25, 07:38)
(Launched: Feb 25, 07:53)
⚡ Live Visualization: This tracker shows Coronal Mass Ejection journeys in real-time, updated every 30 minutes.
Data: NASA DONKI • NOAA SWPC
Updated: Mar 3, 2026, 5:00 PM
The Science Behind the Northern Lights (Explained Simply)
The Northern Lights, or Aurora Borealis, are one of the most stunning natural phenomena on Earth. But they aren’t a weather event—they are a space weather event.
Step 1: The Sun Releases Charged Particles
It all starts with the Sun. The Sun is constantly releasing a stream of tiny, electrically charged particles from its surface. This stream is called the solar wind. Sometimes, the Sun has larger “explosions,” like solar flares or Coronal Mass Ejections (CMEs).
Step 2: The Solar Wind Travels Toward Earth
These solar wind particles travel through space at incredible speeds, often over a million miles per hour (1.6 million km/h). It typically takes this “wind” about 1 to 3 days to cross the 93 million miles (150 million km) to reach Earth.
Step 3: Earth’s Magnetic Shield Is Hit
If this solar wind hit Earth directly, it would be harmful. Luckily, our planet has a protective, invisible “force field” called the magnetosphere. This field deflects most of the solar wind safely around us, but acts like a funnel at the North and South Poles.
Step 4: The Atmosphere Lights Up
As the high-energy solar particles are funneled down, they slam into Earth’s upper atmosphere. When they collide with gas atoms (mostly oxygen and nitrogen), they transfer energy, causing the atoms to release light.
Why Auroras Have Different Colours
Oxygen (Green & Red Aurora) Explained
Green is the most common color, caused by particles hitting oxygen atoms at lower altitudes (60-150 miles). Red is rarer and happens when oxygen is hit at very high altitudes (above 150 miles).
Nitrogen (Pink & Purple Aurora) Explained
Blue, pink, or purple colors are usually caused by particles hitting nitrogen atoms.
FAQ: New Knowledge Aurora Insights
Q: What makes your aurora explanation different from other websites?
Because we use a real-time Cause → Effect Line that links solar eruptions to visible auroras. This data is produced through our own API pipeline and does not exist anywhere else online.
Q: How does your system prove the link between the Sun and auroras?
We combine raw solar wind measurements with Earth’s geomagnetic response. When a CME hits Earth, our visual line shows the immediate reaction in the atmosphere.
Q: Is this information available on standard aurora forecast websites?
No. Traditional sites show forecasts or indexes, but none provide a continuous real-time chain from solar eruption → magnetosphere disturbance → aurora visibility in Iceland.
Q: Are you creating new scientific data?
No — we are creating new knowledge, not new raw data. Our system transforms existing API data into a unique visual model and simplified explanation.
Research & Methodology
Our Cause → Effect Aurora Model is built from two live scientific data streams:
- Solar Wind & CME Data: From NOAA/NASA DSCOVR & ACE satellites.
- Geomagnetic Response Data: Real-time magnetometer readings and K-index disturbances.
By combining these, we create a visual timeline that shows the step-by-step reaction from Sun → Earth → Auroras in Iceland. This is original interpretation representing new knowledge created by Airmango’s Aurora AI project.
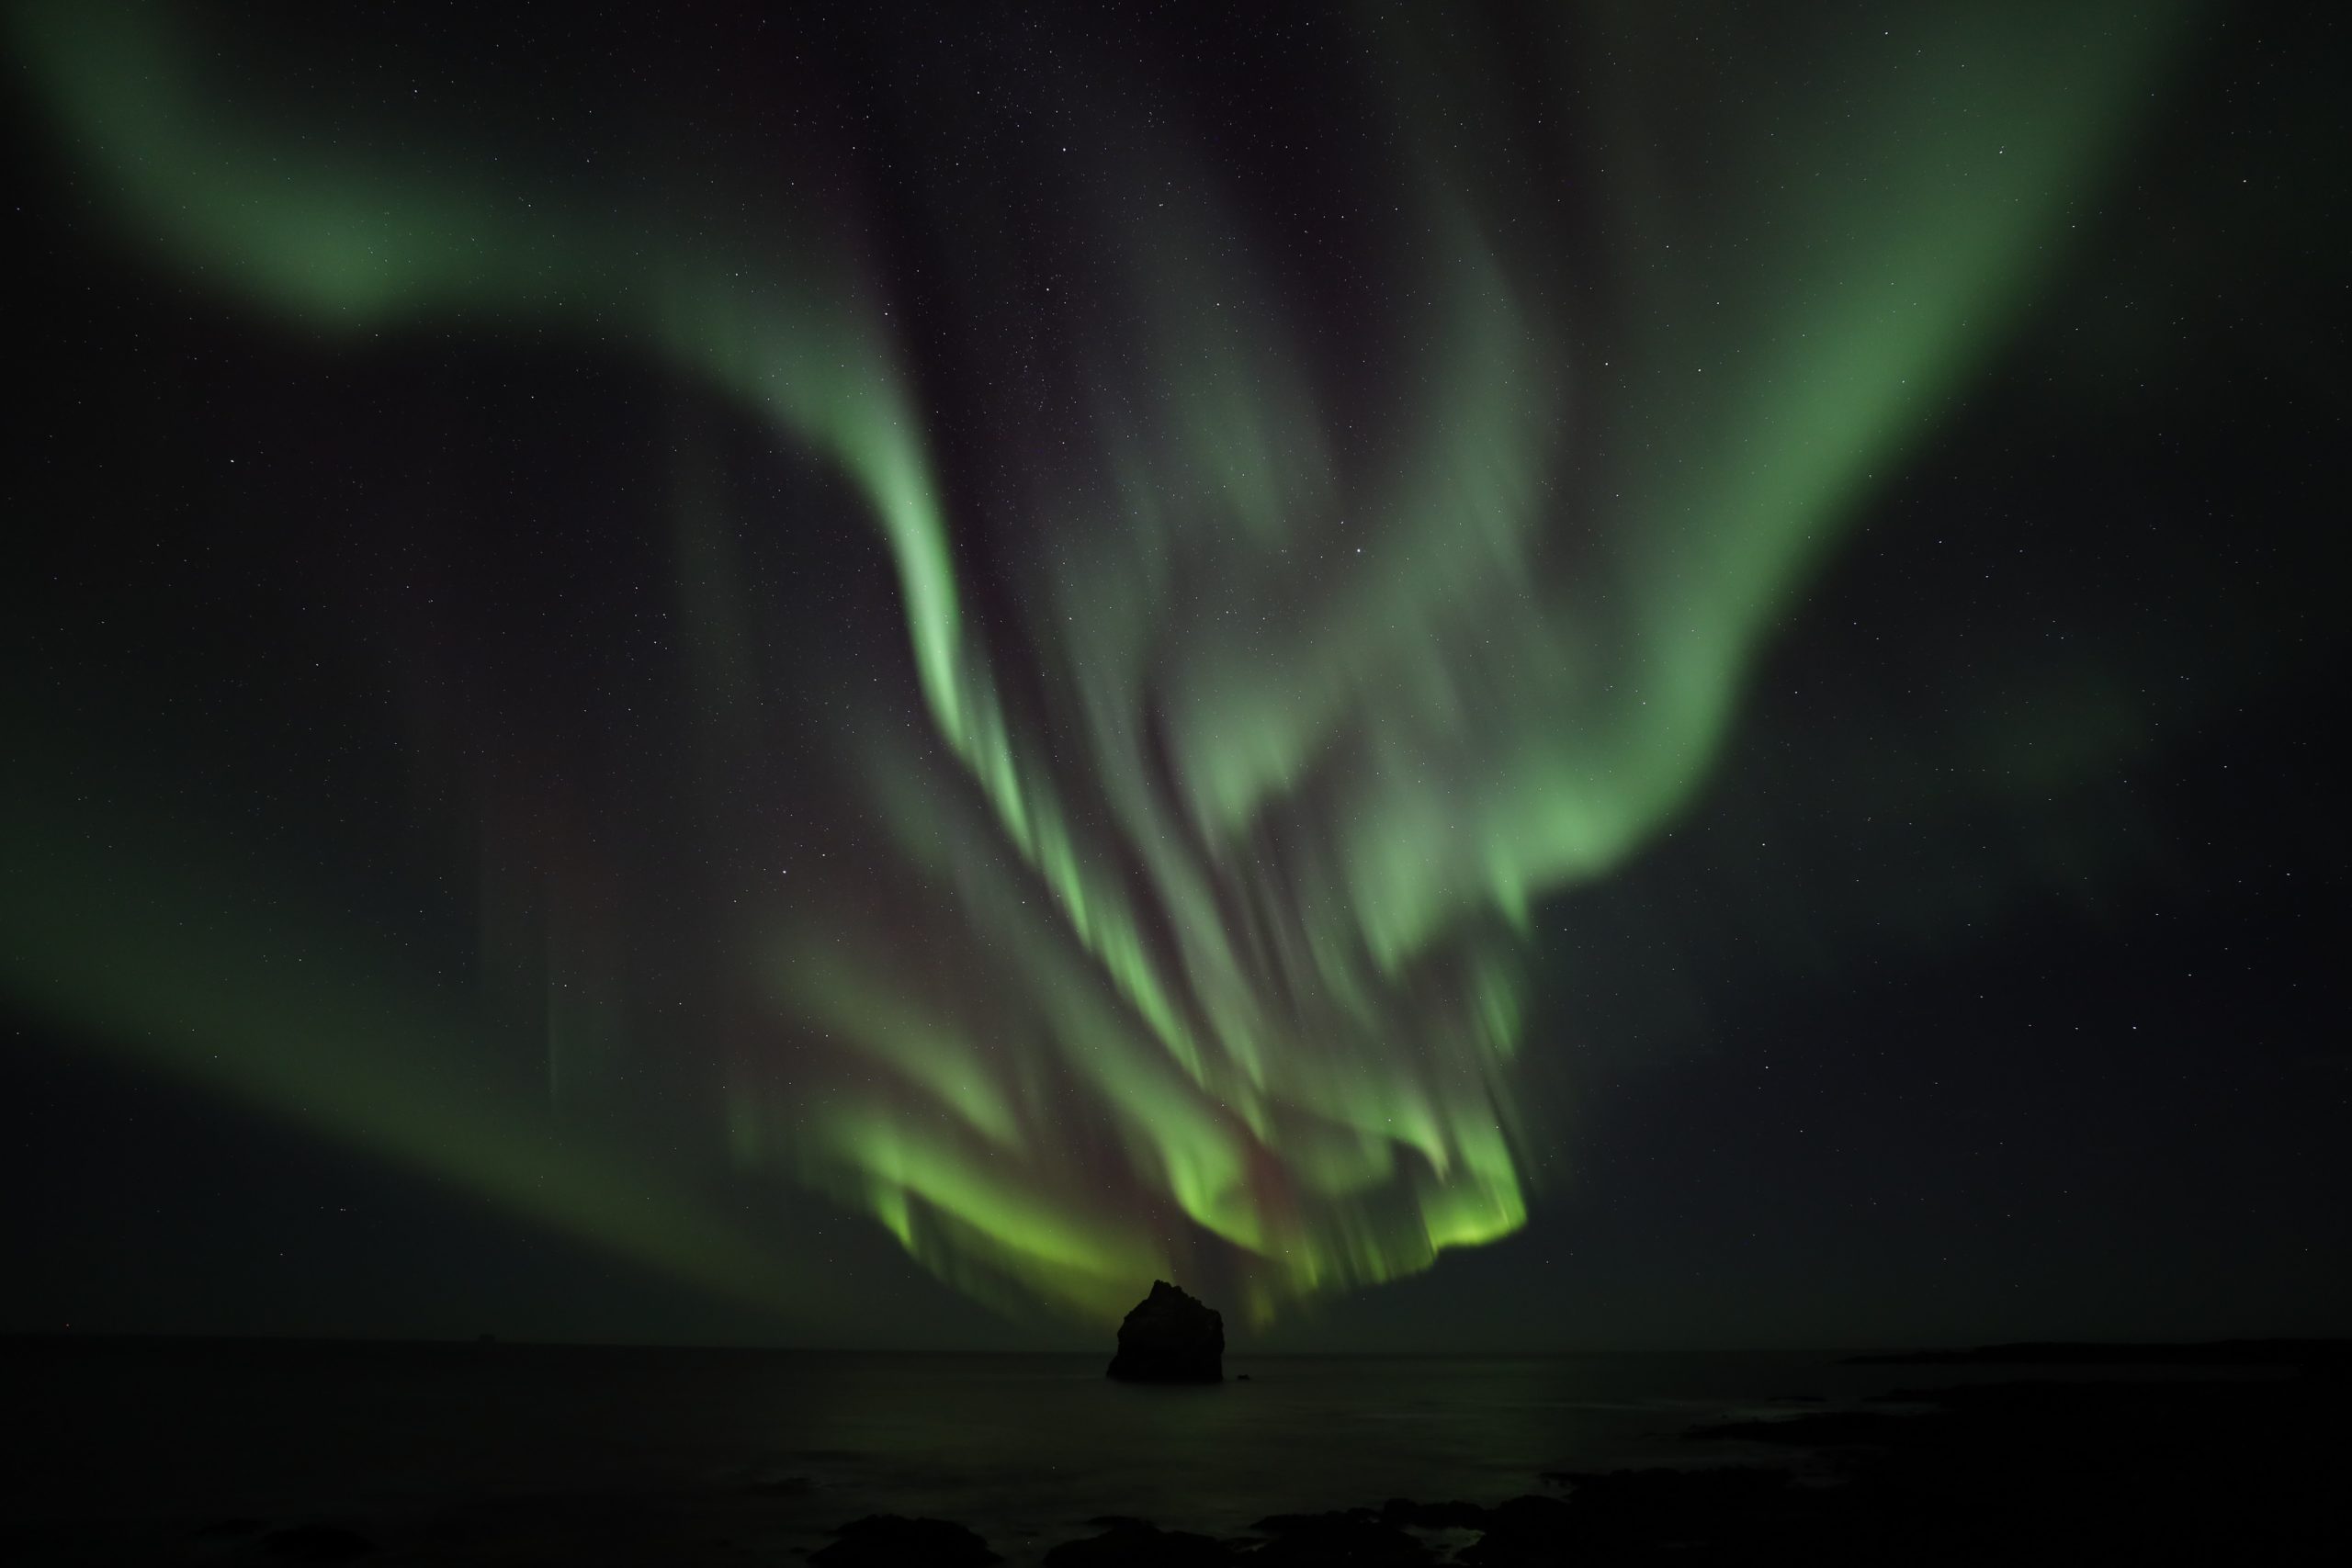
What are the Northern Lights?
For many years, people in the polar regions have been mystified by the dancing of bright lights in the darker months. This wonder continues today. But what are the northern lights, and why do they happen?
What are the northern lights?
Long story short, the northern lights are the visual byproduct of intense space weather. They are a natural phenomenon related to a multi-step process, similar in a way to lightning, rainbows, or even colorful sunsets.
The things that cause them are primarily unseen, and occupy the space around us in our atmosphere. These are things like atmospheric gases, high powered electrons, and our geomagnetic field.
The true wonder of all of this is that sometimes all of these things align into a moment of interaction- and when we are lucky, we can see the magic of auroras.
It all starts here on Earth
Earth is a special planet. It is one of the few places that we know of that can support human life. One of the many reasons that this is possible, is because we are protected from harsh space weather by our geomagnetic field. Many other planets also have a magnetic field, but ours is one of the strongest.
The core of the Earth is filled with layers of partially molten iron under great gravitational pressure. This area of iron is huge, and because of the different temperatures, there is a fair amount of movement occurring here.
The hottest material rises, causing swirling convection currents inside the Earth. You can see a current like this in a pot of boiling water. The way that those bubbles spiral up to the surface, is a lot like what is happening inside the Earth. The movement of all of this metal makes electrical currents that rise up through the Earth’s surface, and create magnetic fields.
However, that isn’t the end of it! The Earth is also spinning, which causes additional movement in an effect called ‘the Coriolis Force’. This force combines all of those magnetic fields into one larger magnetic field, which protects all of us from radiation and solar wind, and forms the magnetosphere.
Because we can’t see the magnetic field, we normally represent it by drawing lines. These lines go into and out of the Earth, meeting at the poles, making the Earth look like an exceptionally round butterfly.
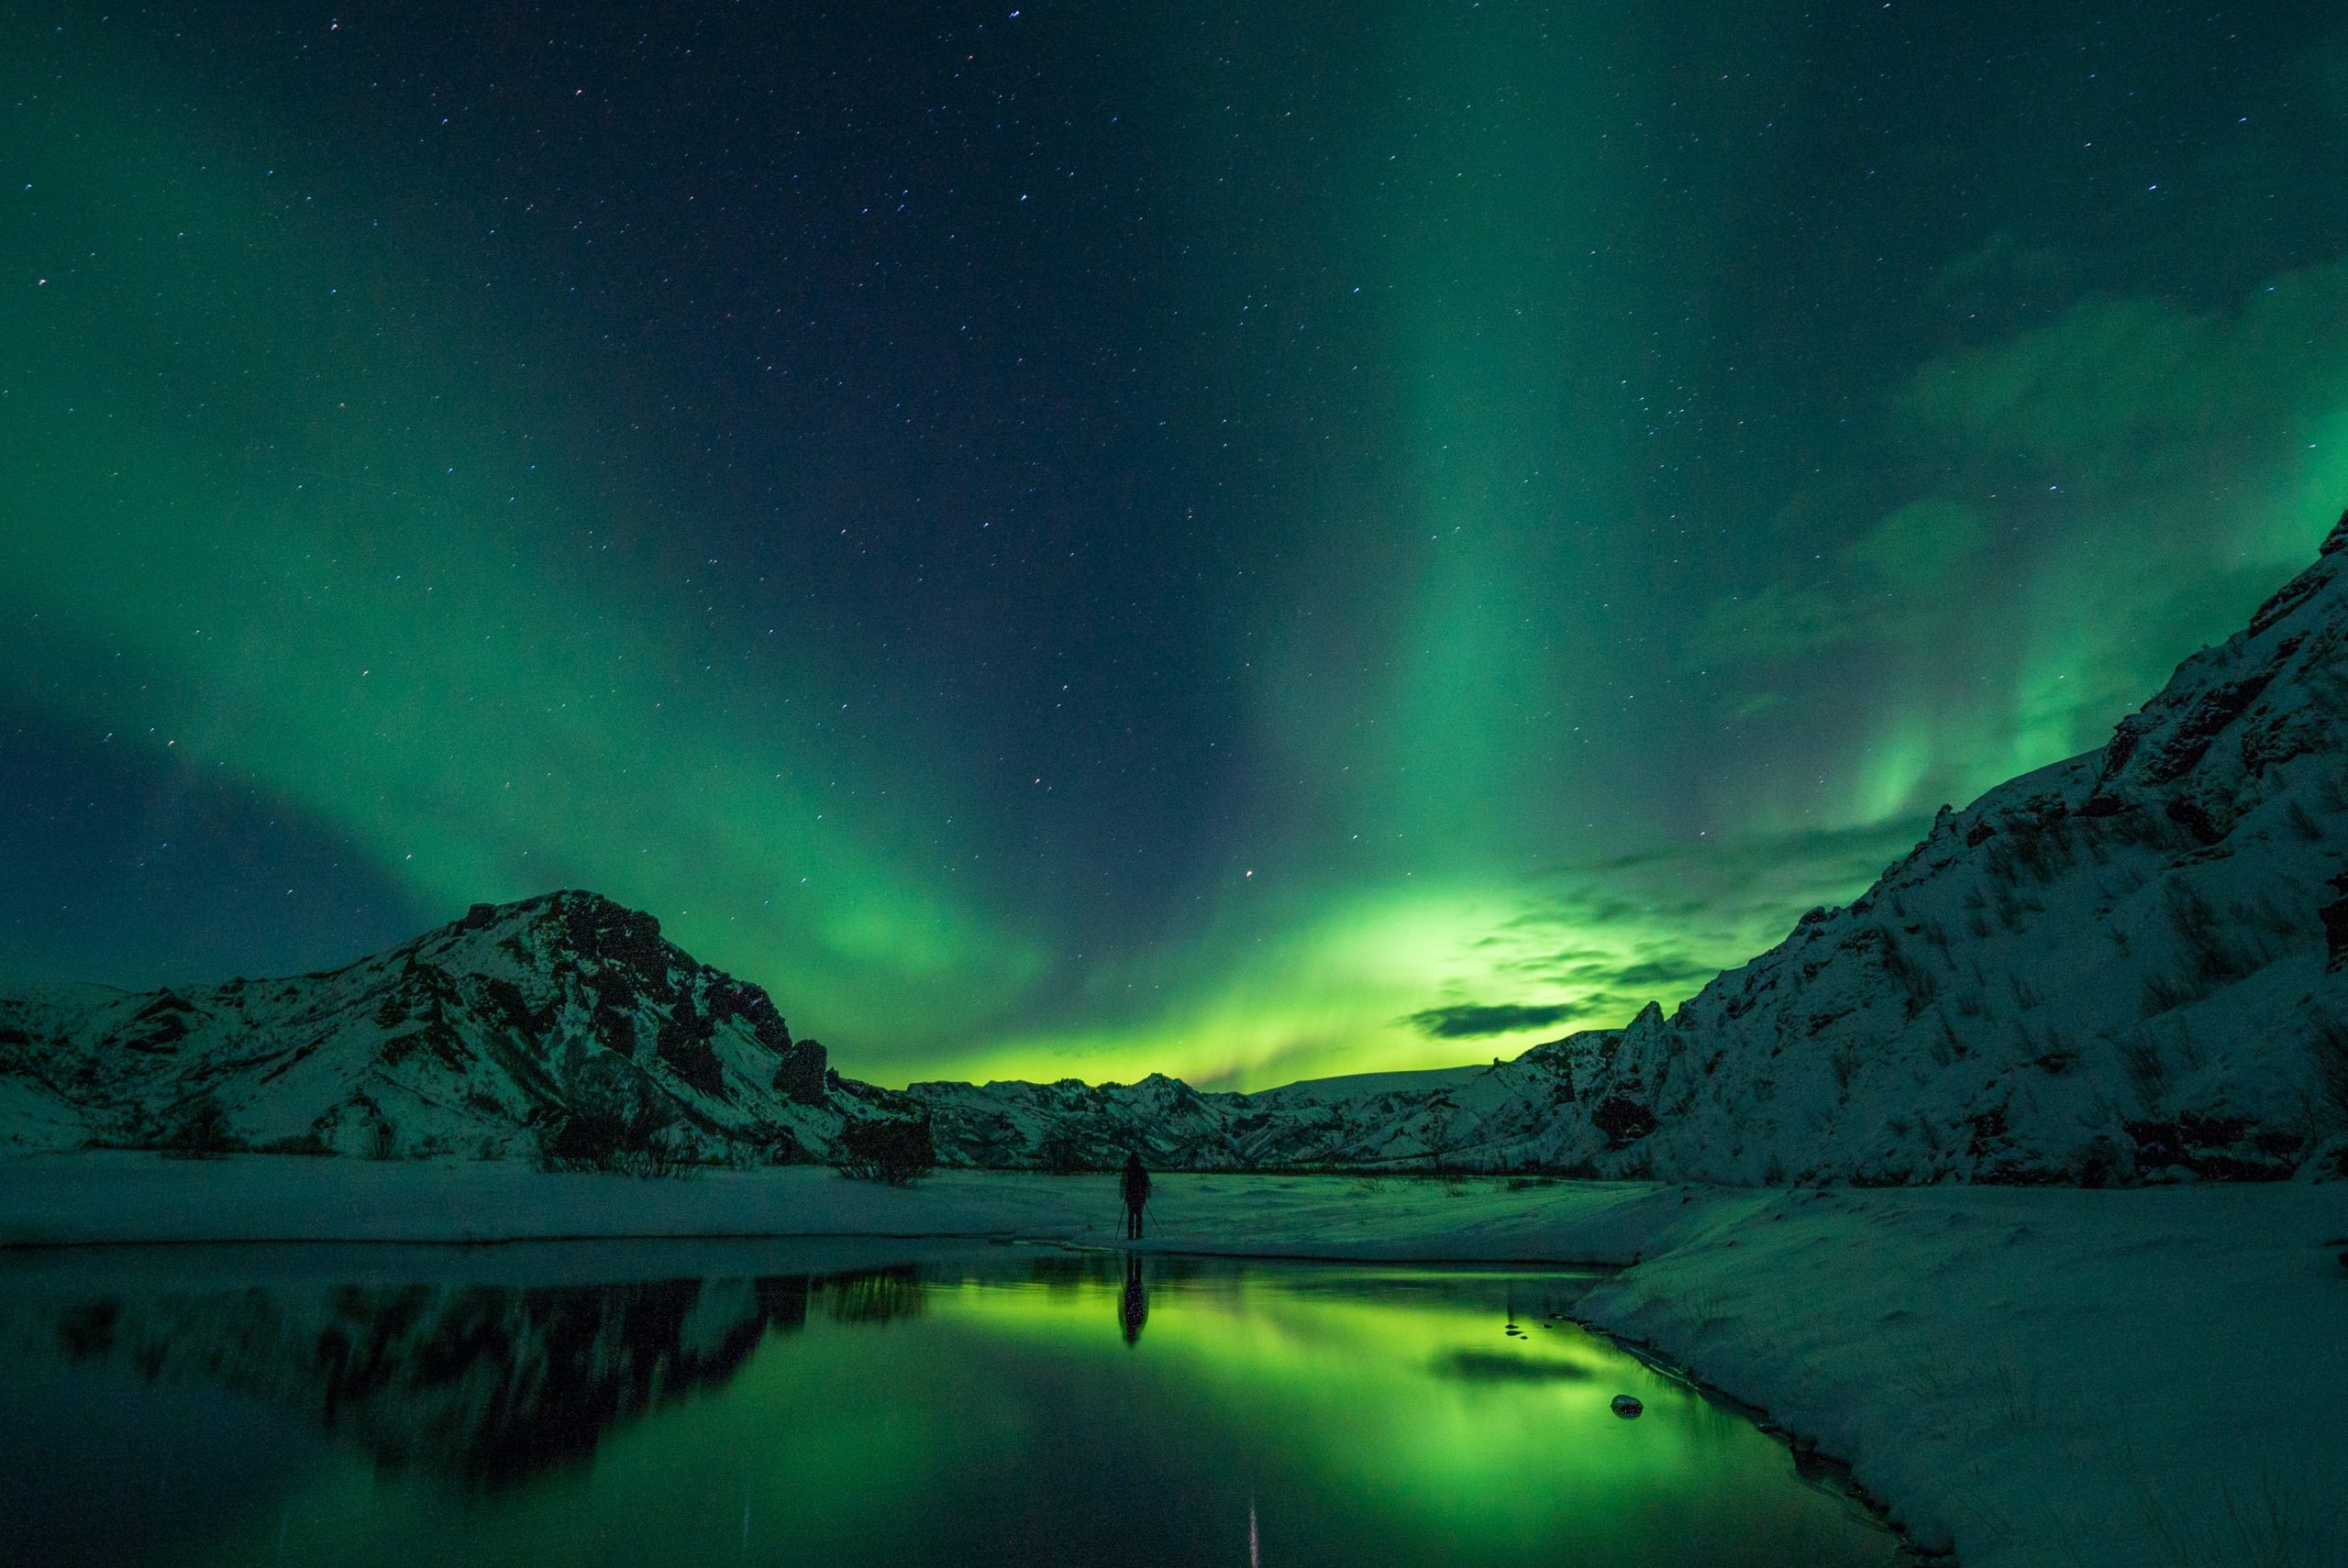
From the sun, with love
So we know about Earth and its magnetic field. But where does the actual aurora come from? While the Earth is creating convection currents, a similar thing is happening in the Sun, a star that is nearly 15 million degrees Celsius at its core.
As the pressure and movement within the sun push outwards, magnetic fields form here as well. The stronger ones are able to push through to the surface, slowing as they cool, and creating sunspots. We pay attention to these dark spots on the Sun, and often predict large auroral activity by their reappearance.
But back to the action! The electrically charged gas (or plasma) that exits the sun contains the magnetic fields that were just created. When this massive “ball” of plasma breaks away from the surface, it is ejected out into space as a “solar storm”. (Smaller versions of this kind of expulsion happen frequently, and are often referred to as solar wind.)
Depending on the strength of the solar storm and the obstacles that it meets along its way, its speed and travel time can vary. That is why auroral forecasts are not always perfectly timed, it can be challenging for us to measure these factors.
The lucky collision
If everything lines up and the sun sends a solar storm in our direction, it will first have to pass over Mercury and Venus, before it gets to us. But when it does finally arrive, a strange sort of collision occurs between us and the solar storm.
The magnetic field inside the solar storm clashes with our magnetic field, and combines. Once they are connected, the charged gases travel down the imaginary lines of the connected magnetic field, traveling to the poles that attract it.
As the storm passes over us, these imaginary lines go with it, eventually breaking and reconnecting on the other side. This breakage creates another opportunity for gas to travel down to the poles, as the storm moves away.
An aurora is made
The gases carried within the solar storm have arrived, and are traveling down to the places on our planet where the magnetic force is the strongest, the poles. But how does all of this make an aurora?
The gas that is now in our atmosphere contains supercharged protons and electrons, or ions. This energy becomes trapped in our ionosphere, around the north and south pole in a shape we call the auroral oval.
When this happens, they will eventually collide with pockets of oxygen and nitrogen in our atmosphere- which is the big moment that we are waiting for.
At the moment of this crash between ions and gases, energy is released that creates a glow, or an effect of visible light. You’ve seen many interactions like this here on Earth, like the interaction that creates neon light in signs.
This is an exciting moment, and a reminder of how small we are in the scale of the universe. But it is also only the beginning of the aurora’s visual journey to us, once it arrives. Because next, we have to learn about all of the Earth factors that have to line up and cooperate, for us to even begin to be able to witness this incredible natural phenomenon with our own eyes.